March Cheesepalooza Challenge
Since joining the Cheesepalooza Challenge in September I have managed to create at least one of the cheeses each month except for February where I missed the gouda challenge. I have also created a number of extra cheese or cultured dairy products as well. I have managed to write about most of them but have missed a few Cheesepalooza deadlines to be included in the challenge but if you are interested they are all located here in my blog.
It has been 3 MONTHS since I have had an opportunity to make cheese; family life and work have kept me exceptionally busy this year volunteering for my kid’s clubs and teams doing everything from writing newsletters, timing at ski races, brainstorming on band names and band logos and chauffeuring literally thousands of kilometers to name a few.
The time has flown past and there is now a slight lull in activities so it is:
TIME TO MAKE CHEESE!!!
The March Cheesepalooza Challenge is:
Thermo/Mountain Cheese Month:
Alpine Tomme , Jarlsburg, Gruyere, Manchego
These cheeses are some of my favourites. On our first trip to Europe about 25 years ago (a driving – camping – live on $55 a day type trip) we were passing from France into Switzerland south of Geneva and stopped in one of the last French villages to load up on food as we had been warned of the high prices in Switzerland and besides, we had fallen in love with grocery shopping in France (a love that persists to this day and that has now been passed on to our kids) so we stopped.
I could paint a picture of a quaint little fromagerie in the Alps….blah blah blah but we are actually talking chain supermarket with hopefully lower prices (remember $55 a day including food). We walk into the shop and begin collecting our usual selection of saucisson sec, wine, bottled water, bread and more but where is the fromage? A quick question in broken French and a gesture to a back room leads us to an amazing sight a room with six or seven stout tables each covered in a variety of cheese wheels, some of them were huge – 3 foot diameter and 8 to 10 inches thick. We make our selection and get the attention of the cheese lady. She sets her huge knife on the wheel and is about to cut a wedge from a 2 and a half foot wheel about 4 inches thick; a quick NON! and some pantomime and we get a sliver of cheese weighing about a pound. Gigantic wheels mean gigantic wedges! That was a close one we almost spent our daily living expense on one piece of cheese. The cheeses we bought that day were delectable and kept us well nourished on our trip through Switzerland.
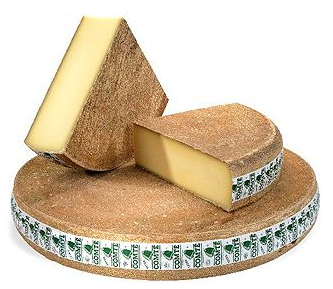
A Nice Wheel of Comte
From Google Images
Now for a little cheese education. From Wikipedia:
Gruyère is a hard yellow cheese, named after the town of Gruyères in Switzerland, and originated in the cantons of Fribourg, Vaud, Neuchâtel, Jura, and Berne. Before 2001, when Gruyère gained Appellation d’Origine Contrôlée (AOC) status as a Swiss cheese, some controversy existed whether French cheeses of a similar nature could also be labeled Gruyère (French Gruyère style cheeses include Comté and Beaufort).
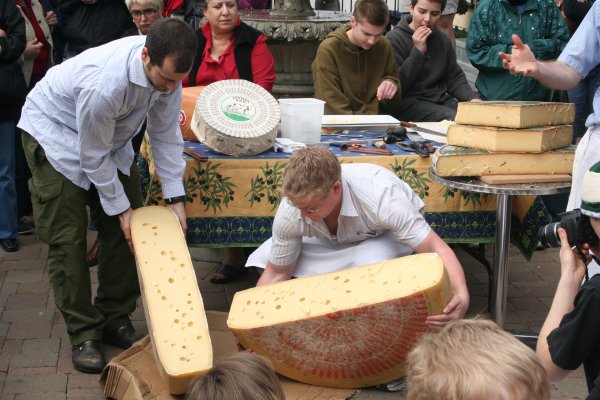
from Google Images:
Big Cheese!
From Gianaclis Caldwell’s Mastering Artisan Cheesemaking:
Swiss varieties with eyes include distinctive types most commonly represented by Emmental, with very large eyes and huge wheels weighing about 220 pounds; and the Gruyère group which includes Beaufort, Comté and Gruyère, with smaller wheels weighing closer to a mere 88 pounds and smaller eyes. These cheeses are not only distinctive because of their appealing eye formations but also their springy texture and sweet nutty flavour.
These cheeses are traditionally made using raw milk.
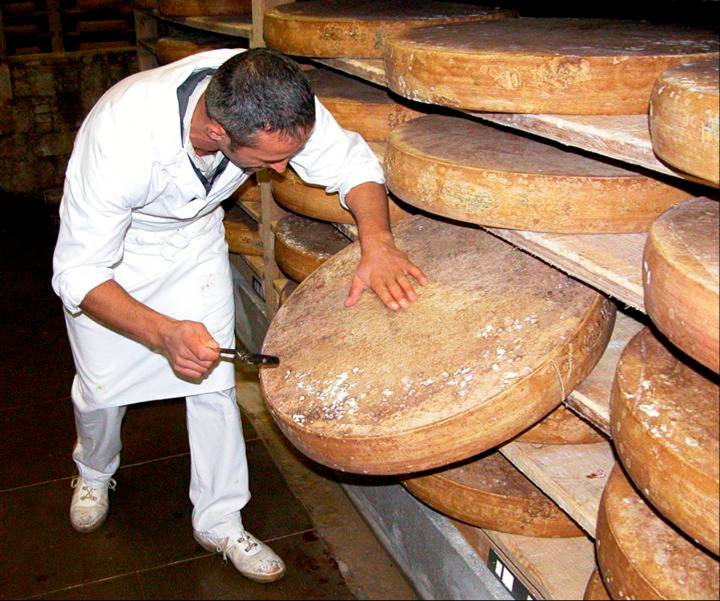
From Google Images:
Man Cheese!
It takes a real Cheeseman to work with this stuff!
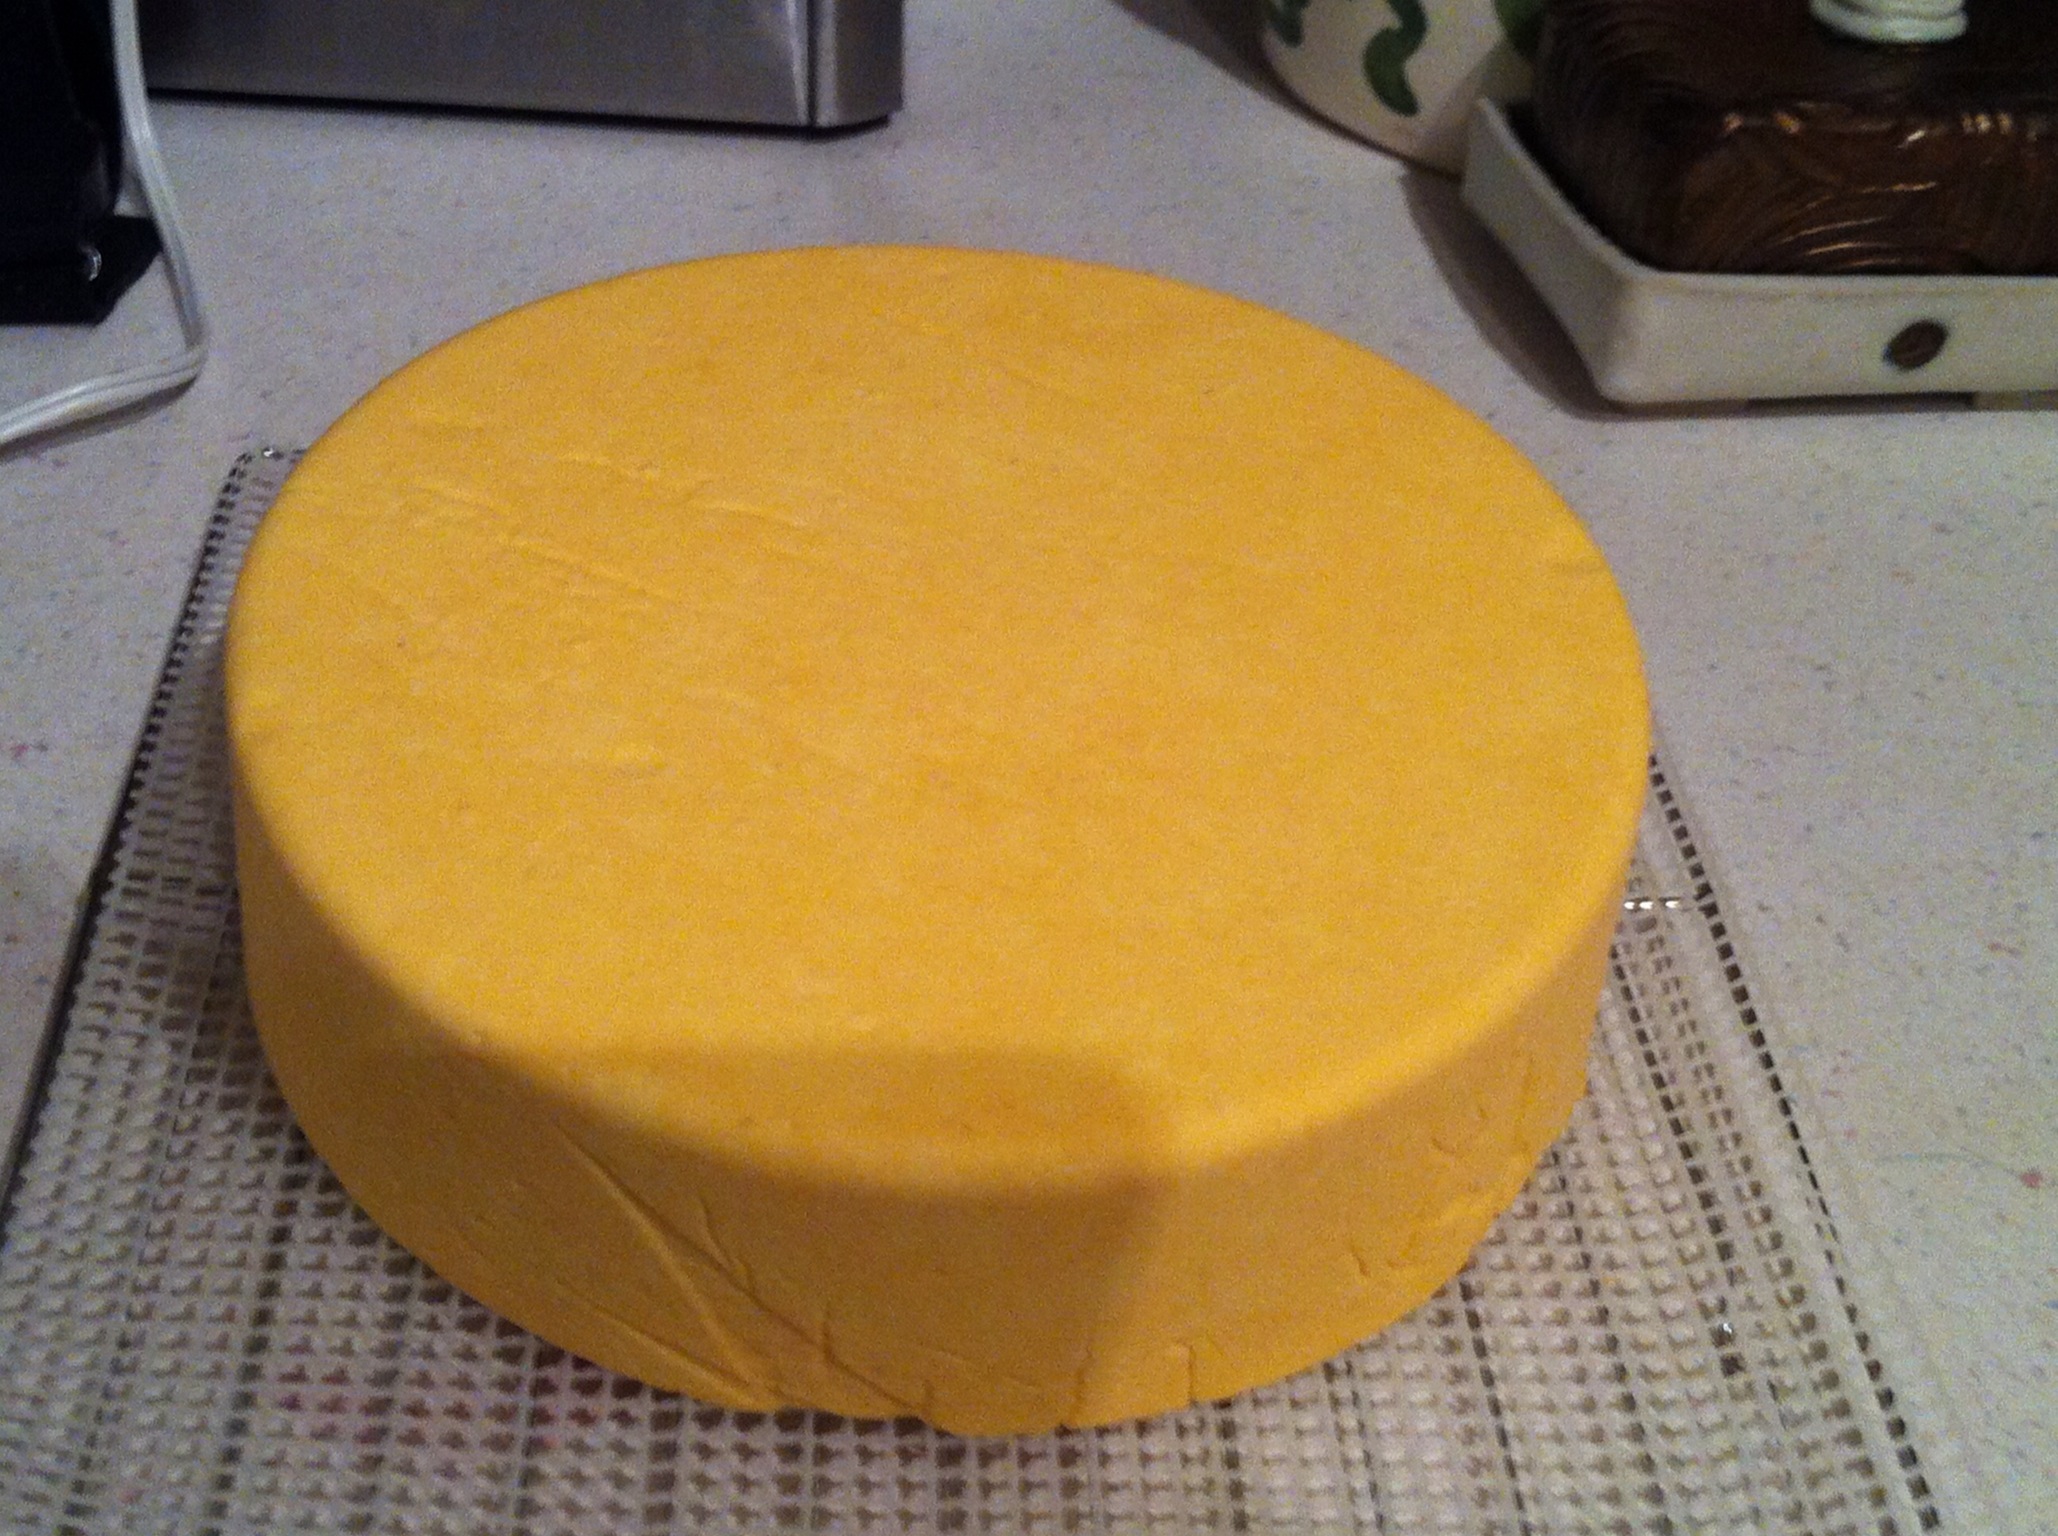
Now on to the cheese make.
I decided to follow Gianaclis Caldwell’s recipe for Hard Cheese with Small Eyes. A cheese making book my wife gave me for Christmas.
The recipe calls for 4 gal of whole or partly skim milk. My ‘cheese roaster’ only holds 3.7 US gallons so I will get a slightly lower yield. I plan on using my St. Paulin/Tome 200 mm x 150 mm mold.

The first step is to heat the milk to 90 degF and sprinkle the cultures over the top allowing 5 minutes for them to rehydrate before gently stirring them in. The recipe calls for Thermo B and LH 100 or Thermo C. I used Thermo B and Thermo C.
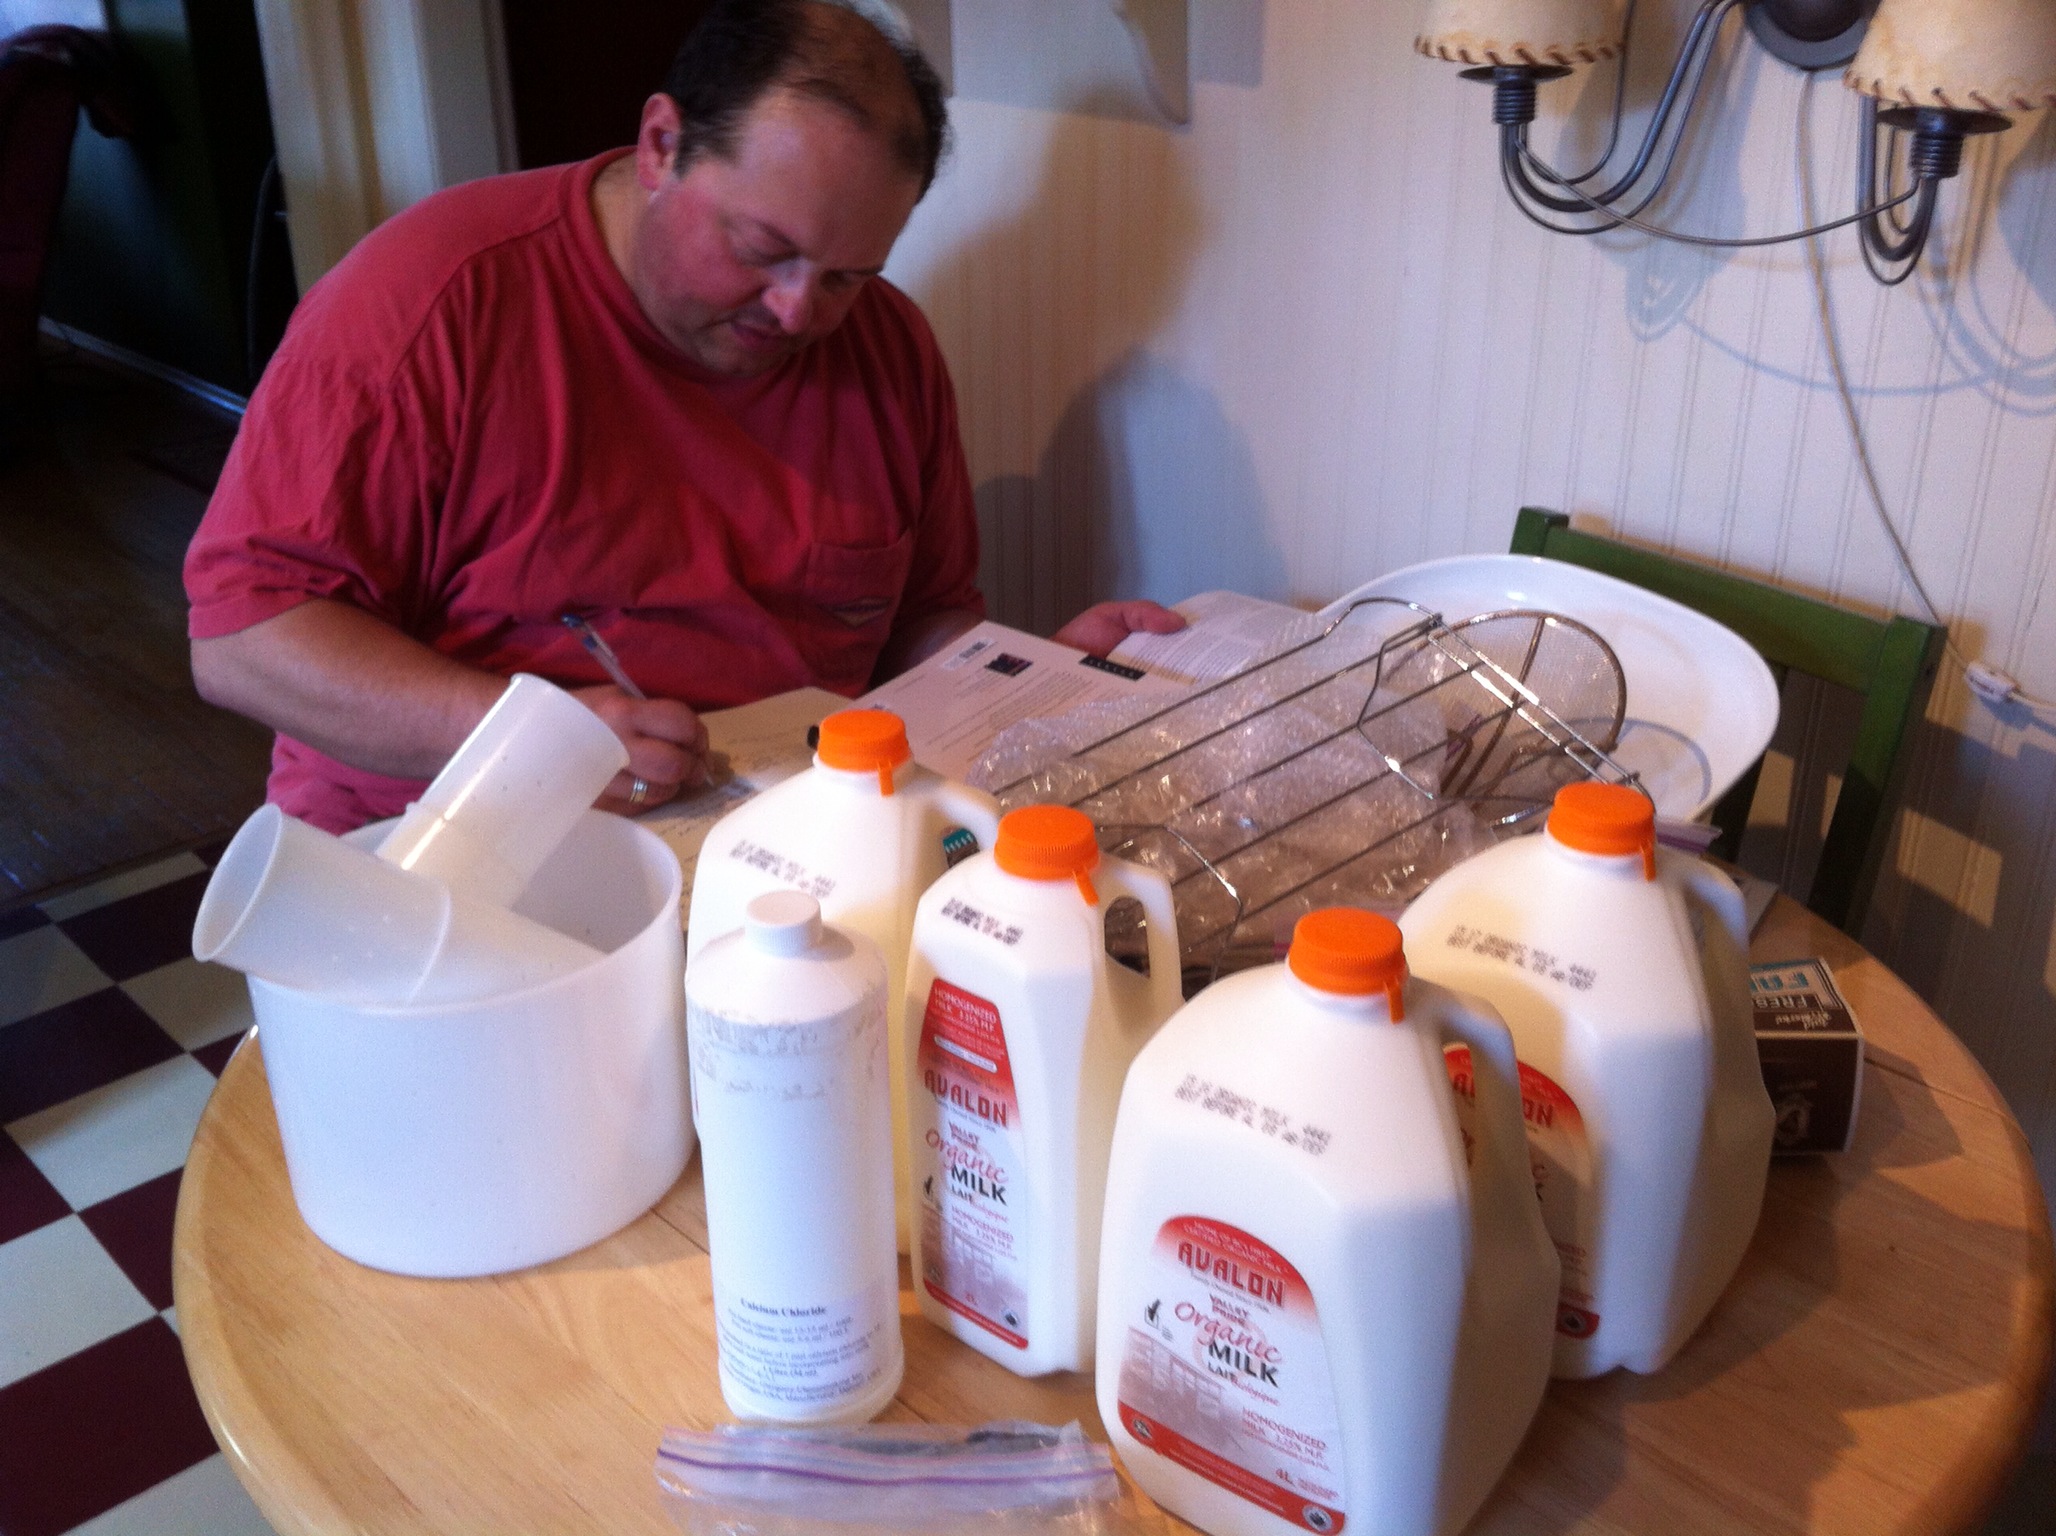
Hard at Work Recording the Steps
It took awhile to get the milk up to temperature but I think I finally have the temperature control completely figured out and got the temperature perfectly to 90 degF. Next you add in the calcium chloride followed by the rennet.
Hold the temperature until you get a clean beak about 25 to 35 minutes. I got a clean break at 30 minutes.

My Comté-Gruyère Being Born!
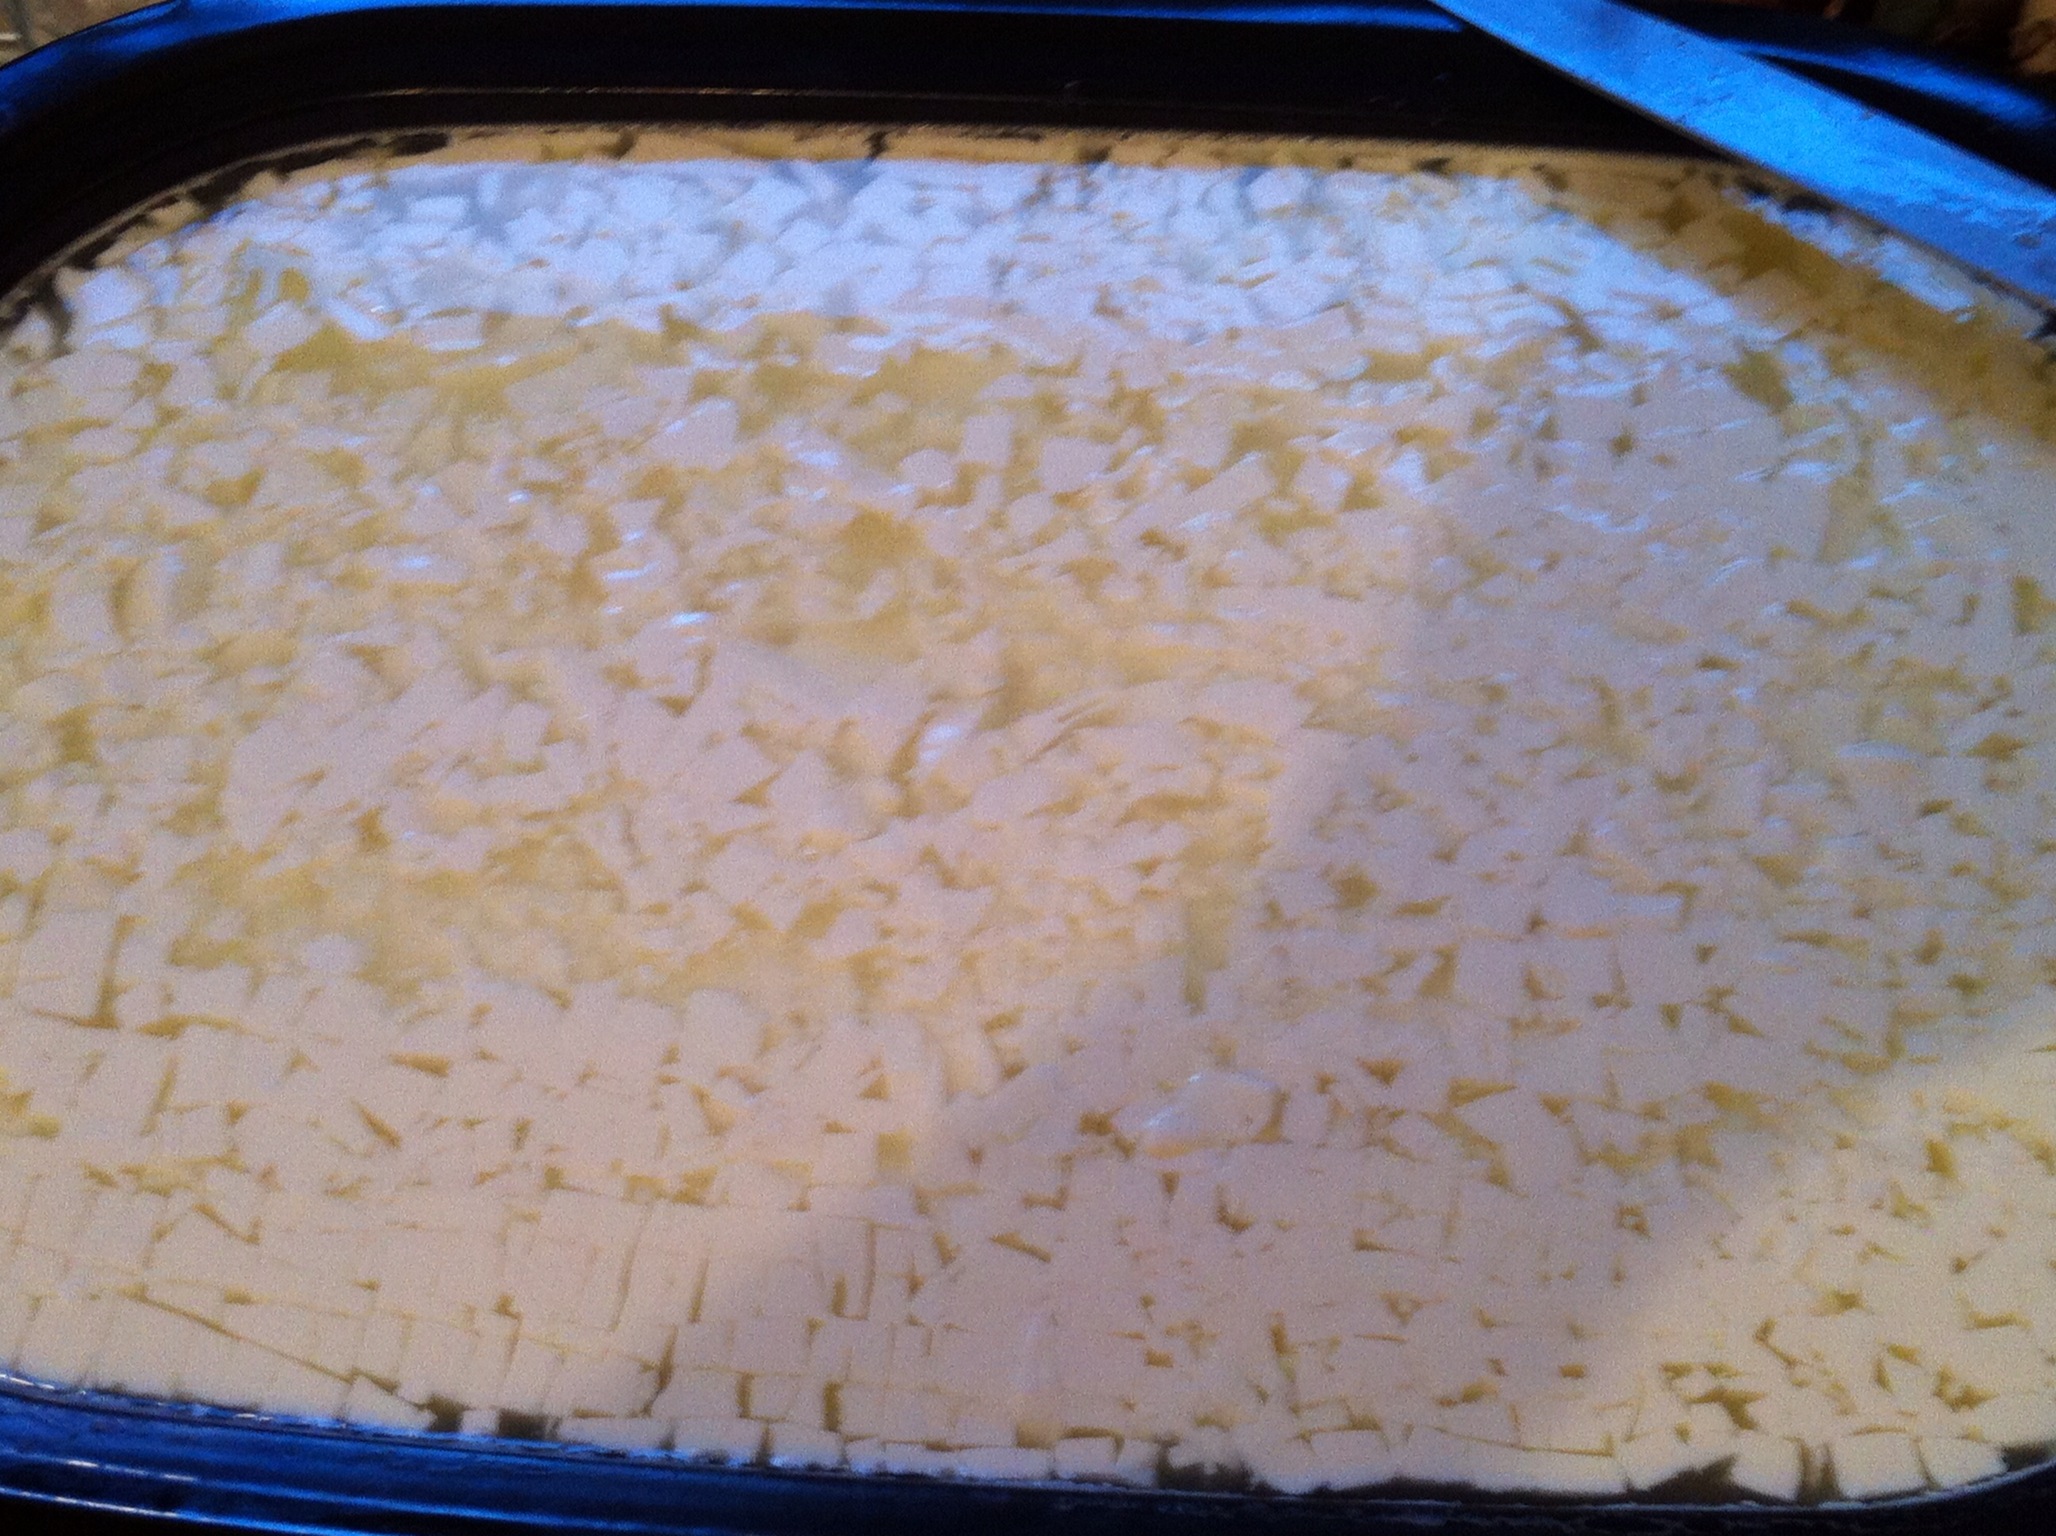
Next cut the curd into 1/4″ cubes and rest for 5 minutes.

Perfect Cuts!
After the 5 minutes has elapsed, cut the curd into 1/8 inch cubes over the course of 5 more minutes.
Next stir and heat the curd to about 118 degF over the course of an hour. The goal is to get the pH down to about 6.35.
My ph and temperature readings were as follows:
At 15 minutes the pH was 6.41 and 97 degF
At 30 minutes the pH was 6.39 and 107 degF
At 45 minutes the pH was 6.36 and 114 degF
At 57 minutes the pH was 6.34 and 119 degF
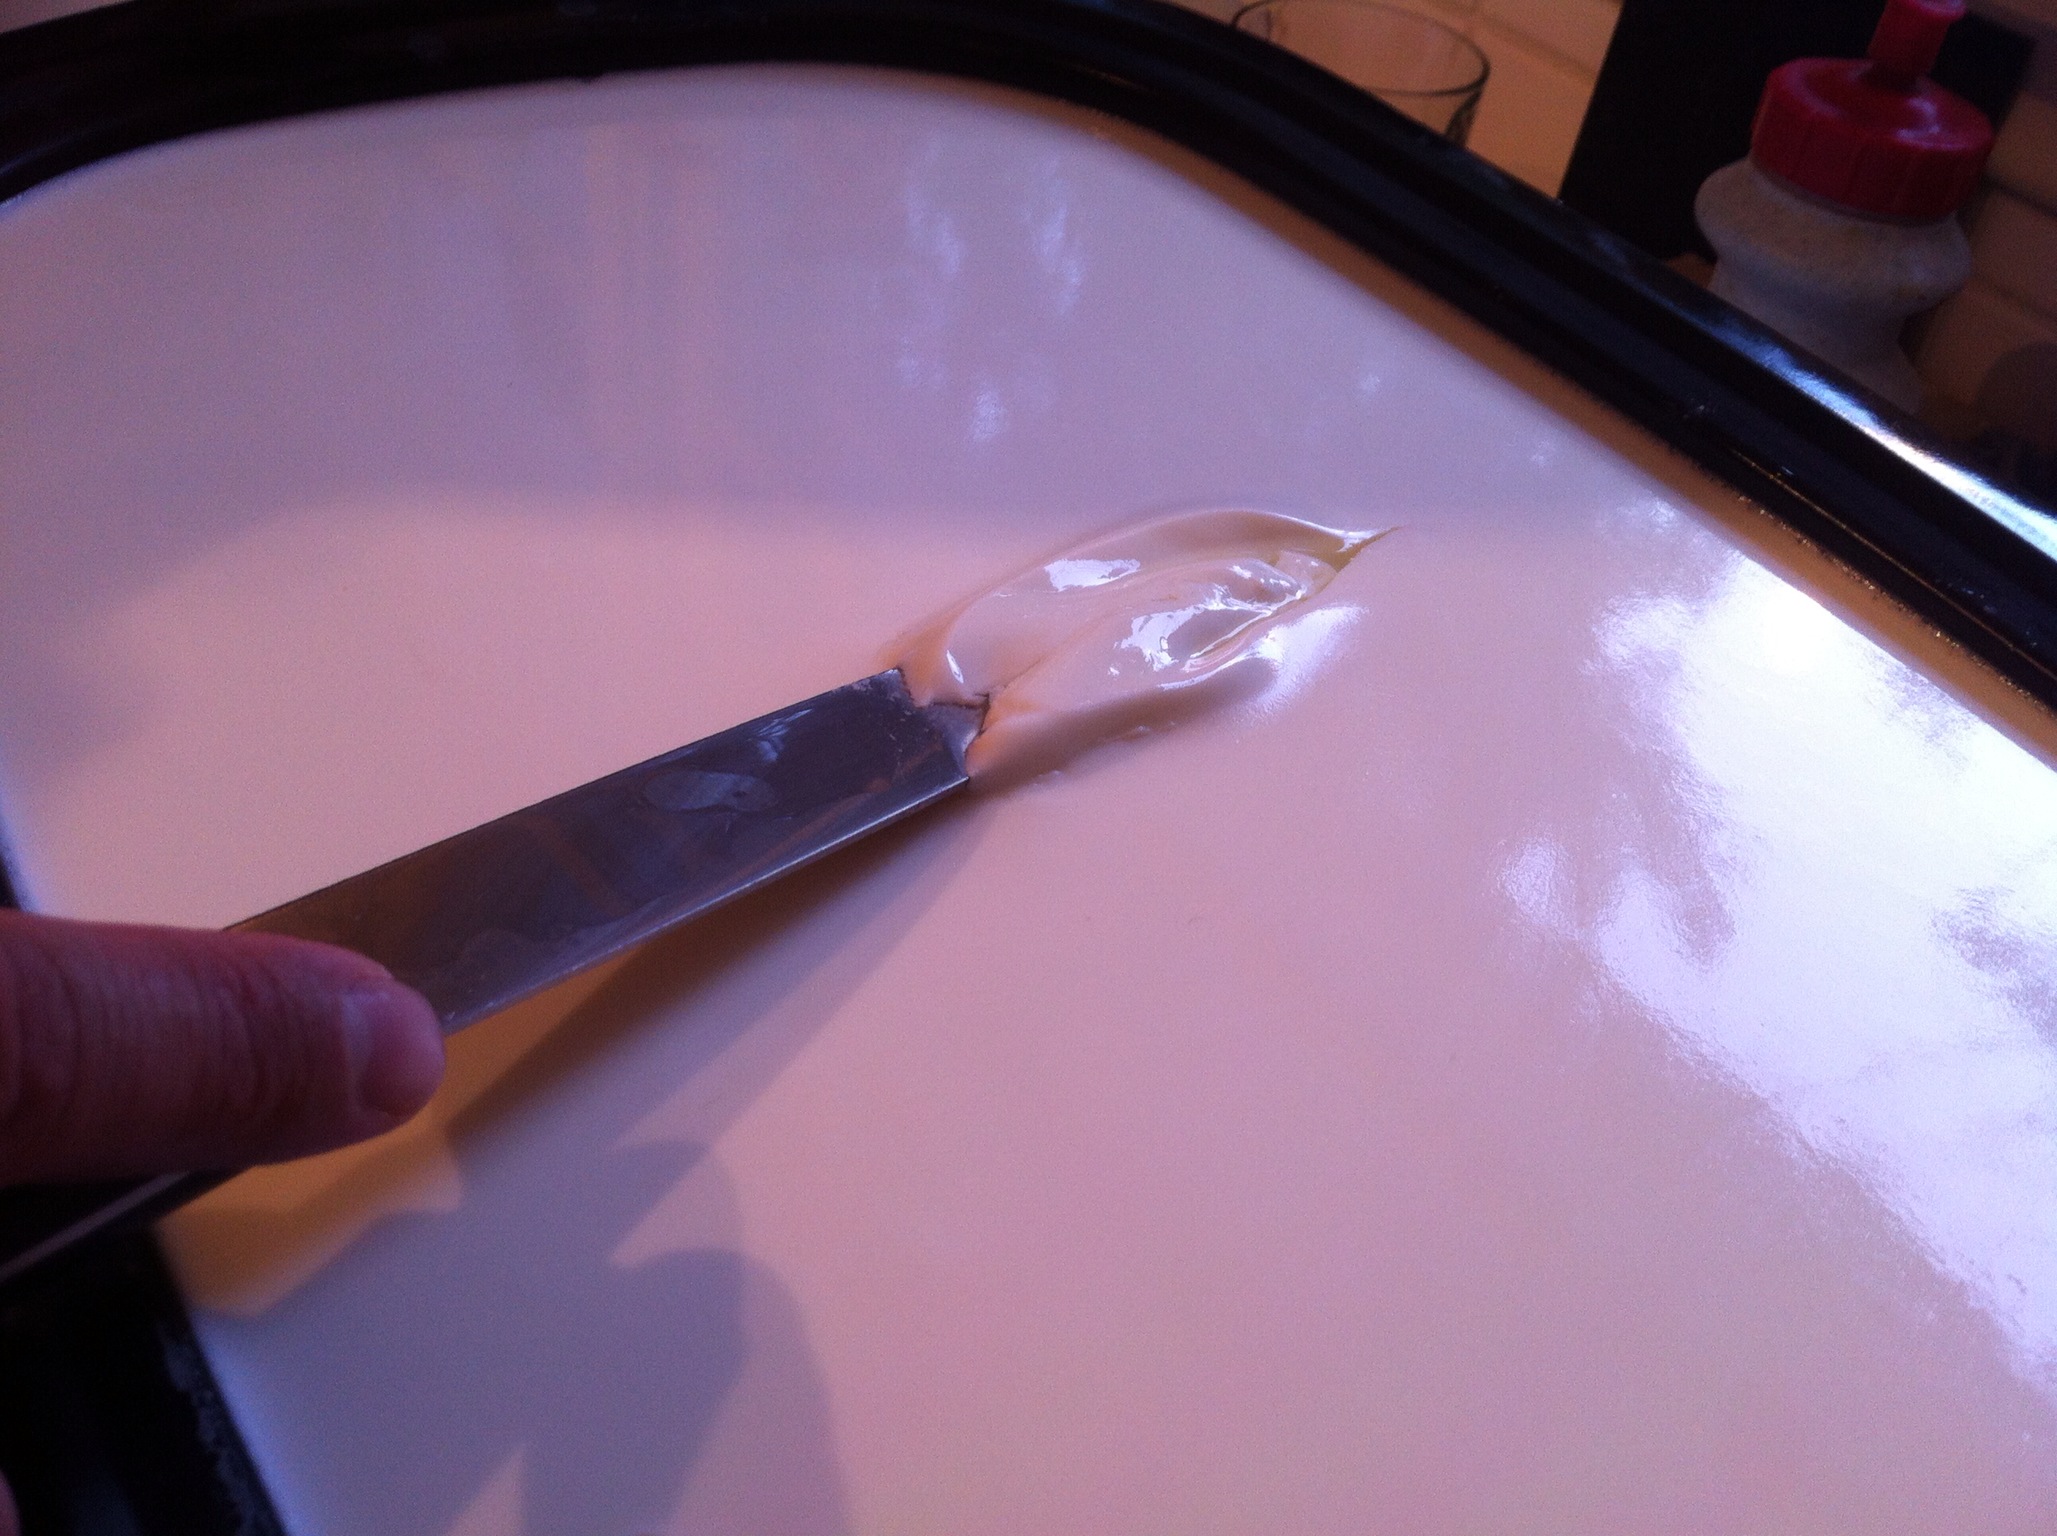
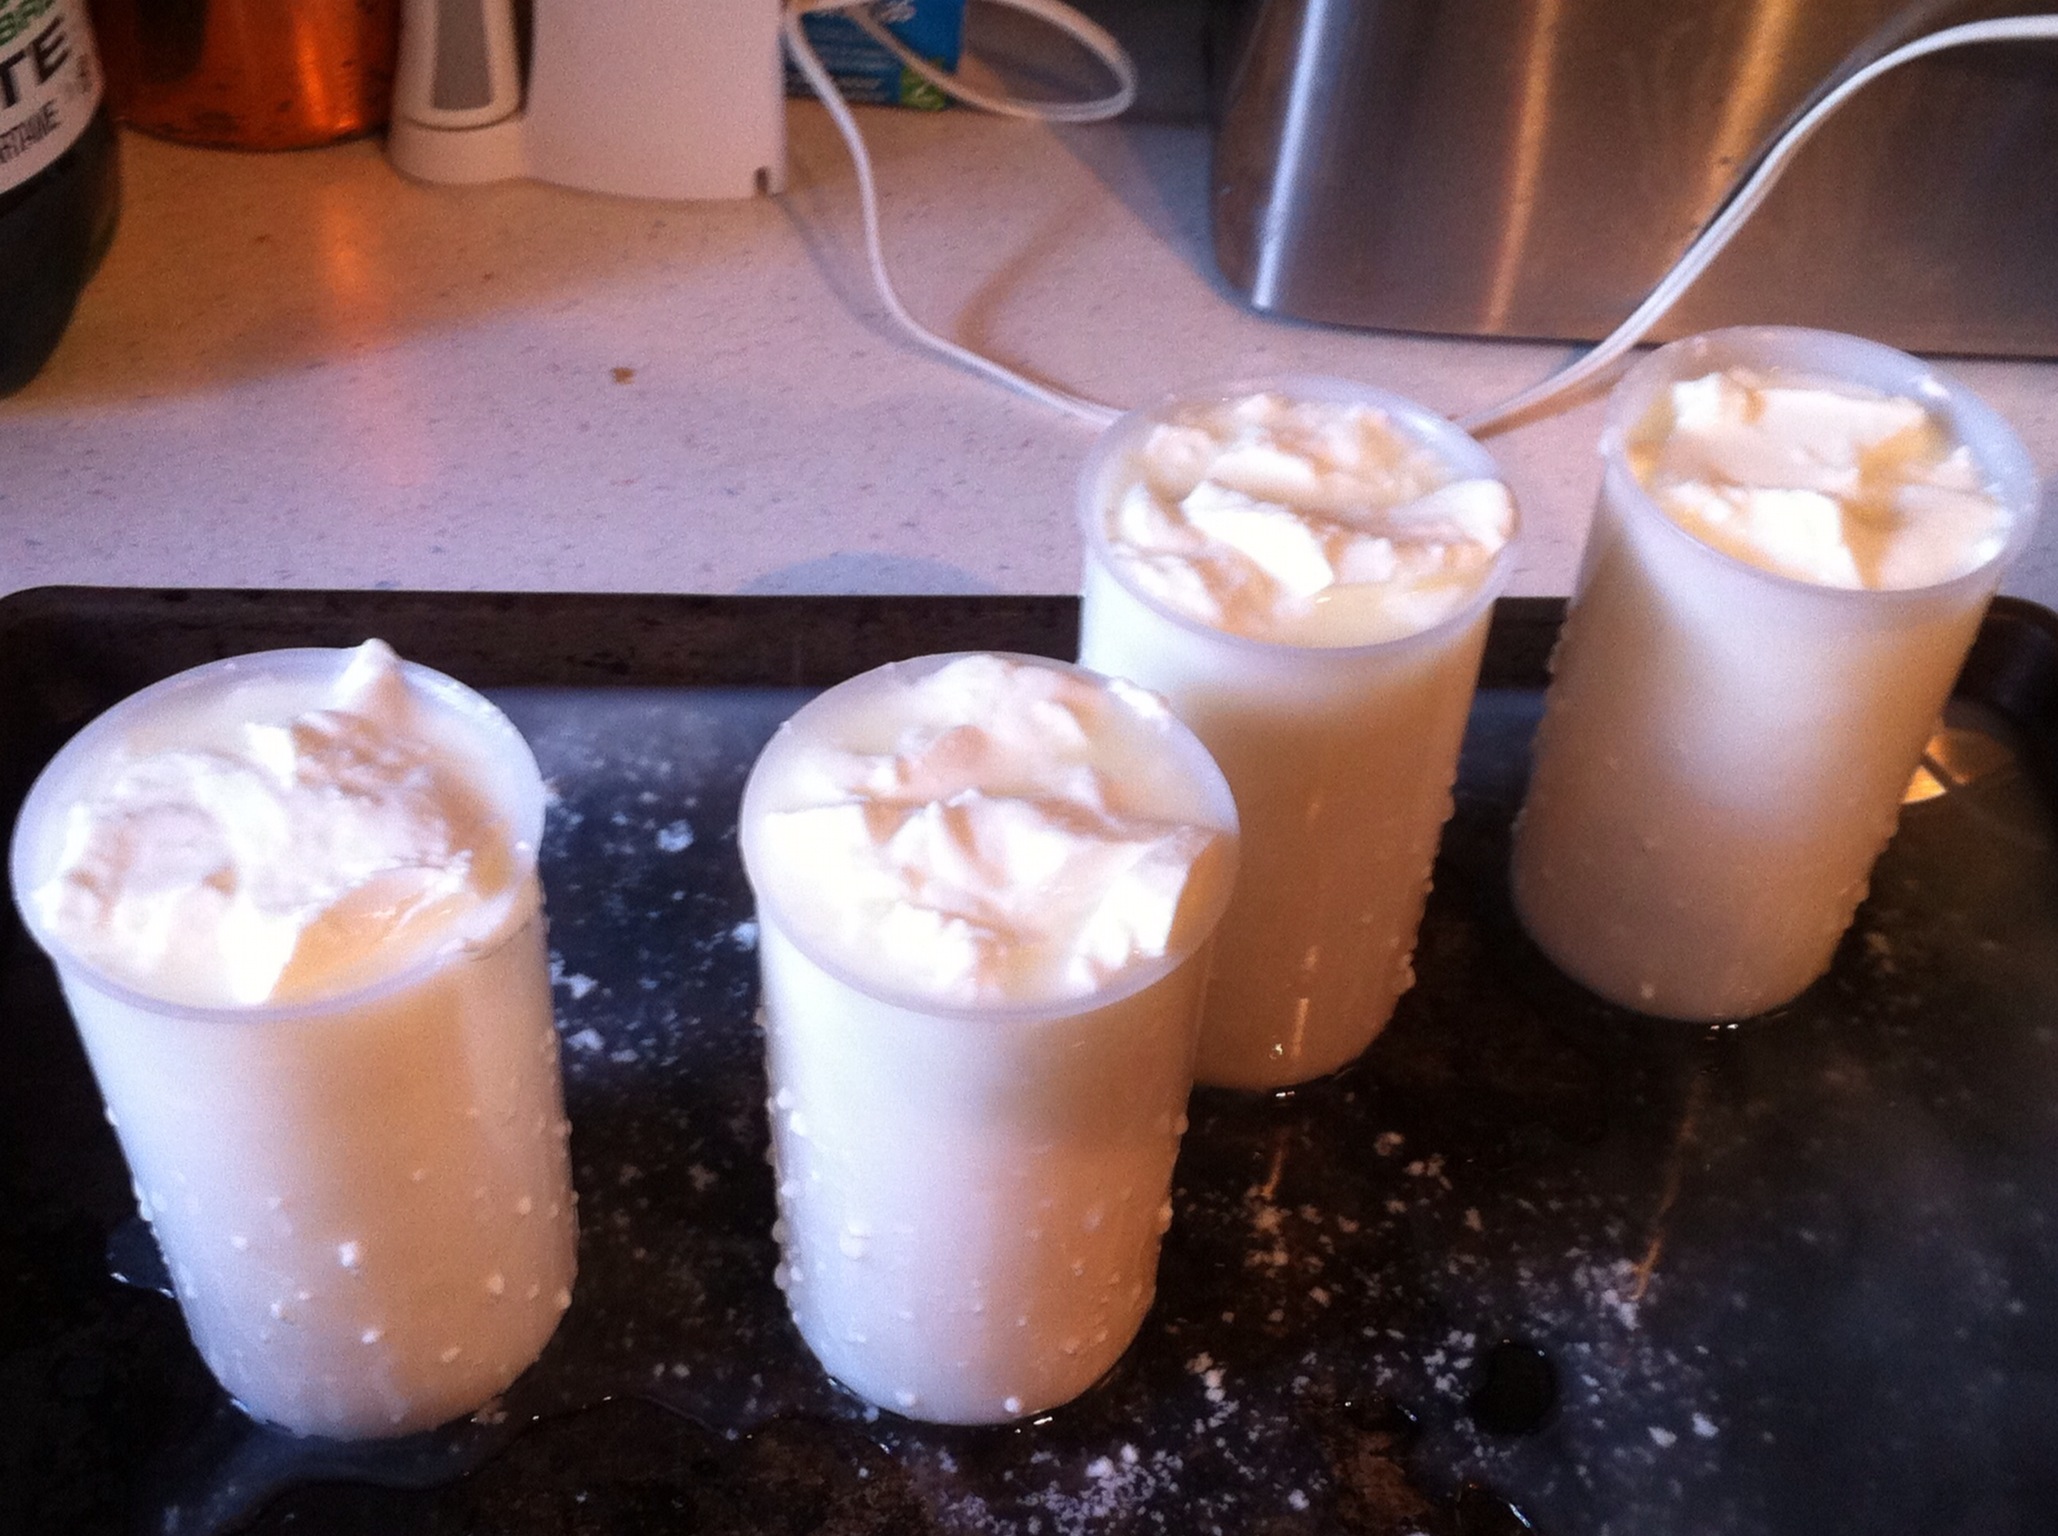
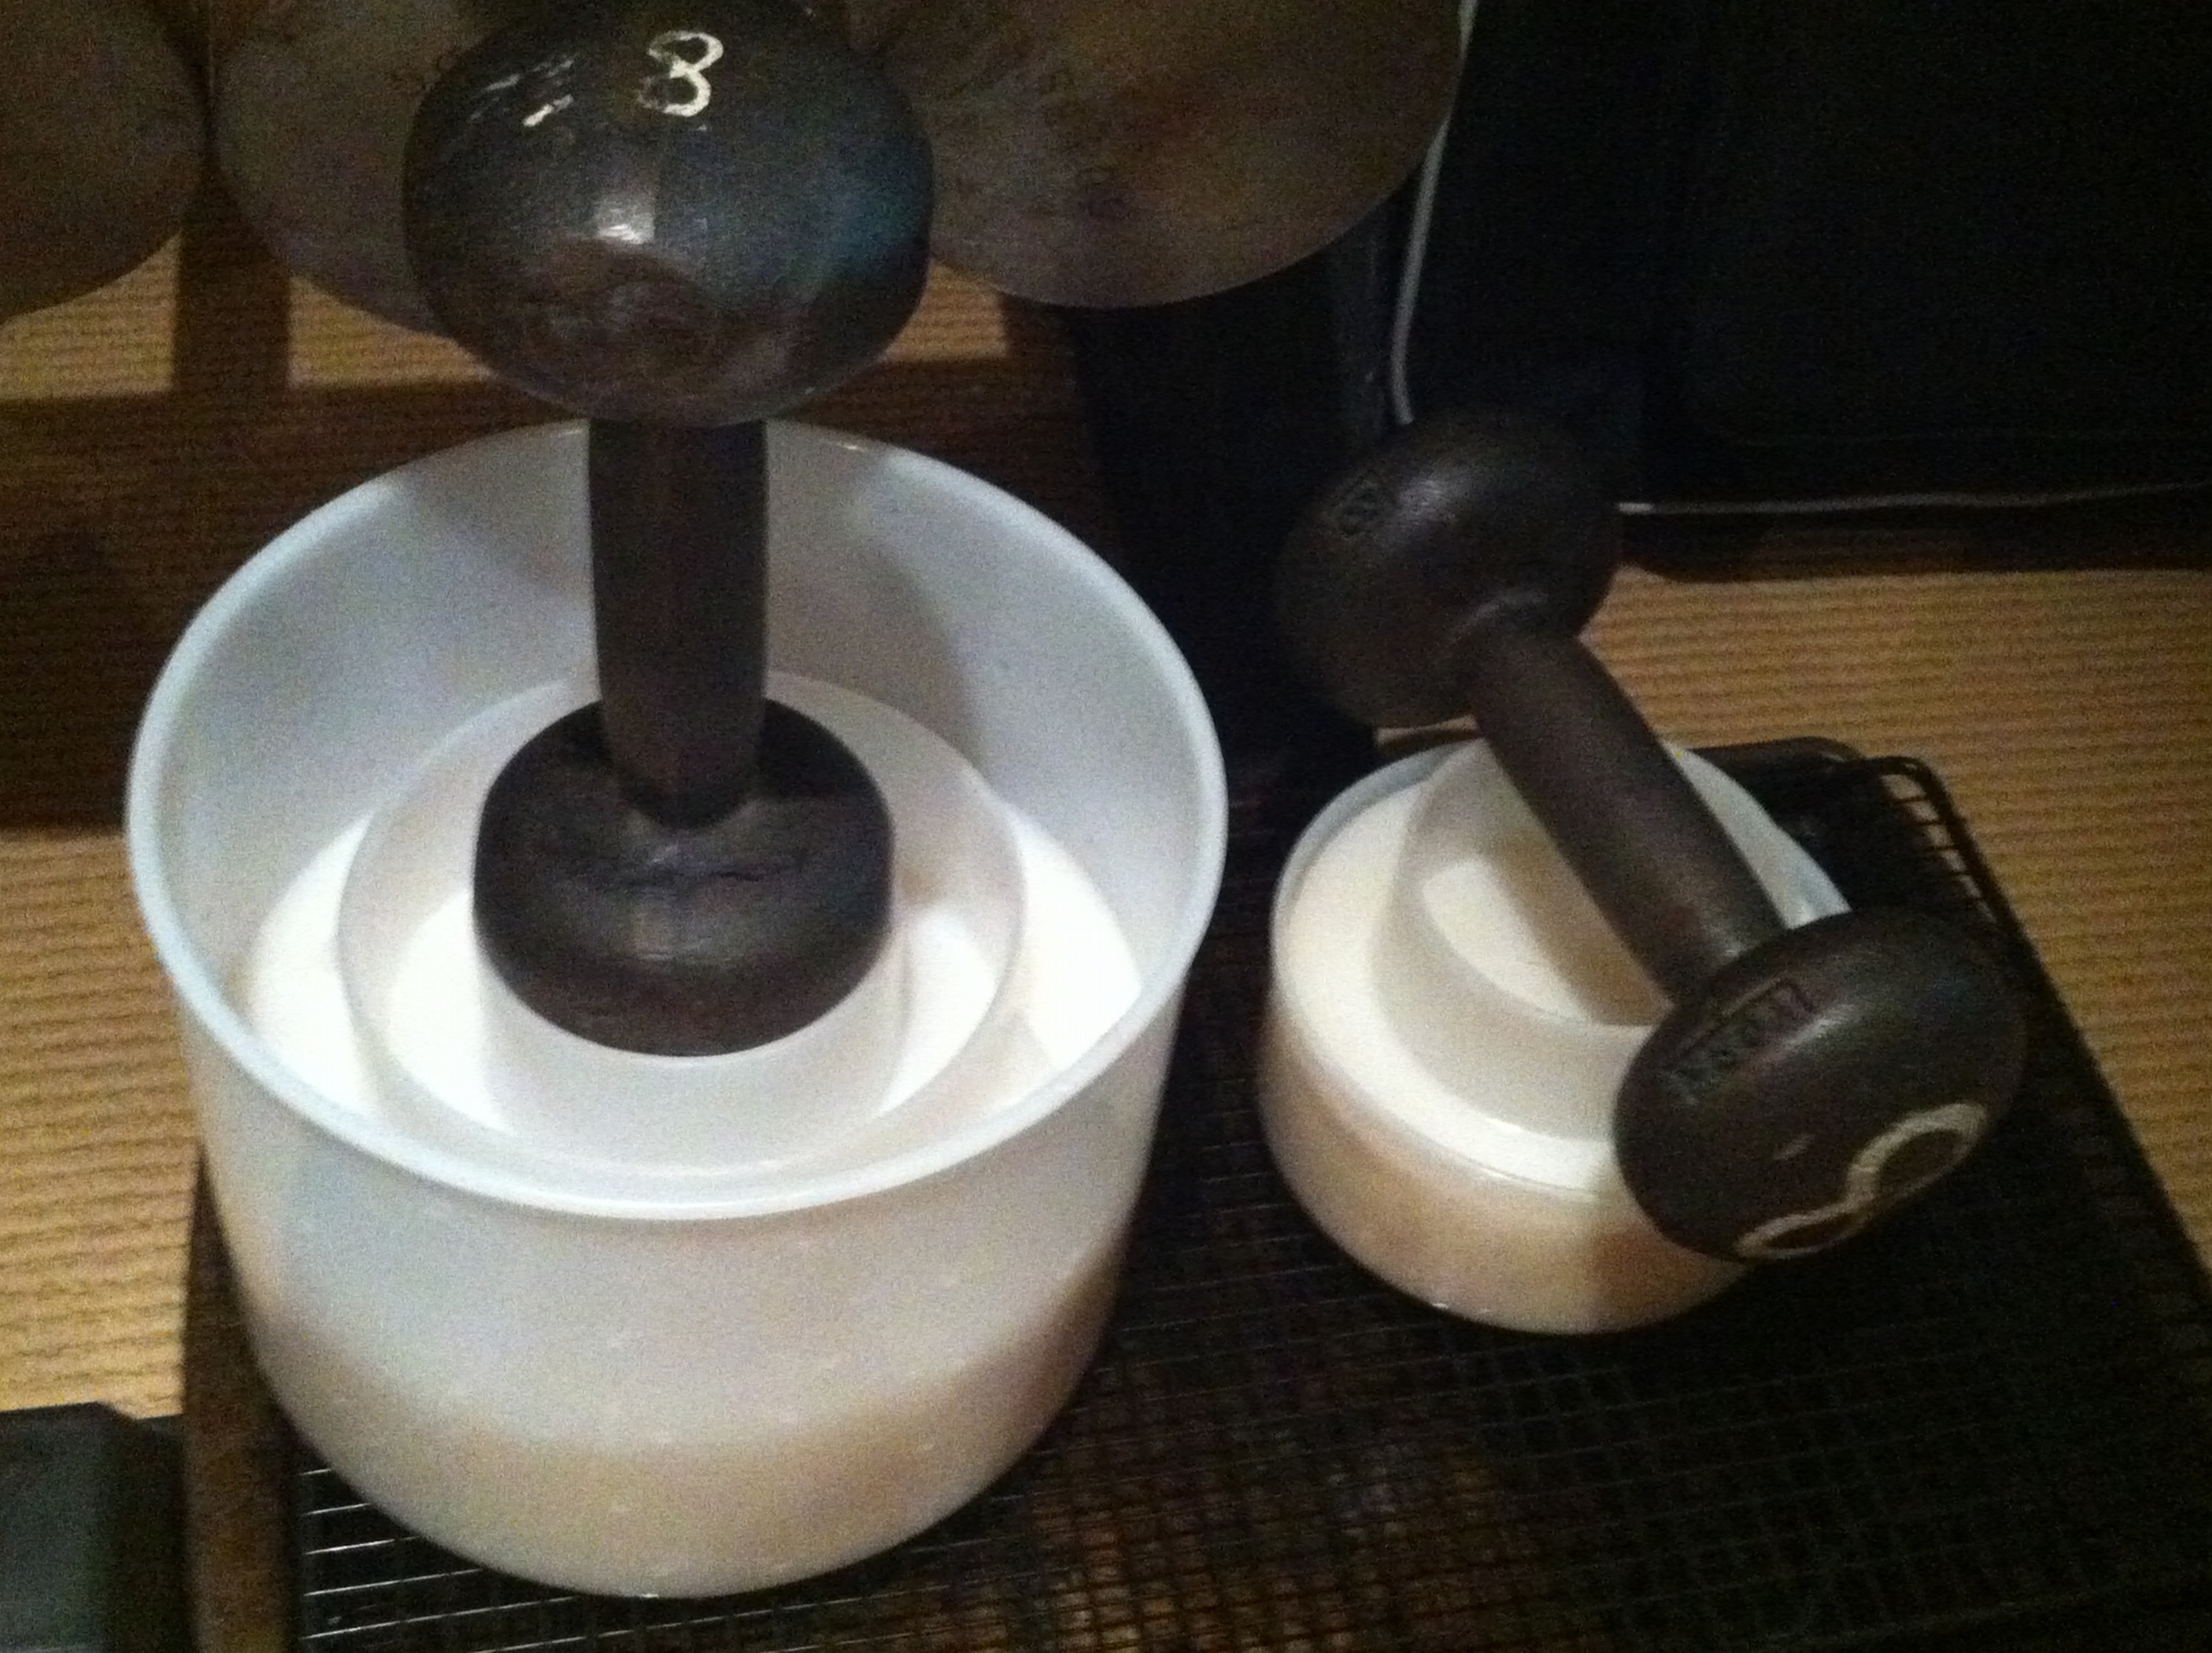
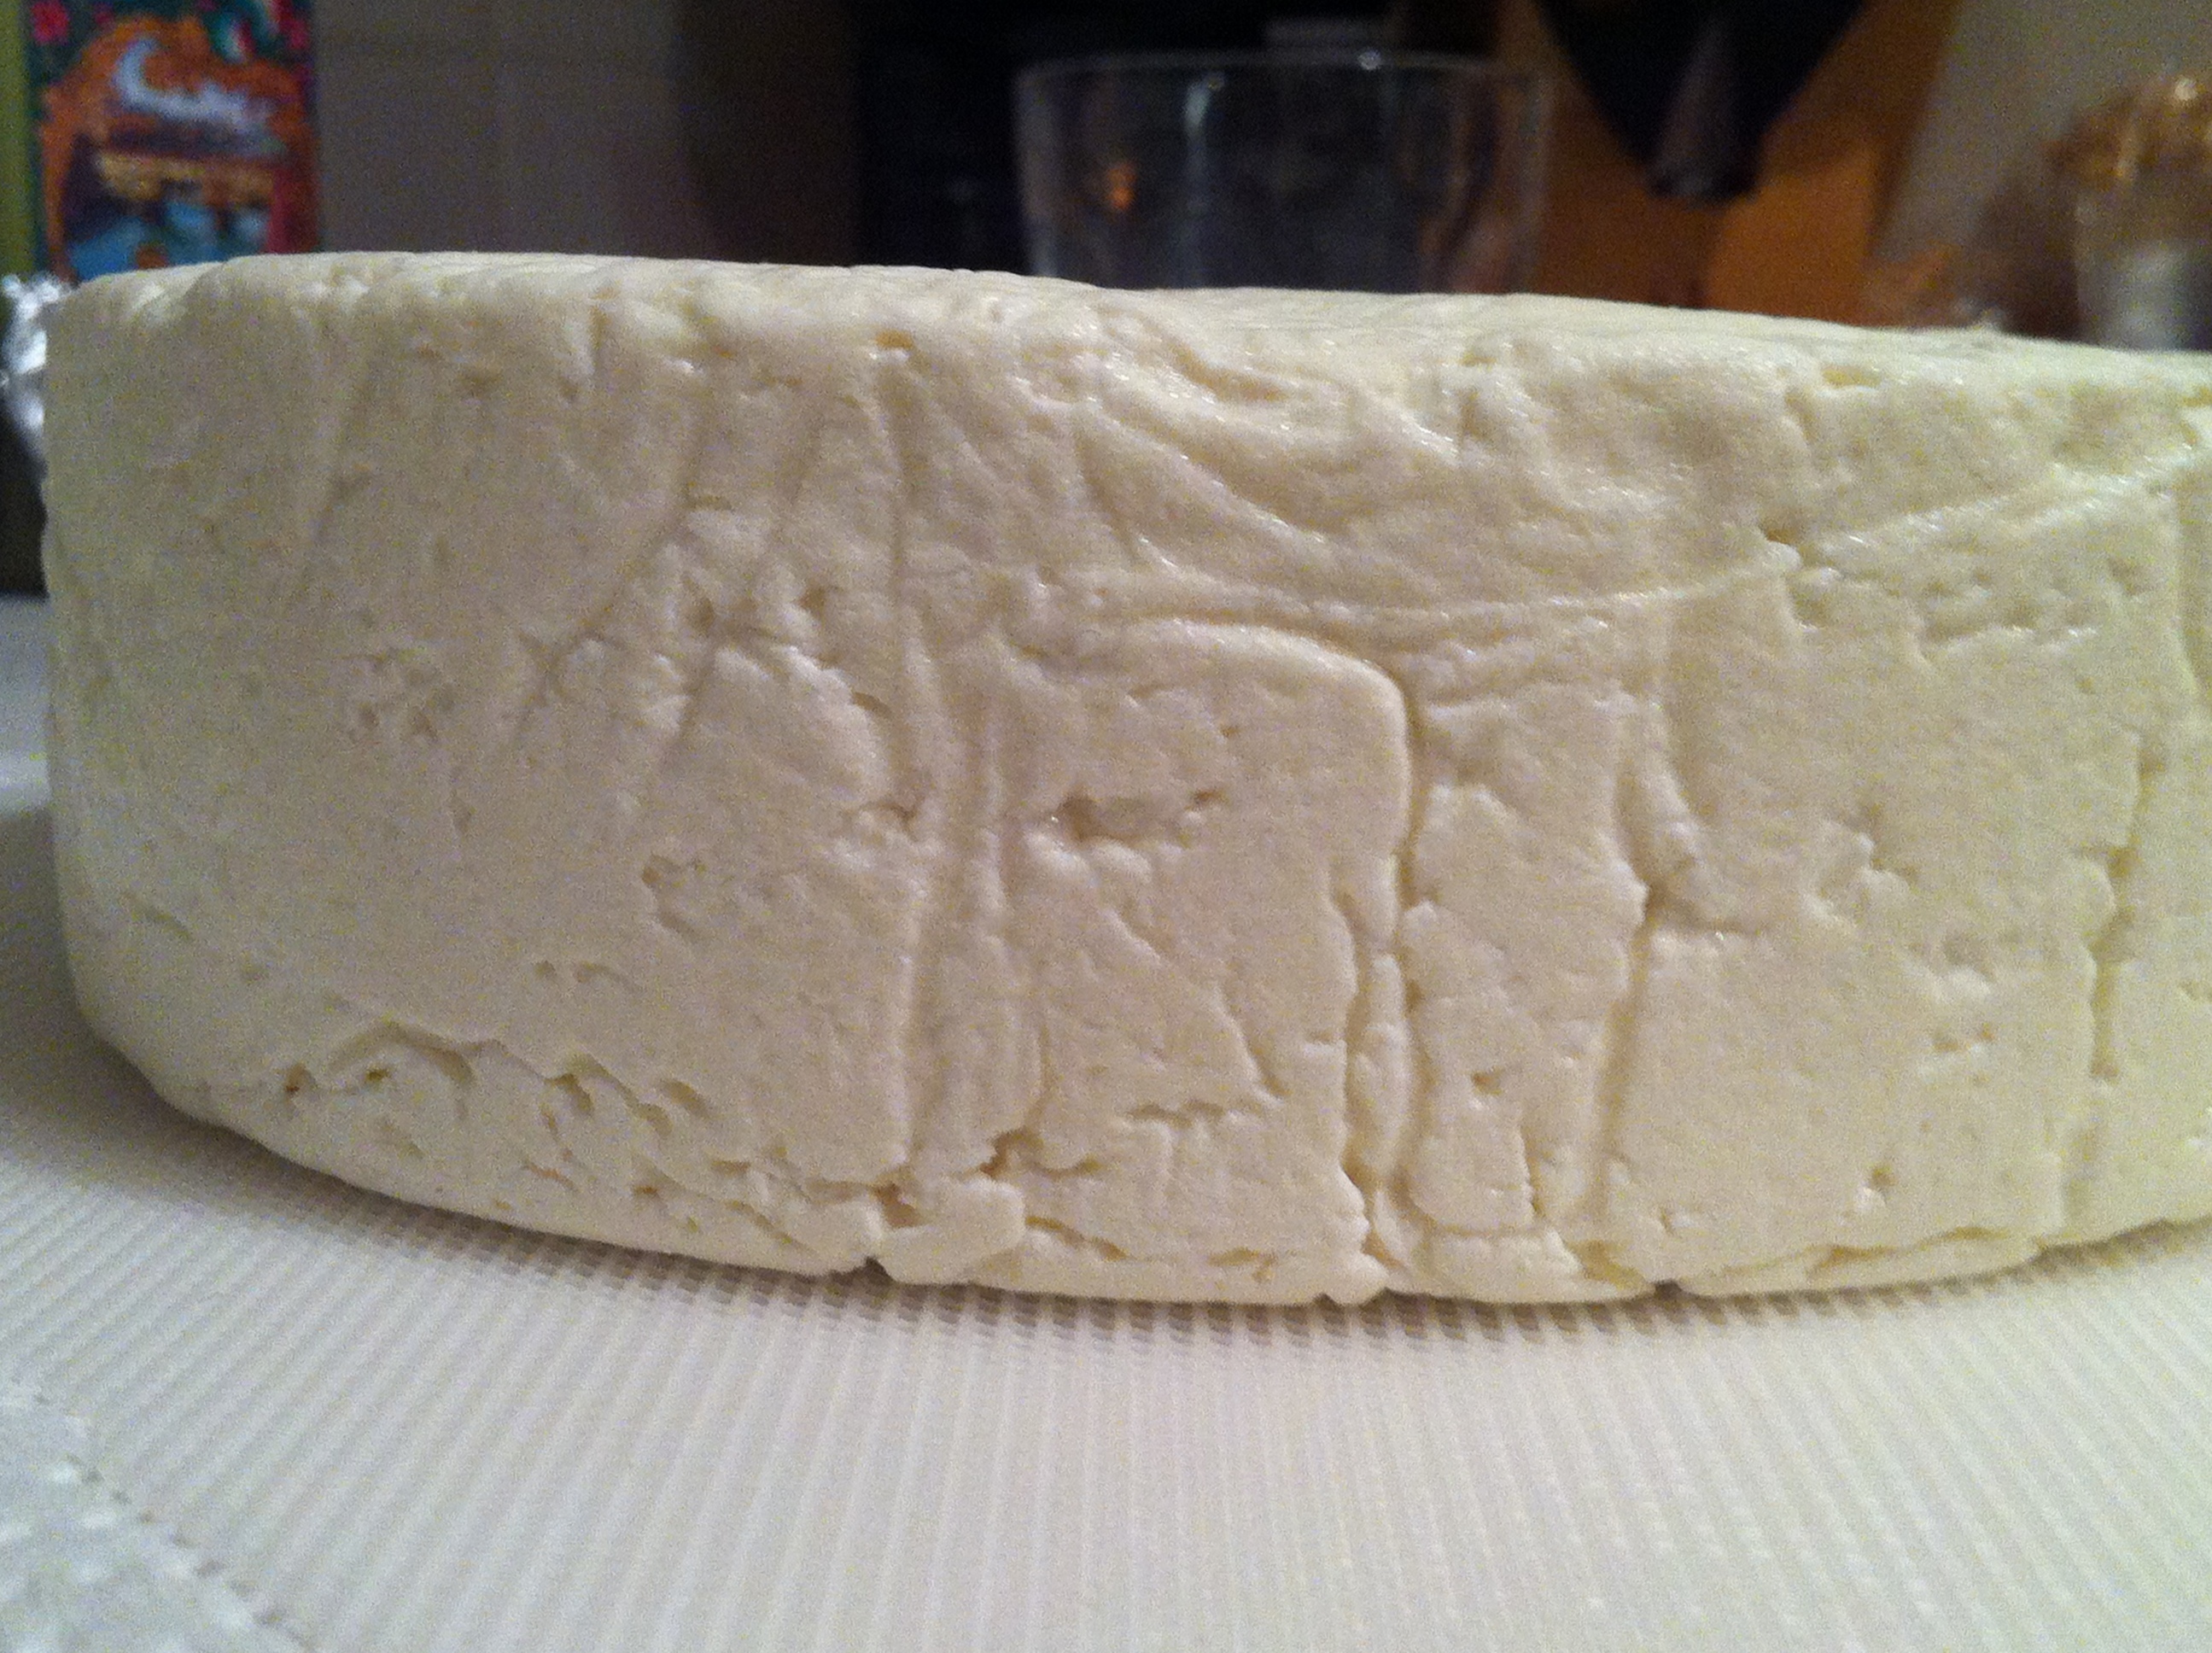
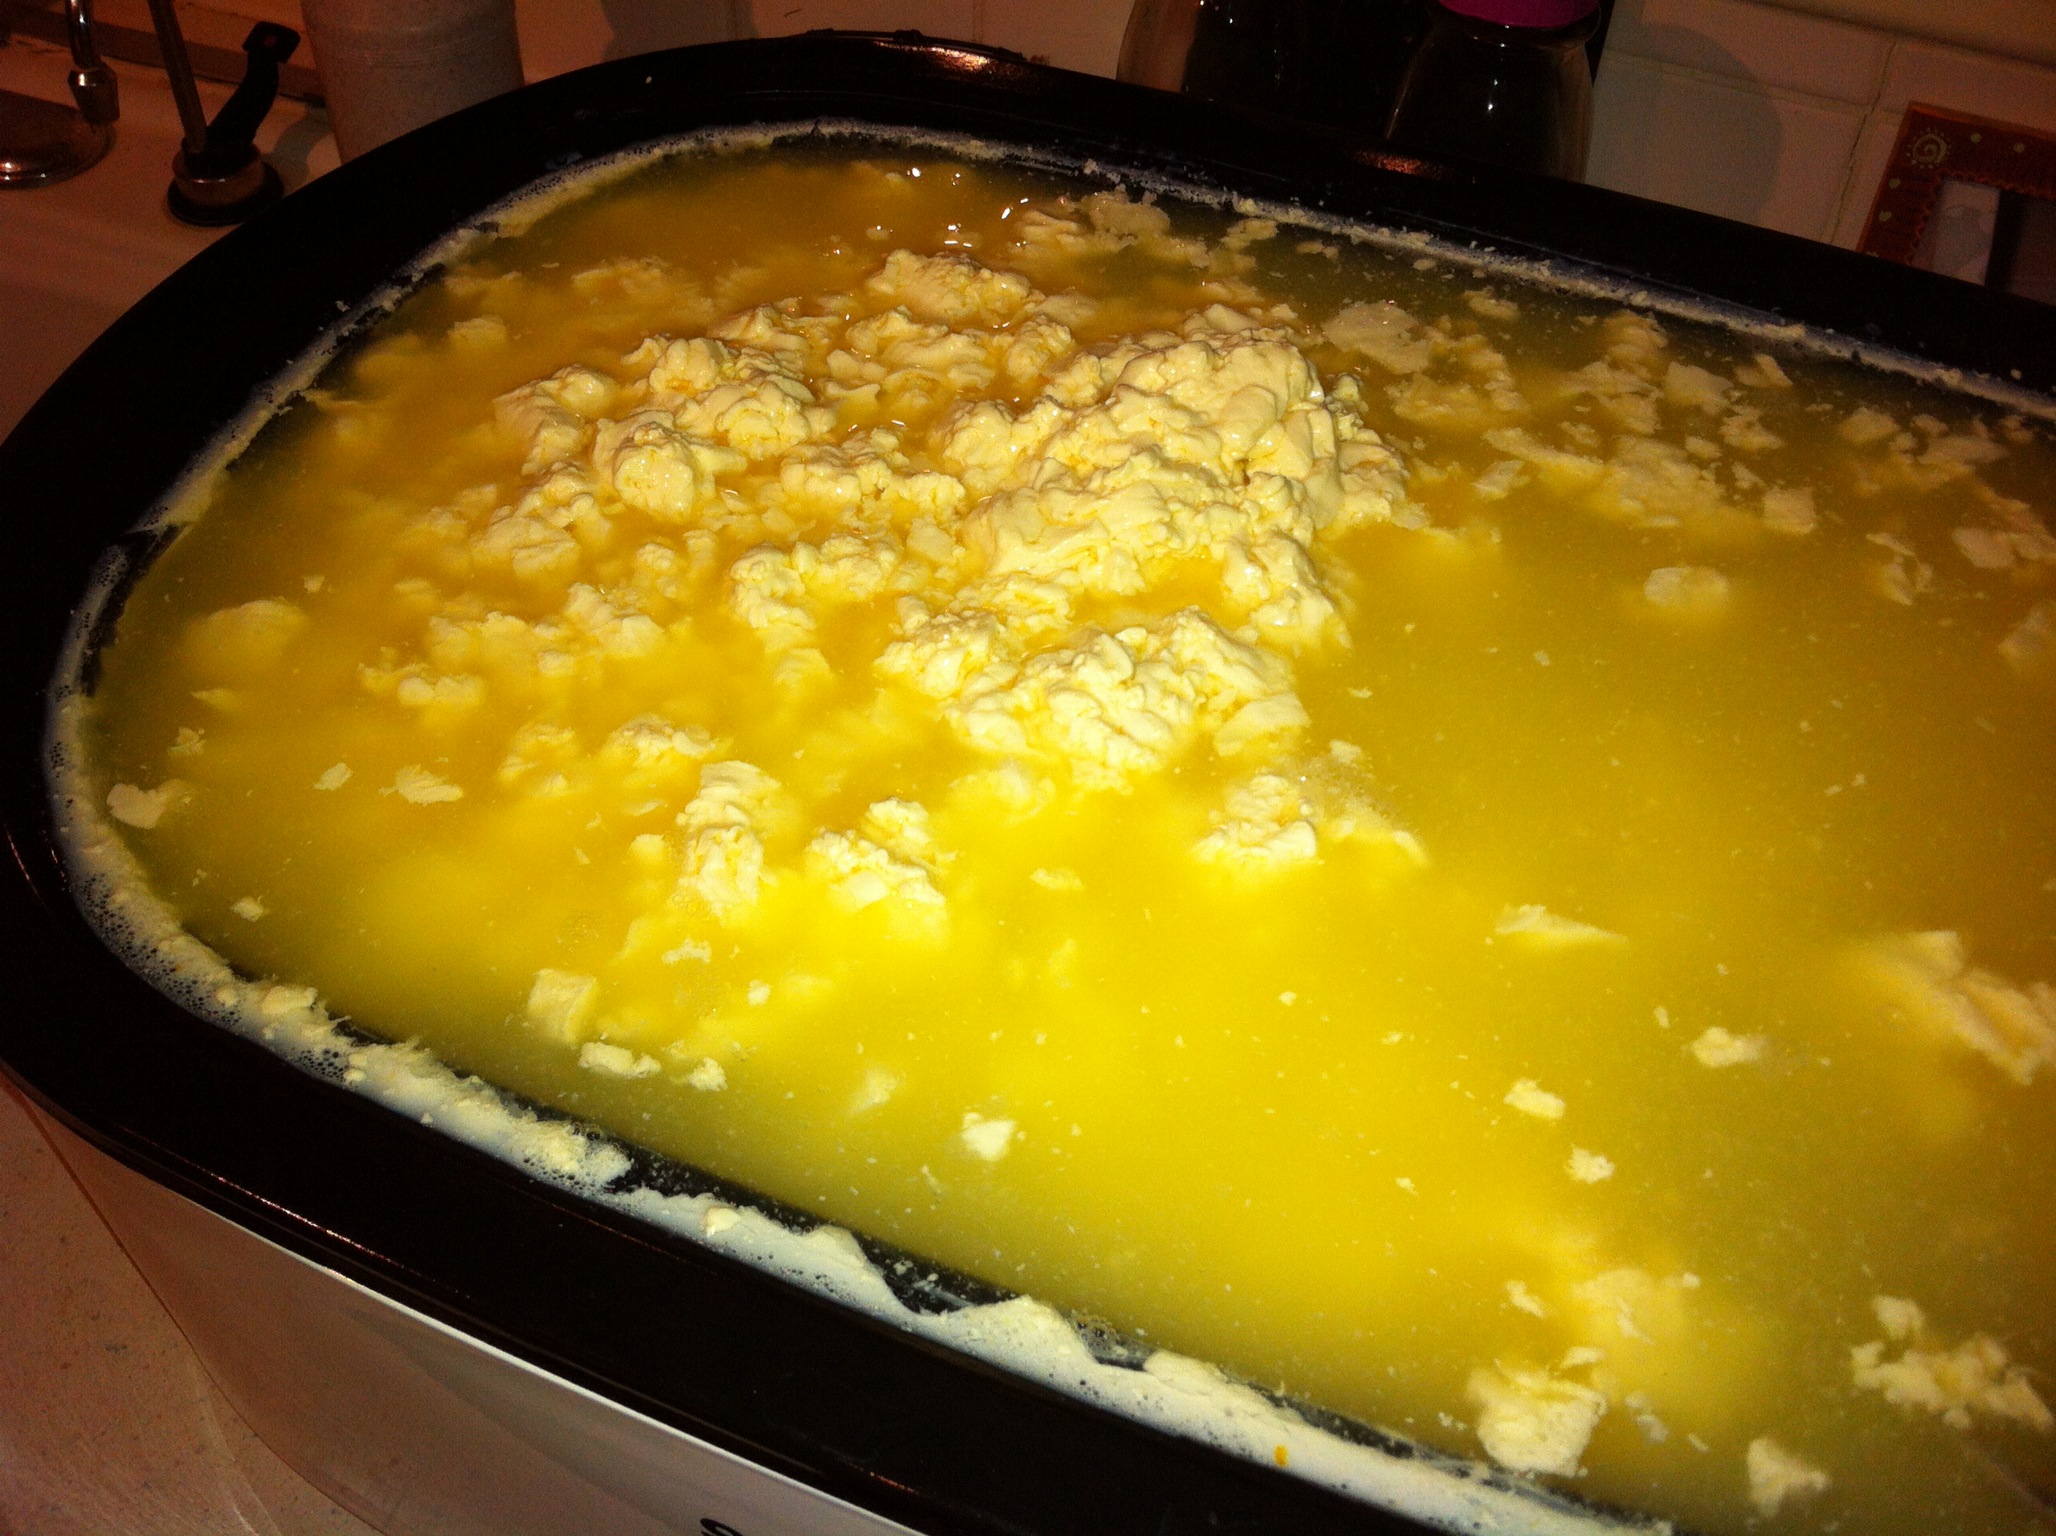
Once the pH and temperature have been attained, allow the curd to settle for 5 minutes. Now drain the whey to the curd level and try to press the curds into one mass. I didn’t have much luck with this so I scooped out handfuls squeezing them together and placing them in the cheese cloth lined hoop.
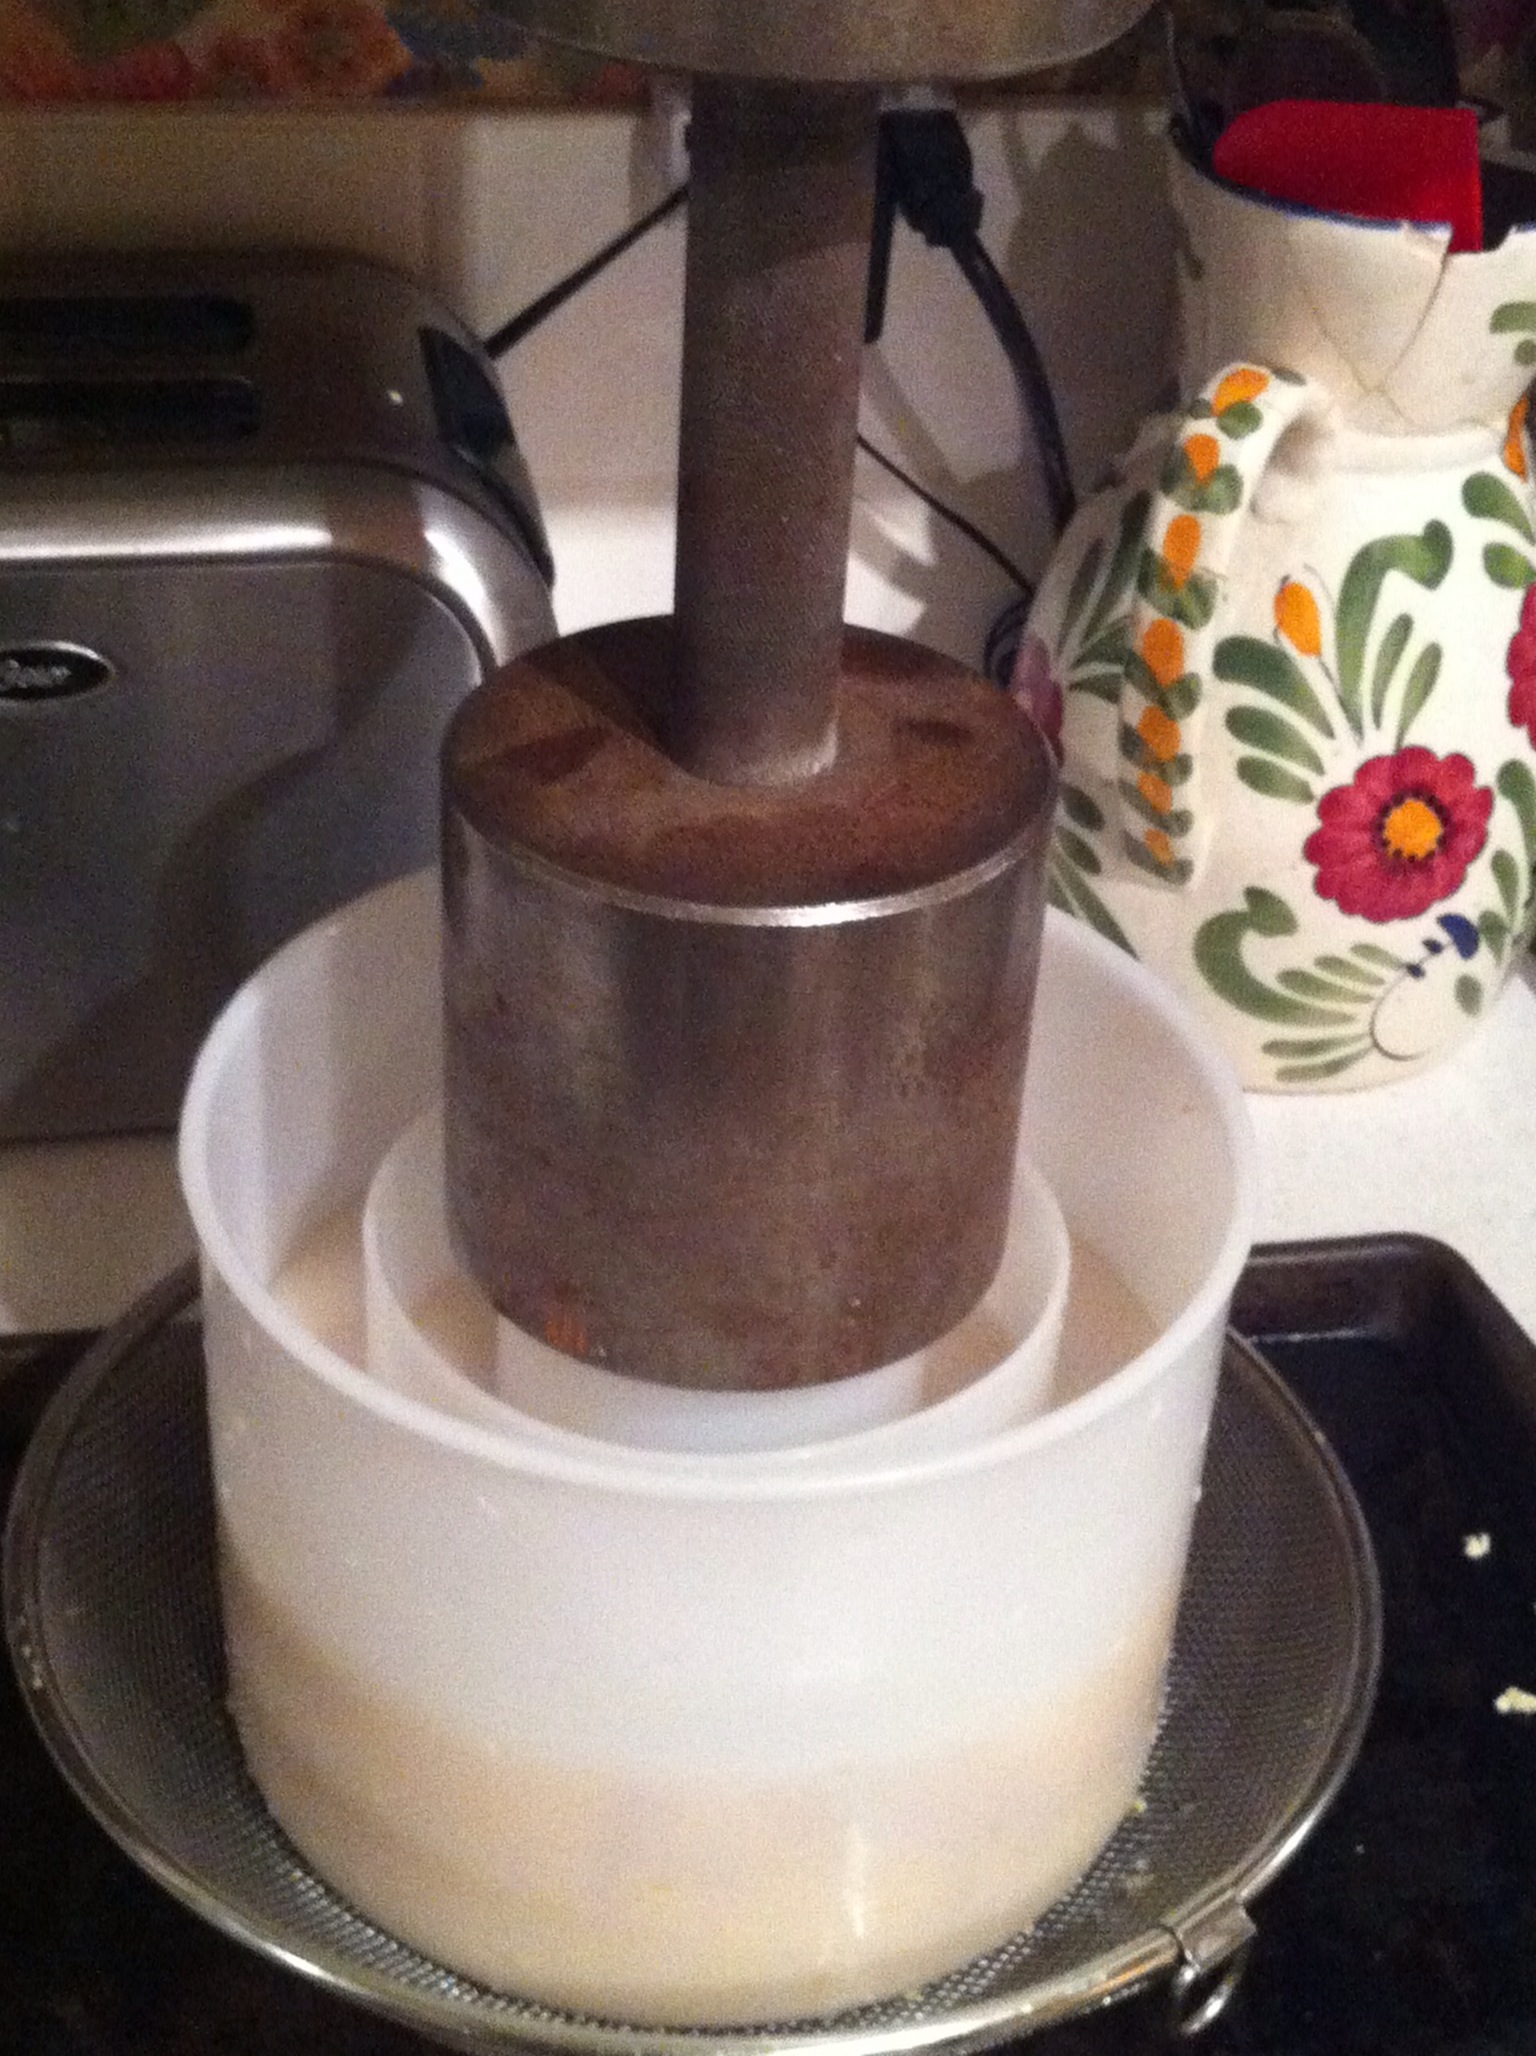
Next press with the weight of the curd for 30 minutes.
Turn and press for an hour with double the weight.

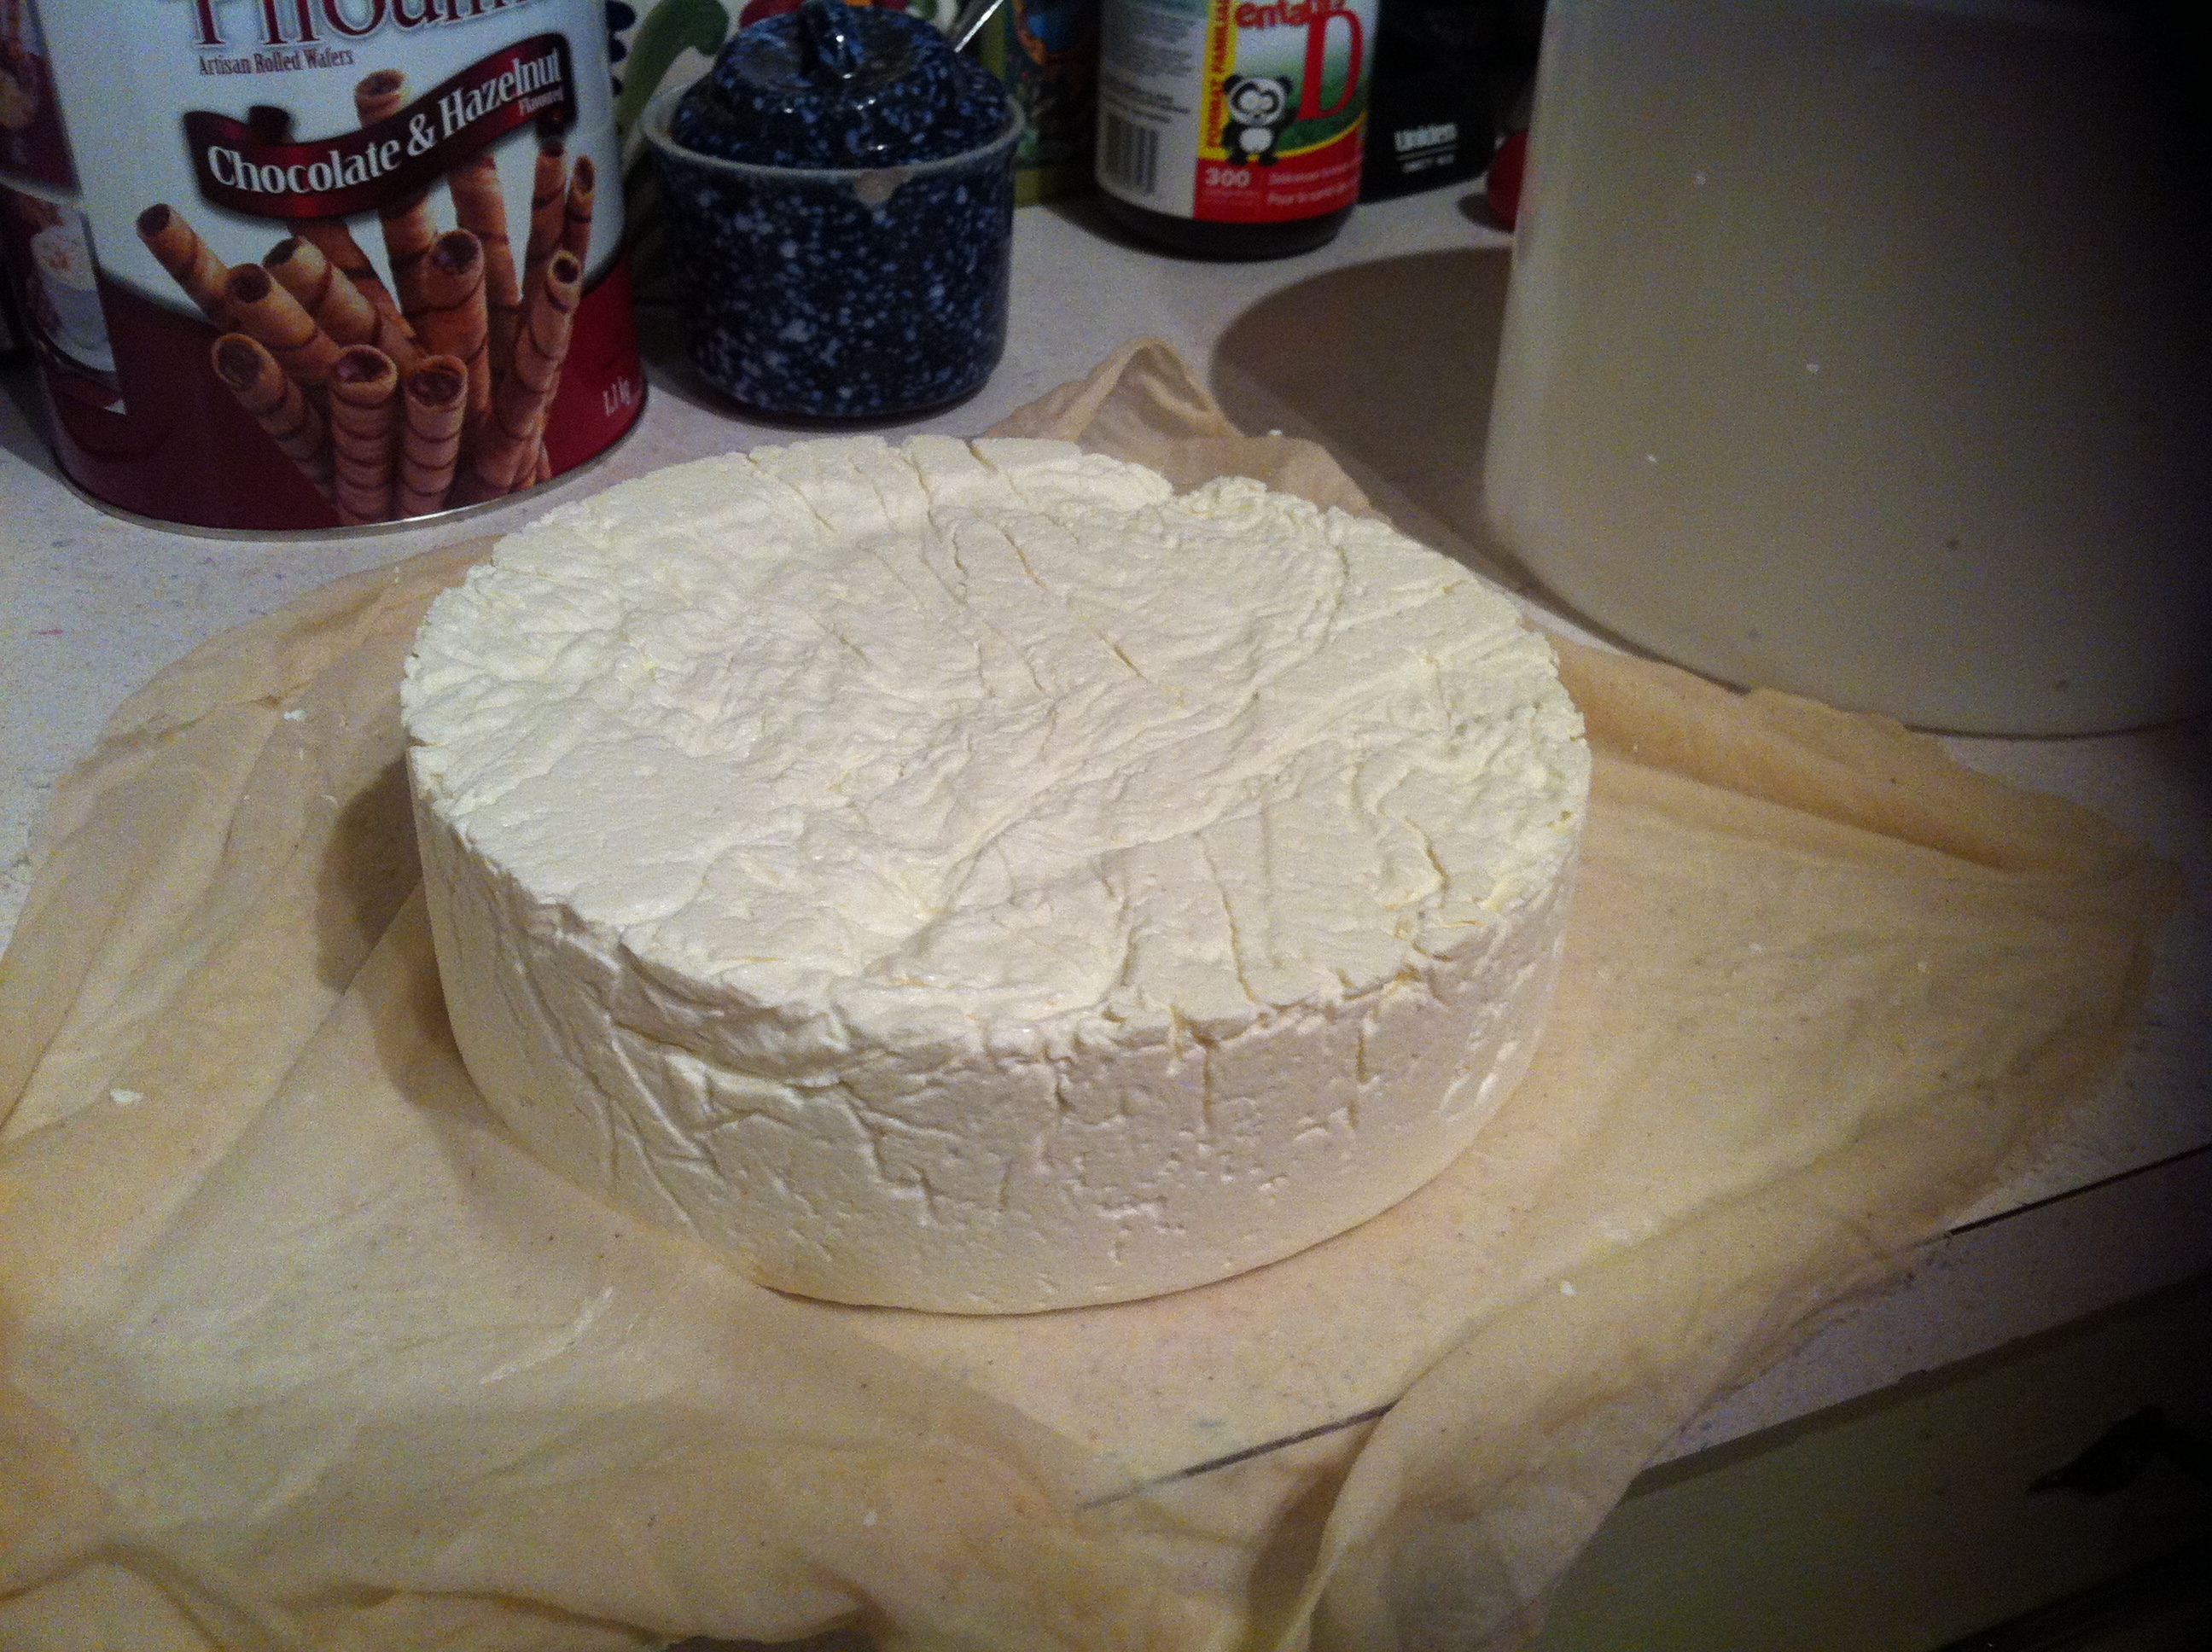
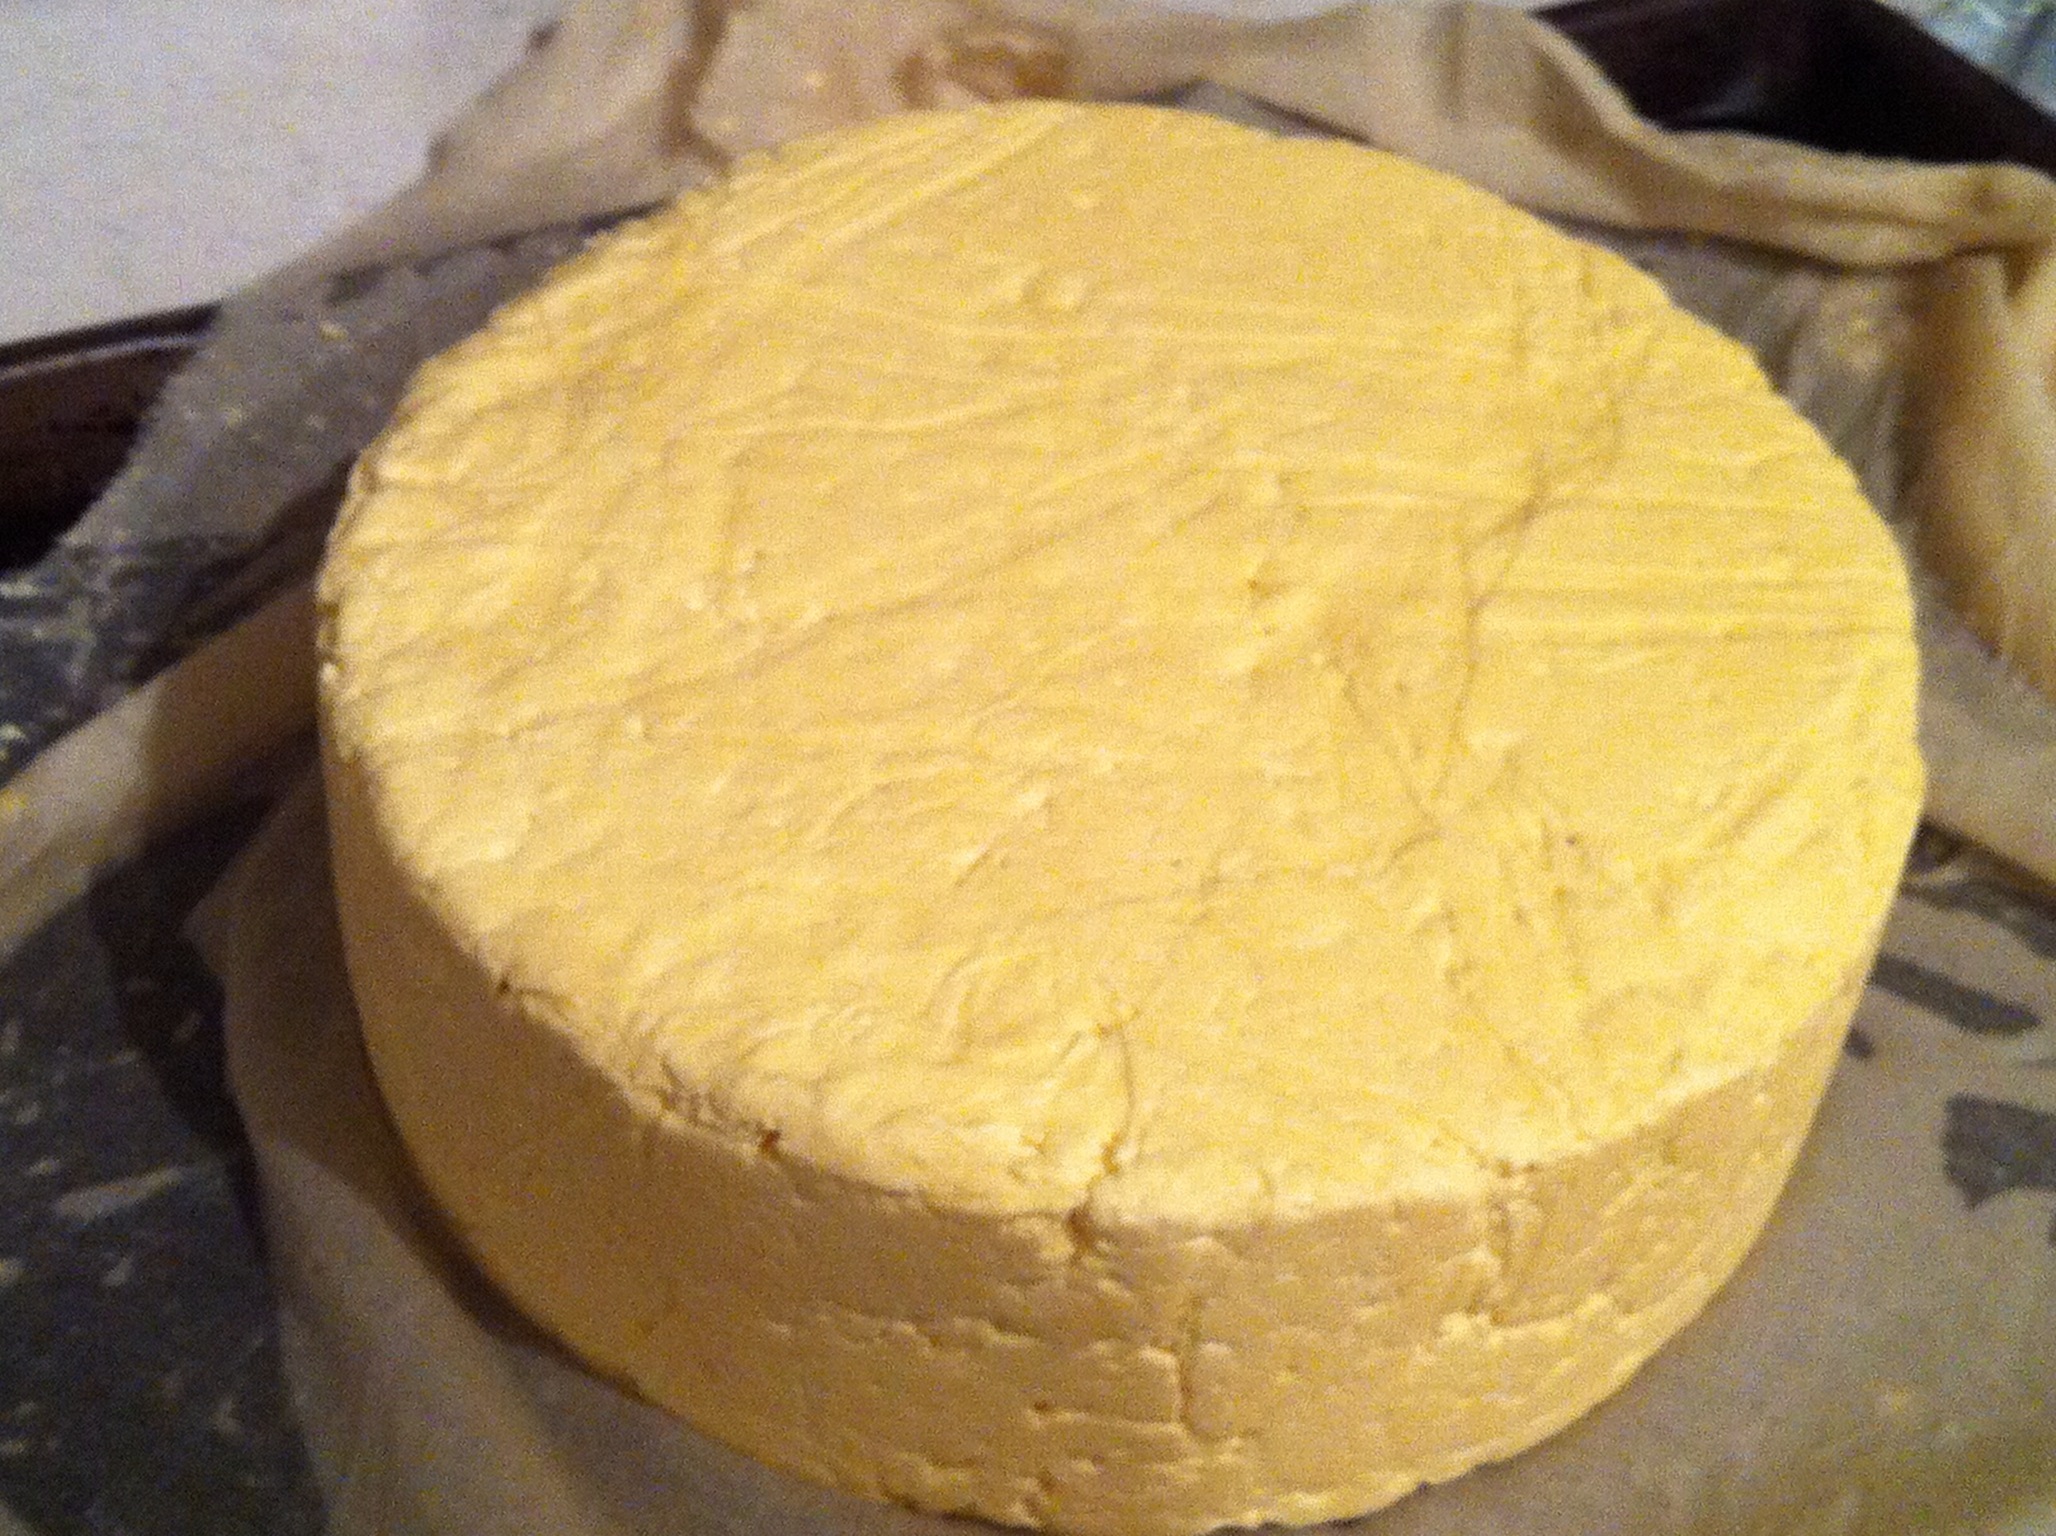
After First Pressing
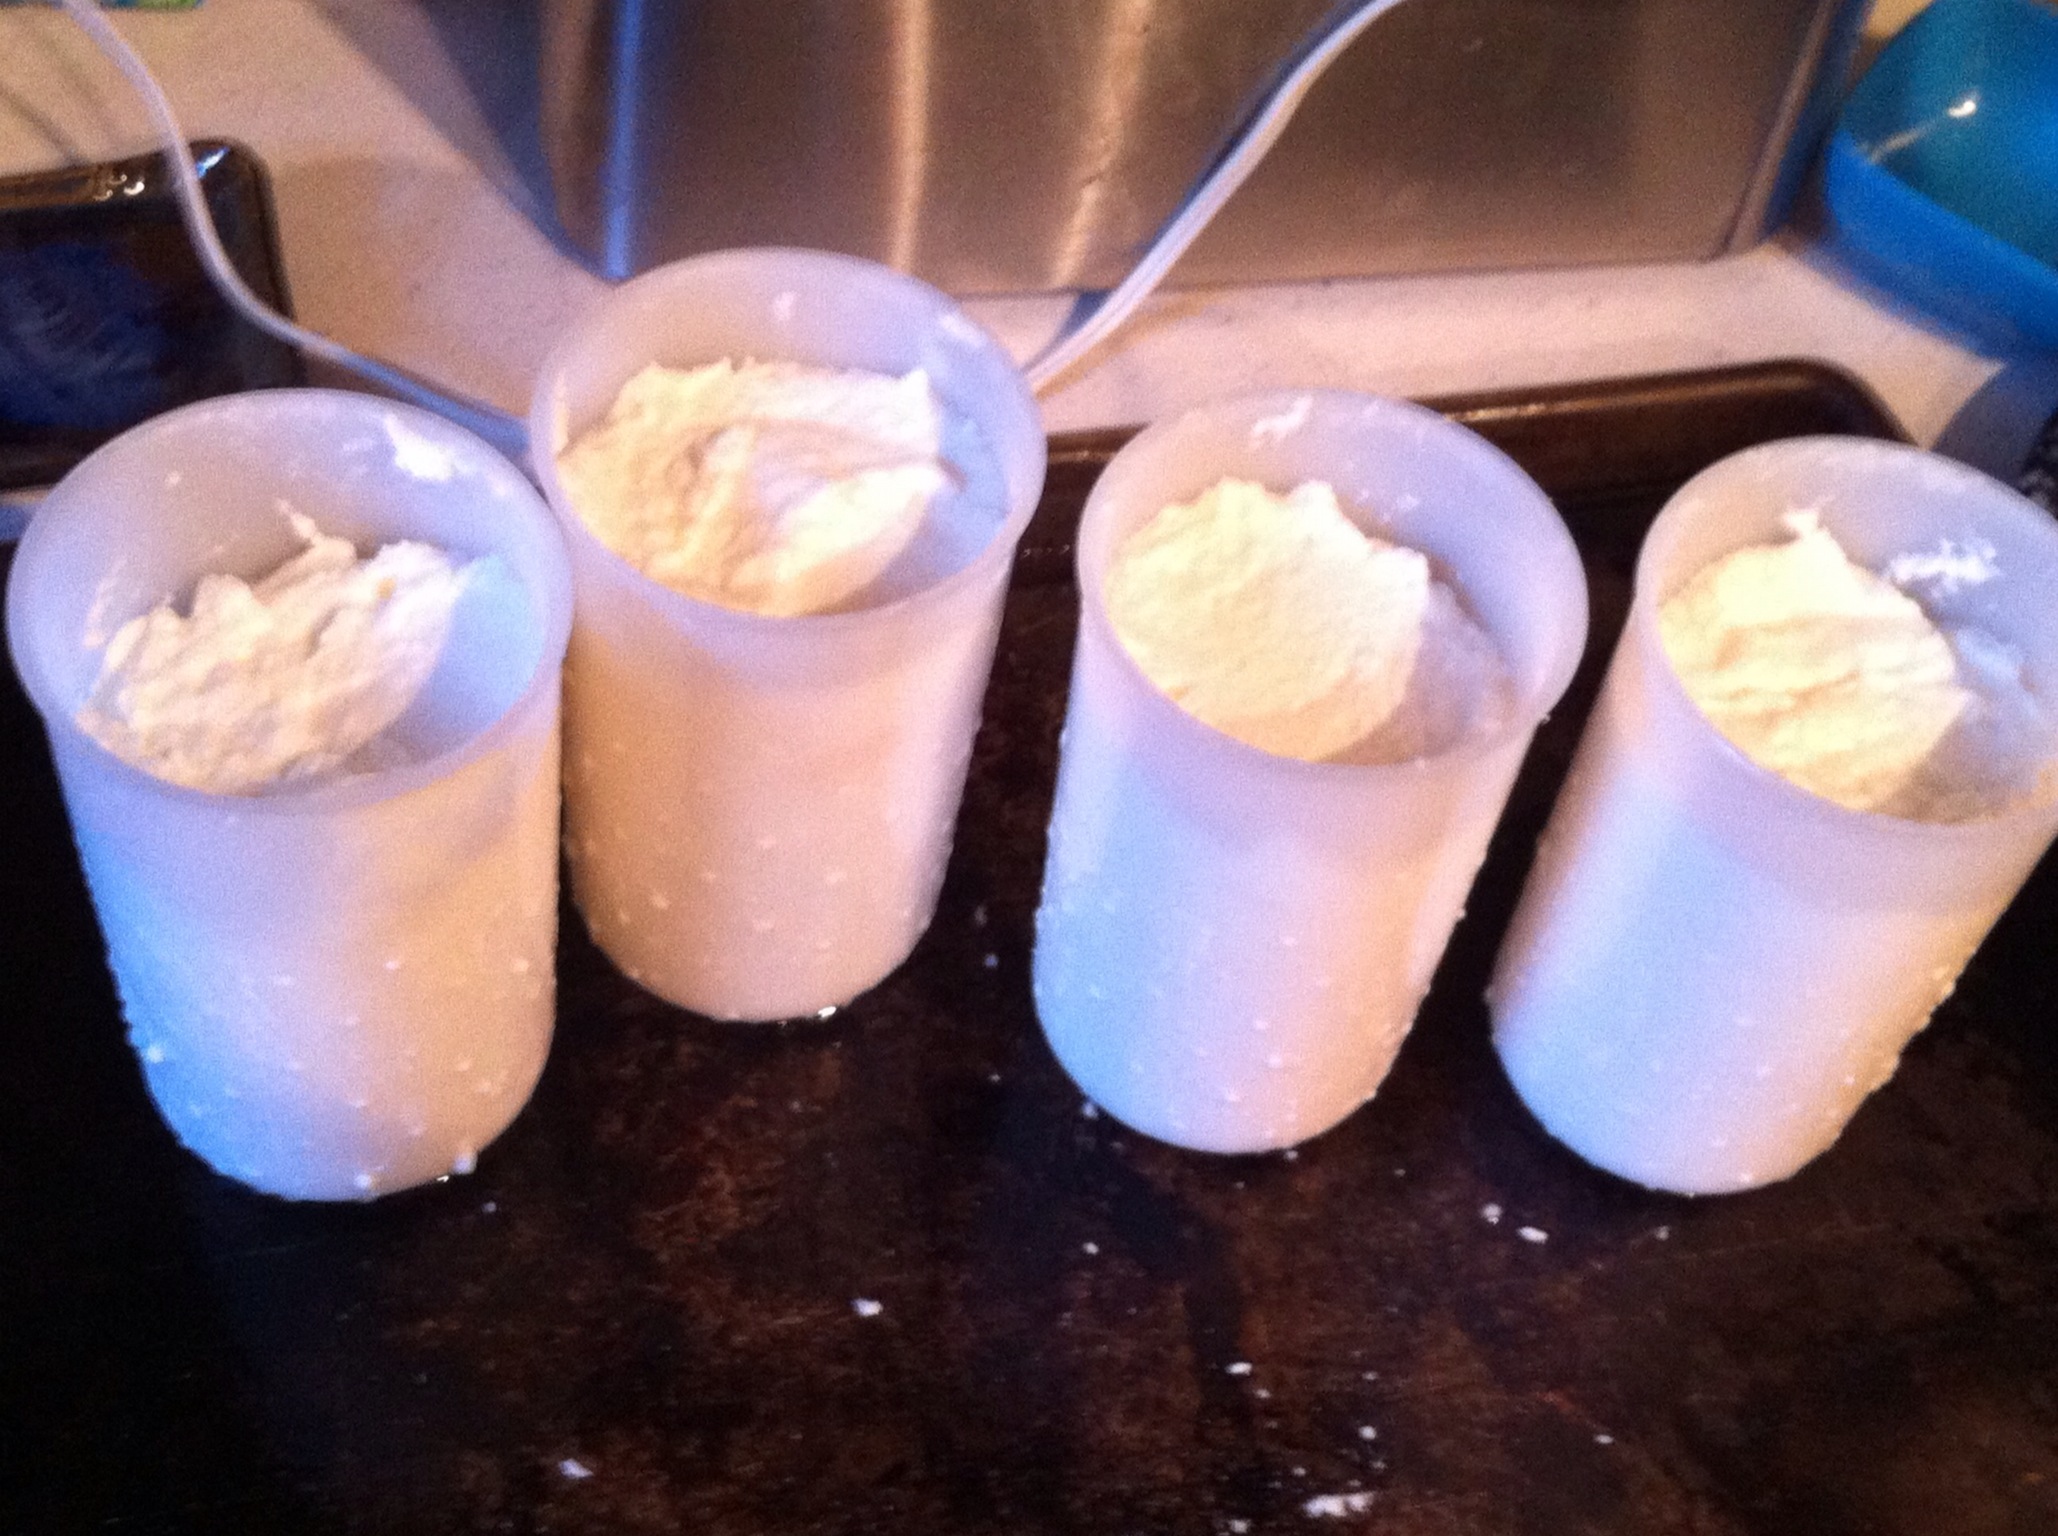
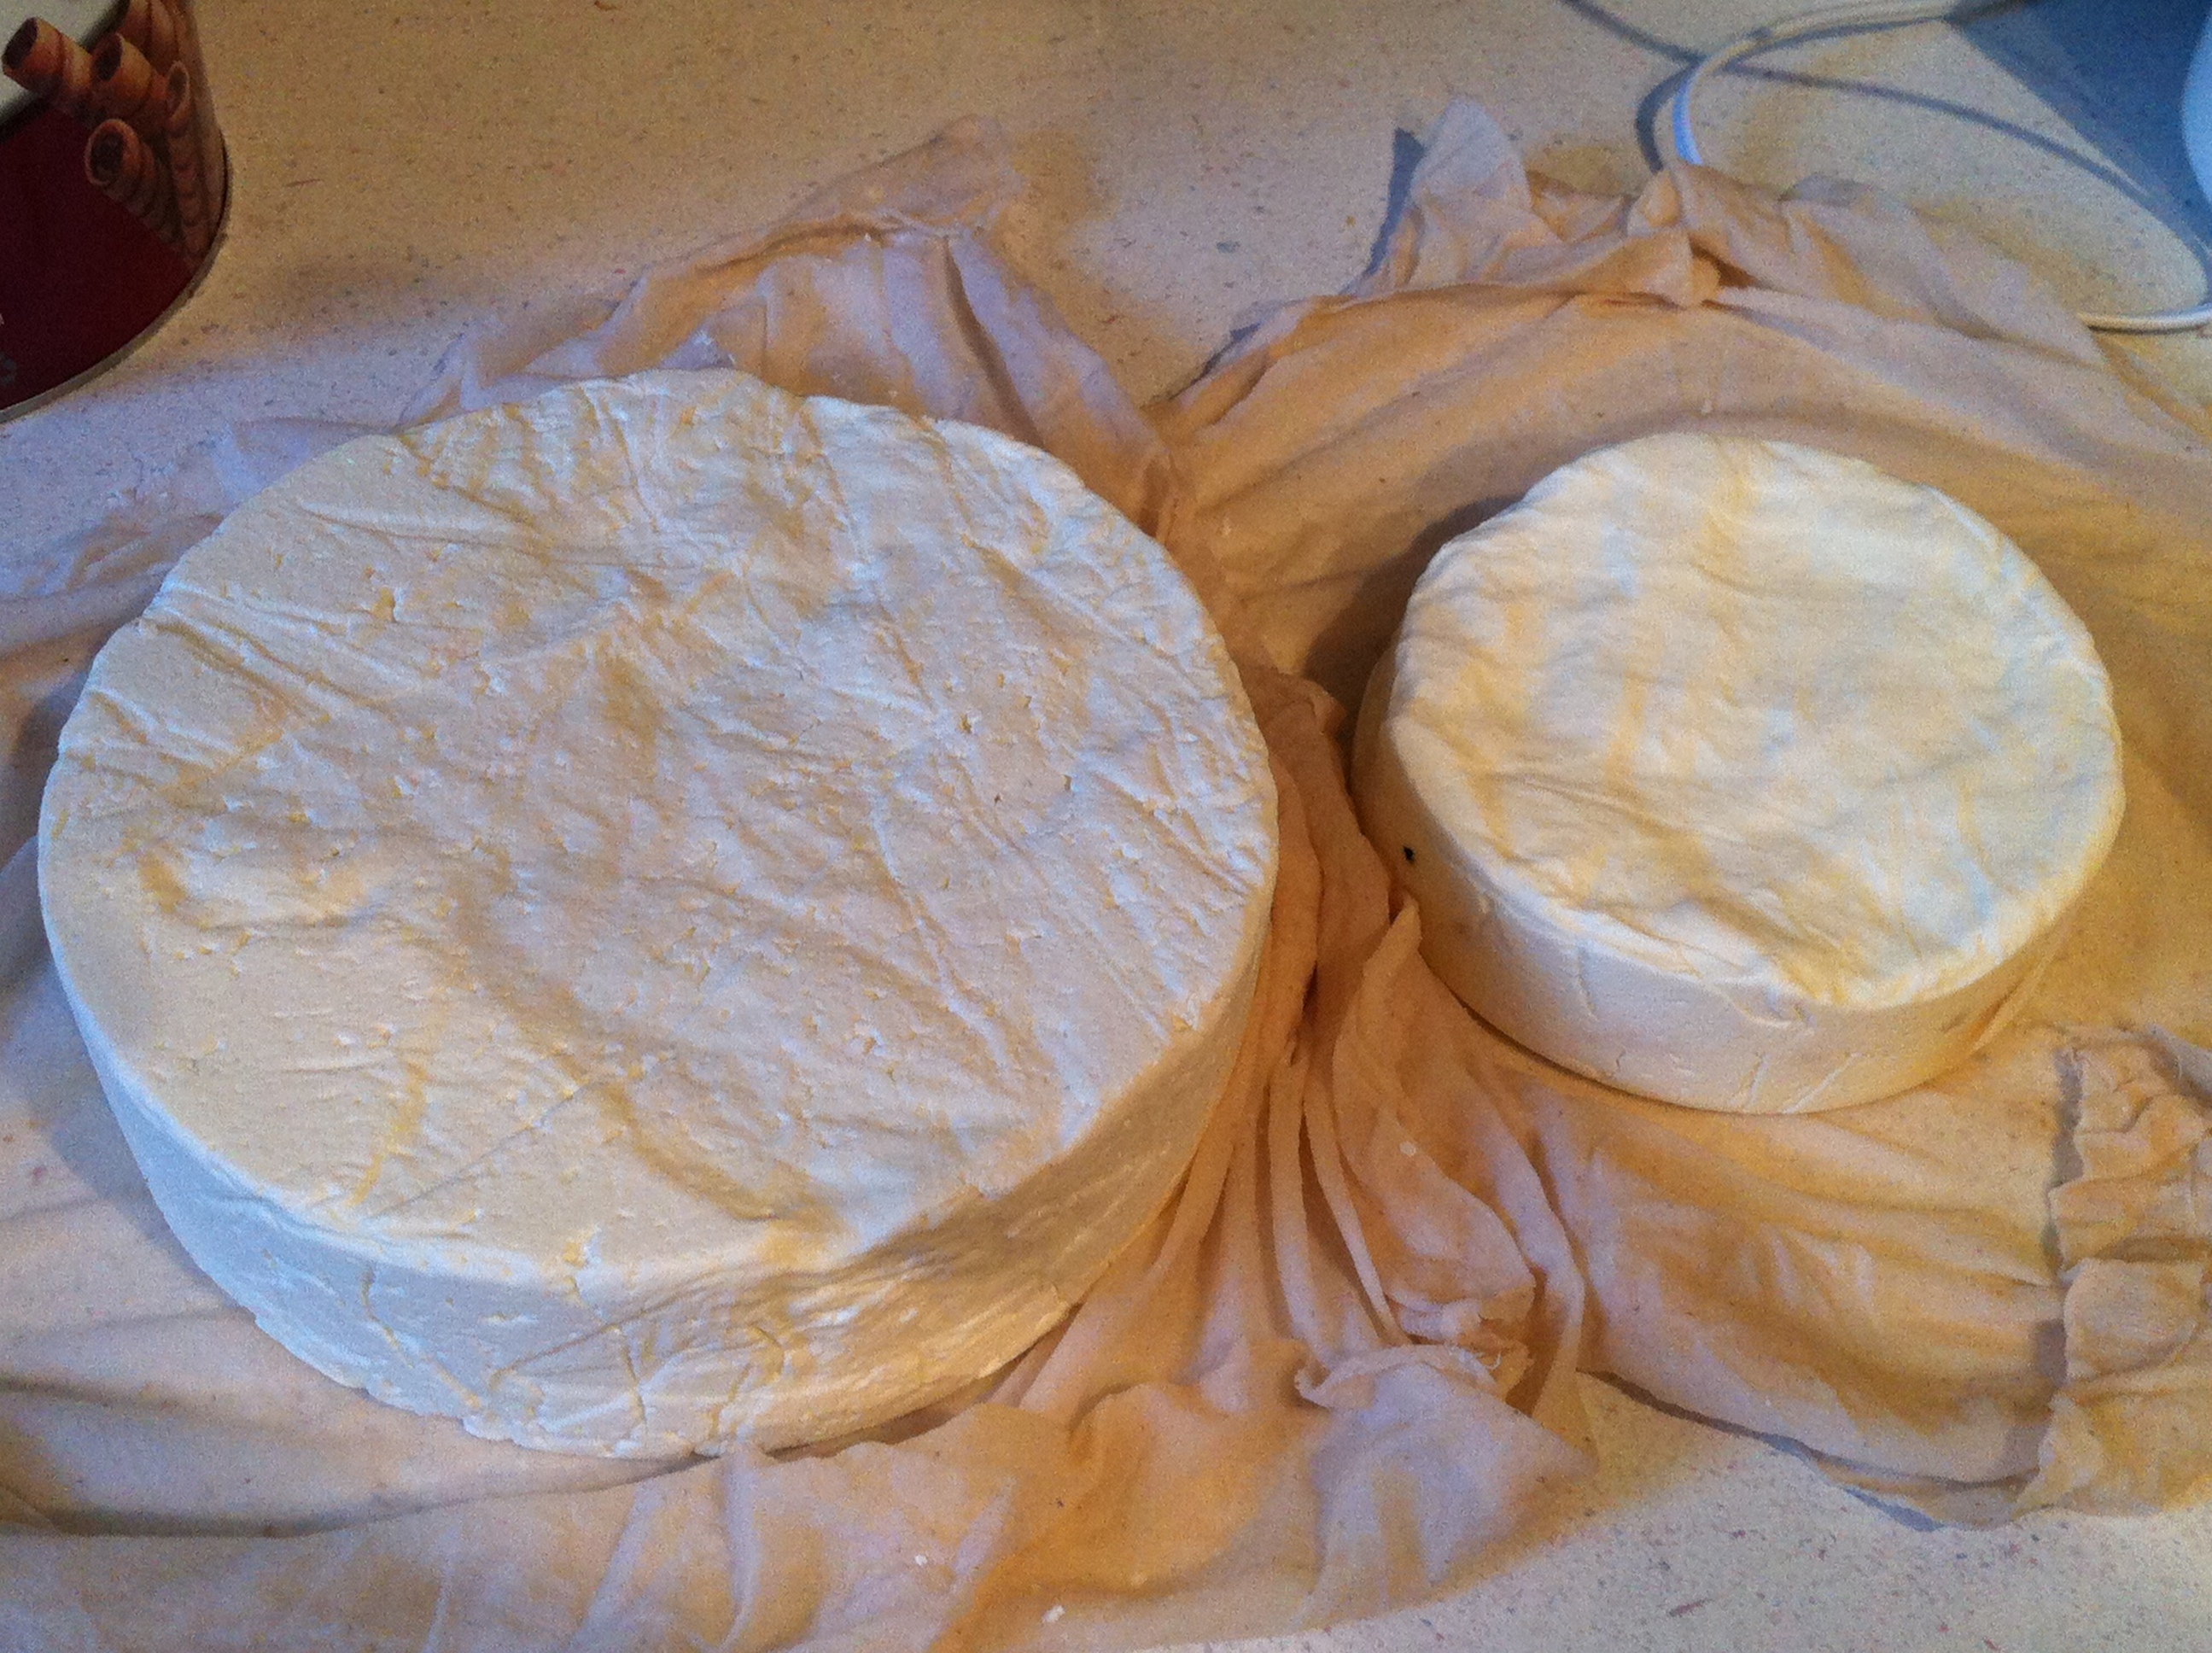
If the curds have not fully knit together, turn and press for another 4 to 6 hours until the final pH is 5.3 to 5.4. I checked the pH at bedtime and it was 5.79. 7 hours later I placed the cheese into the brine but forgot to check the final pH.
I used a heavy brine, submerging the cheese into the brine and sprinkling the top with salt. I left the cheese in the brine for 9.5 hours. The recipe called for brining 3 to 4 hours per pound. My cheese weighed about 4 pounds so it should have been brined for 12 to 16 hours but we were running late to go to my folks for what was left of Easter Weekend. I dried the cheese and placed it in my “cheese cave” at 10 degC and we hit the road for Camrose.
Affinage
The cheese should be turned daily for 3 weeks and kept at 85% RH. Next age for 2 to 3 months at 15 to 18 degC and relative humidity of 90%. Next age for 2 to 3 months at 13 degC and an RH of 85 to 95%.
So keep an eye on my blog and I will try to post regular ‘baby’ pictures of my ‘babies’ as they develop.
Sailor Rick – Epilogue
Keep an eye on my blog for reviews and updates of my flurry of December cheese making activities.
If you enjoy reading my posts and trying some of the recipes, please share my blog with your friends and acquaintances. When I started writing this blog it was at the urging of Val (A Canadian Foodie) to share some of the things I was up to. I didn’t expect this but I really enjoy looking at the stats for my blog and seeing all the different countries (locations) of the folks that read my blog. To date I have had visitors from 30 different countries and over 600 views of my posts. It is great to see food & cheese lovers connecting on such a global scale.
GOAT DROPPINGS
It seems of late whenever I make cheese I do it in a flurry of activity, which results in me making a number of cheeses or other cultured products over the course of a weekend. The downside to this is when I write about my experience with this blog, the posts tend to get big, unwieldy and time consuming to produce. For example the subject of this post was made on the same weekend as 3 other cheeses and one cultured product. So I will write about and post them separately. One benefit of this to the reader is I can watch a cheese develop in the cave and report on its progress in the same post where I describe how I made the cheese. So on to this cheese make.
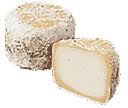
I suspect the title of this post caught your attention. Goat Droppings is the literal translation from French of the cheese make I will describe today. The cheese is called Crottin.
From the online Lexipedia Dictionary: crotte, crottin
n. a piece of dried bovine dung
To borrow a line from my wife Lorrie’s favourite comedian Steve Martin; “Those French they have a different word for everything!”
I love almost every French cheese I have every had the fortune of sinking my teeth into but Crottin is one of my favourites and yes to the embarrassment of my children I have left drool marks on the window of a Sancerre Formagerie that had a lovely display of Crottins in the window. Sancerre is about 5 km from the village of Chavignol, a town in the eastern Loire Valley of central France known for the quality of their Crottin.
According to Wikipedia:
Crottin de Chavignol is the most famous goat cheese of the many varieties produced in the Loire Valley. This cheese is the claim to fame for the village of Chavignol, France, which has only two hundred inhabitants. The small cylindrical goat cheese from the area around Chavignol has been produced since the 16th century, but it wasn’t until 1829 that it was first written about. The etymology is dubious: the word “Crot” described a small oil lamp made from burned clay, which resembles the mould used to prepare the cheese. Another explanation is that old Crottin gets harder and browner and tends to look like dung, the French word for an animal dropping being crotte. Protected by the AOC Seal, Crottin de Chavignol is produced today with traditional methods. If a cheese is labeled “Crottin”, it is of the Crottin type, but to be labeled “Crottin de Chavignol”, it has to be from the area around Chavignol, and it has to meet the stringent AOC production criteria. The flavour of Crottin de Chavignol is subtle and slightly nutty. In its youth, its dough is solid and compact, and its rind is white. As it ripens, the dough becomes crumbly and the mould on the rind matures into a bluish colour. The bluish colour doesn’t mean that the cheese is no longer edible—quite the opposite.
So now you have the rest of the story; I prefer goat droppings as the literal translation. Here are a few photos of Crottin from the Internet so you will be able to compare them to my cheese make.
A selection of images from Google Images:


Lets see how mine stack (or should that be pile) up.
I have found Crottin for sale here in Edmonton on occasion but the last time I purchased one it was about $10.00 or if you are stupid enough to do the math….$100/kg; definitely for a special treat and it also provides a strong persuasion to learn to make your own.
The Make
For this recipe I followed the recipe in “Making Artisan Cheese” by Tim Smith.
The recipe uses a gallon of goat’s milk, direct set Flora Danica culture, Geotrichium candidum, liquid rennet, calcium chloride and 4 crottin molds.
I had to modify the recipe right off the bat, as I had to substitute the Flora Danica Culture with Abiasa Mesophilic Aroma B. From Mary Karlin’s book “Artisan Cheese Making at Home”:
Both Flora Danica and Abiasa Mesophilic Aroma B contain:
Lactobacillus lactis ssp. Lactis,
Lactococcus lactis ssp. cremoris,
Lactococcus lactis ssp. lactis biovar. diacetylactis,
Leuconostoc mesenteroides ssp. cremoris
This is an easy cheese to make. Heat the milk to 72°F (usually room temperature), add the culture and mix well. Rest for 20 minutes maintaining the temperature. Add the calcium chloride, rest 5 minutes. Stir in the Geotrichium candidum and the Penicillium candidum and then add the rennet. Cover and keep the milk at the target temperature and the curds will form in 18 to 20 hours but sometimes up to 24 hours.
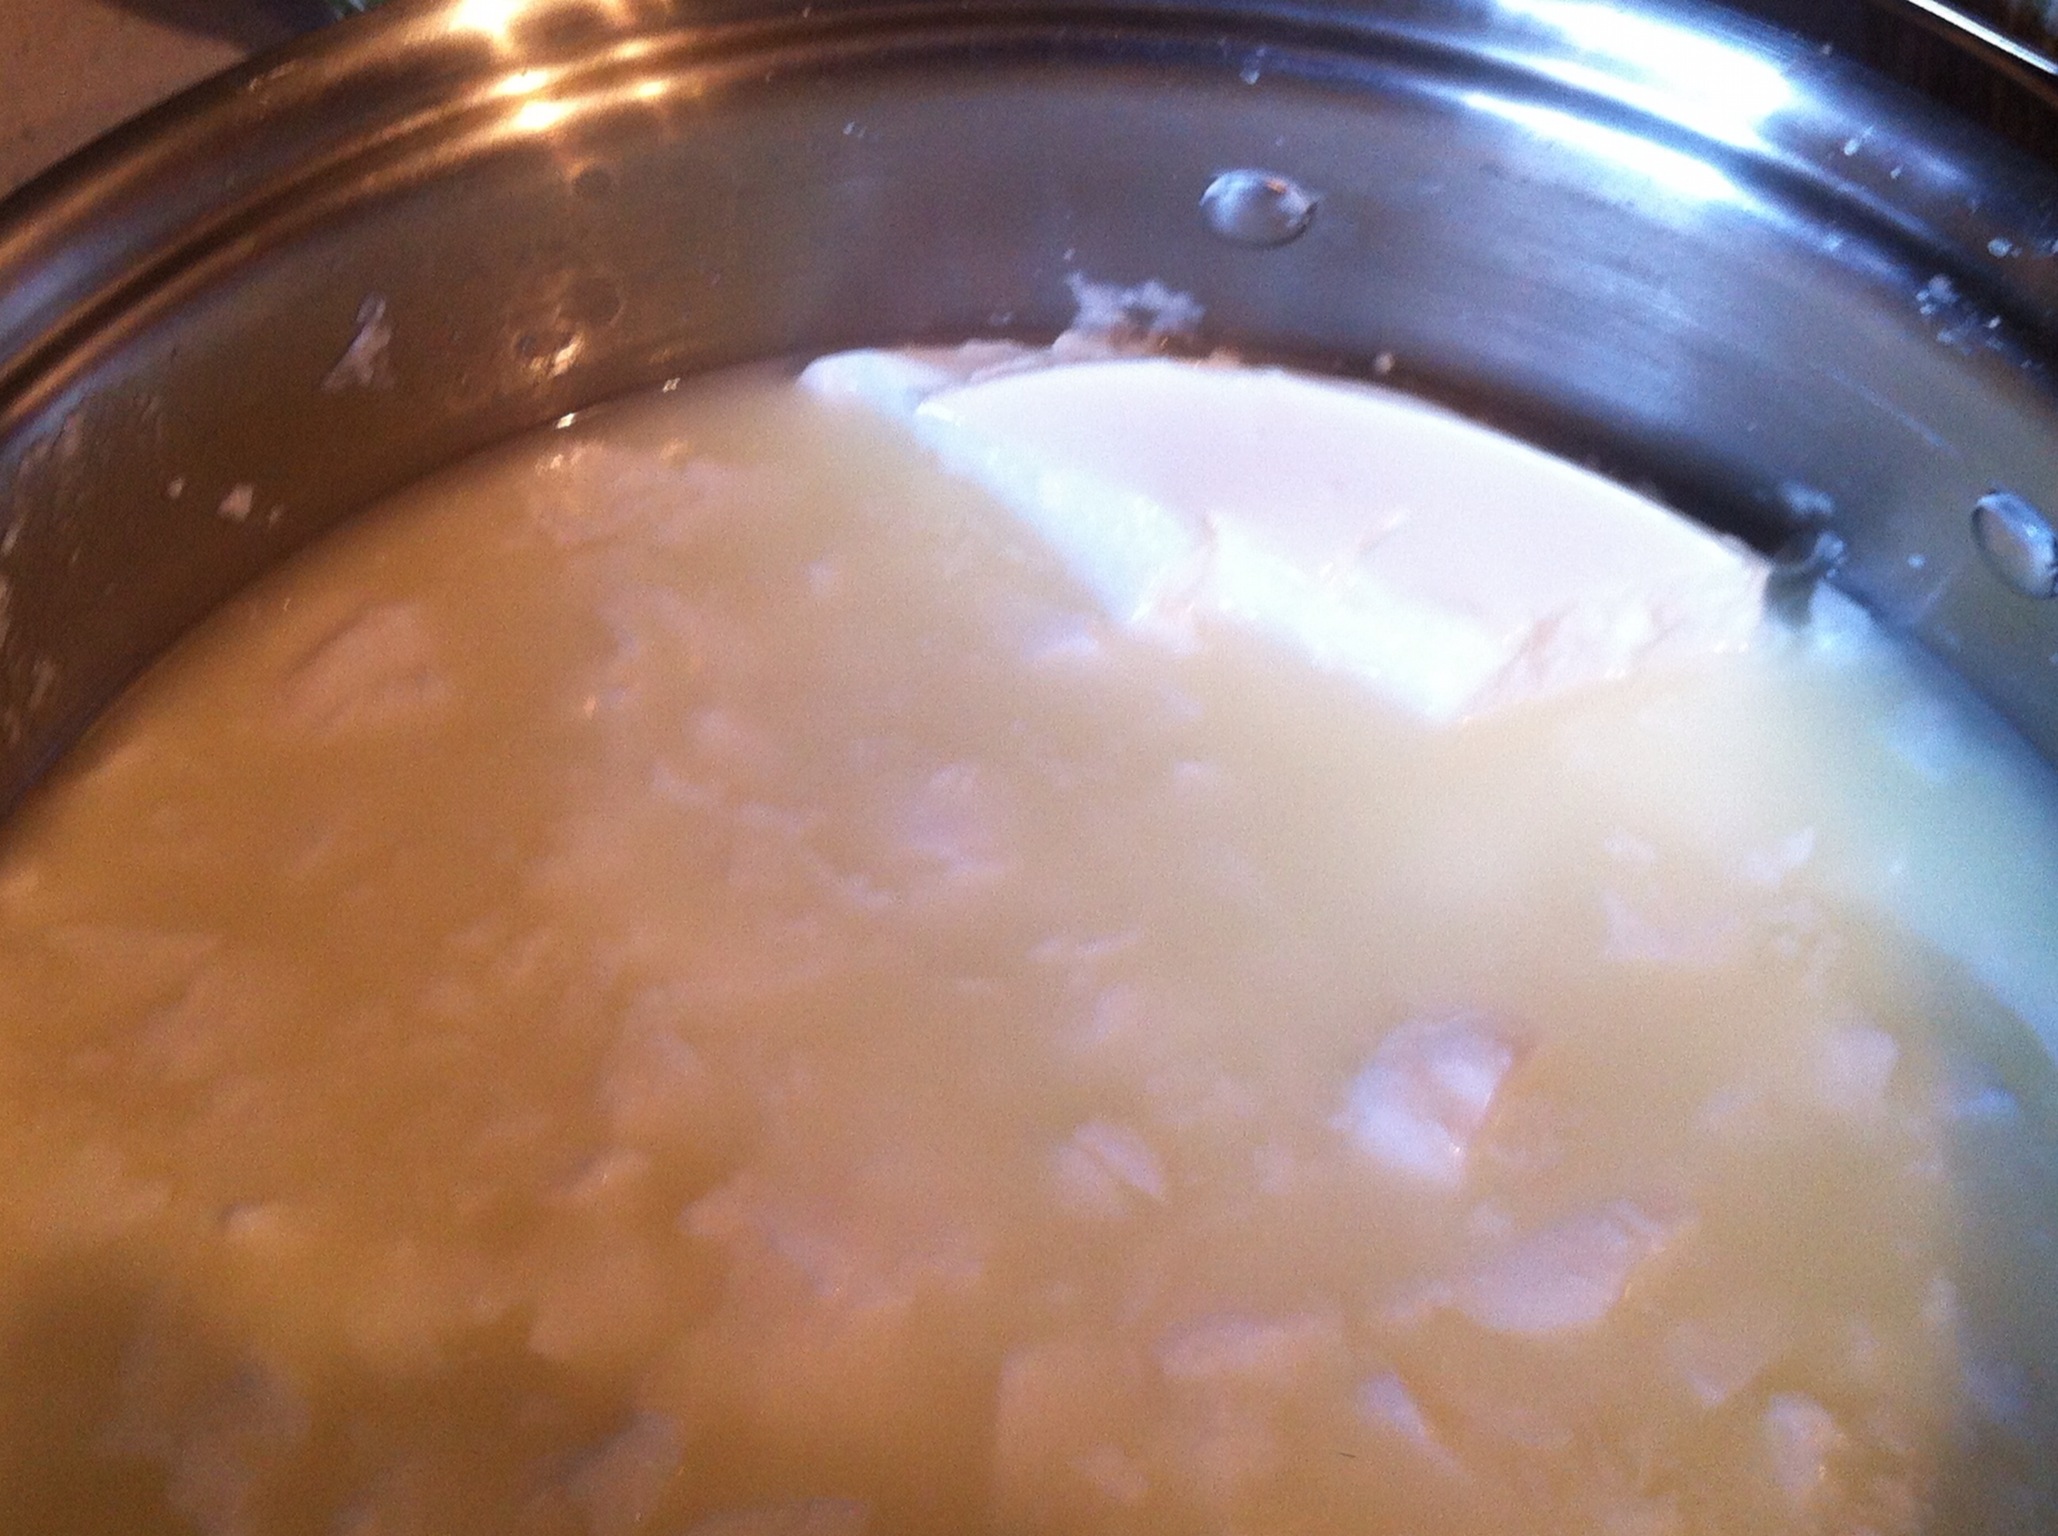
I was busy the next day so I left the curds form for another 24 hours. When I took the lid off the pot there was a white scum/skin on the surface, which I skimmed off.

The curds had set nicely and there was a good clean break and the curds had pulled away from the edge of the pot.
I ladled the curds into the molds, filling them to the top. I kept adding curds as the level subsided.
To speed the process I took the last of the curds and placed them in a muslin-lined colander to drain the whey and then added to the molds as room permitted. Eventually all of the curds fit into the four molds.
I left the molds to drain for 3 days before removing the cheese from the molds; at which time I sprinkled them with salt. The recipe said to let them drain for 24 hours or until the cheese pulls away from the edge of the molds. The tops of the cheese had already started to develop a nice Penicillium candidum covering. I placed the Crottins in the cheese cave at 13°C and 95% Relative Humidity. I flipped the Crottins once each day and they were soon fully developed on all sides with the Penn.c..
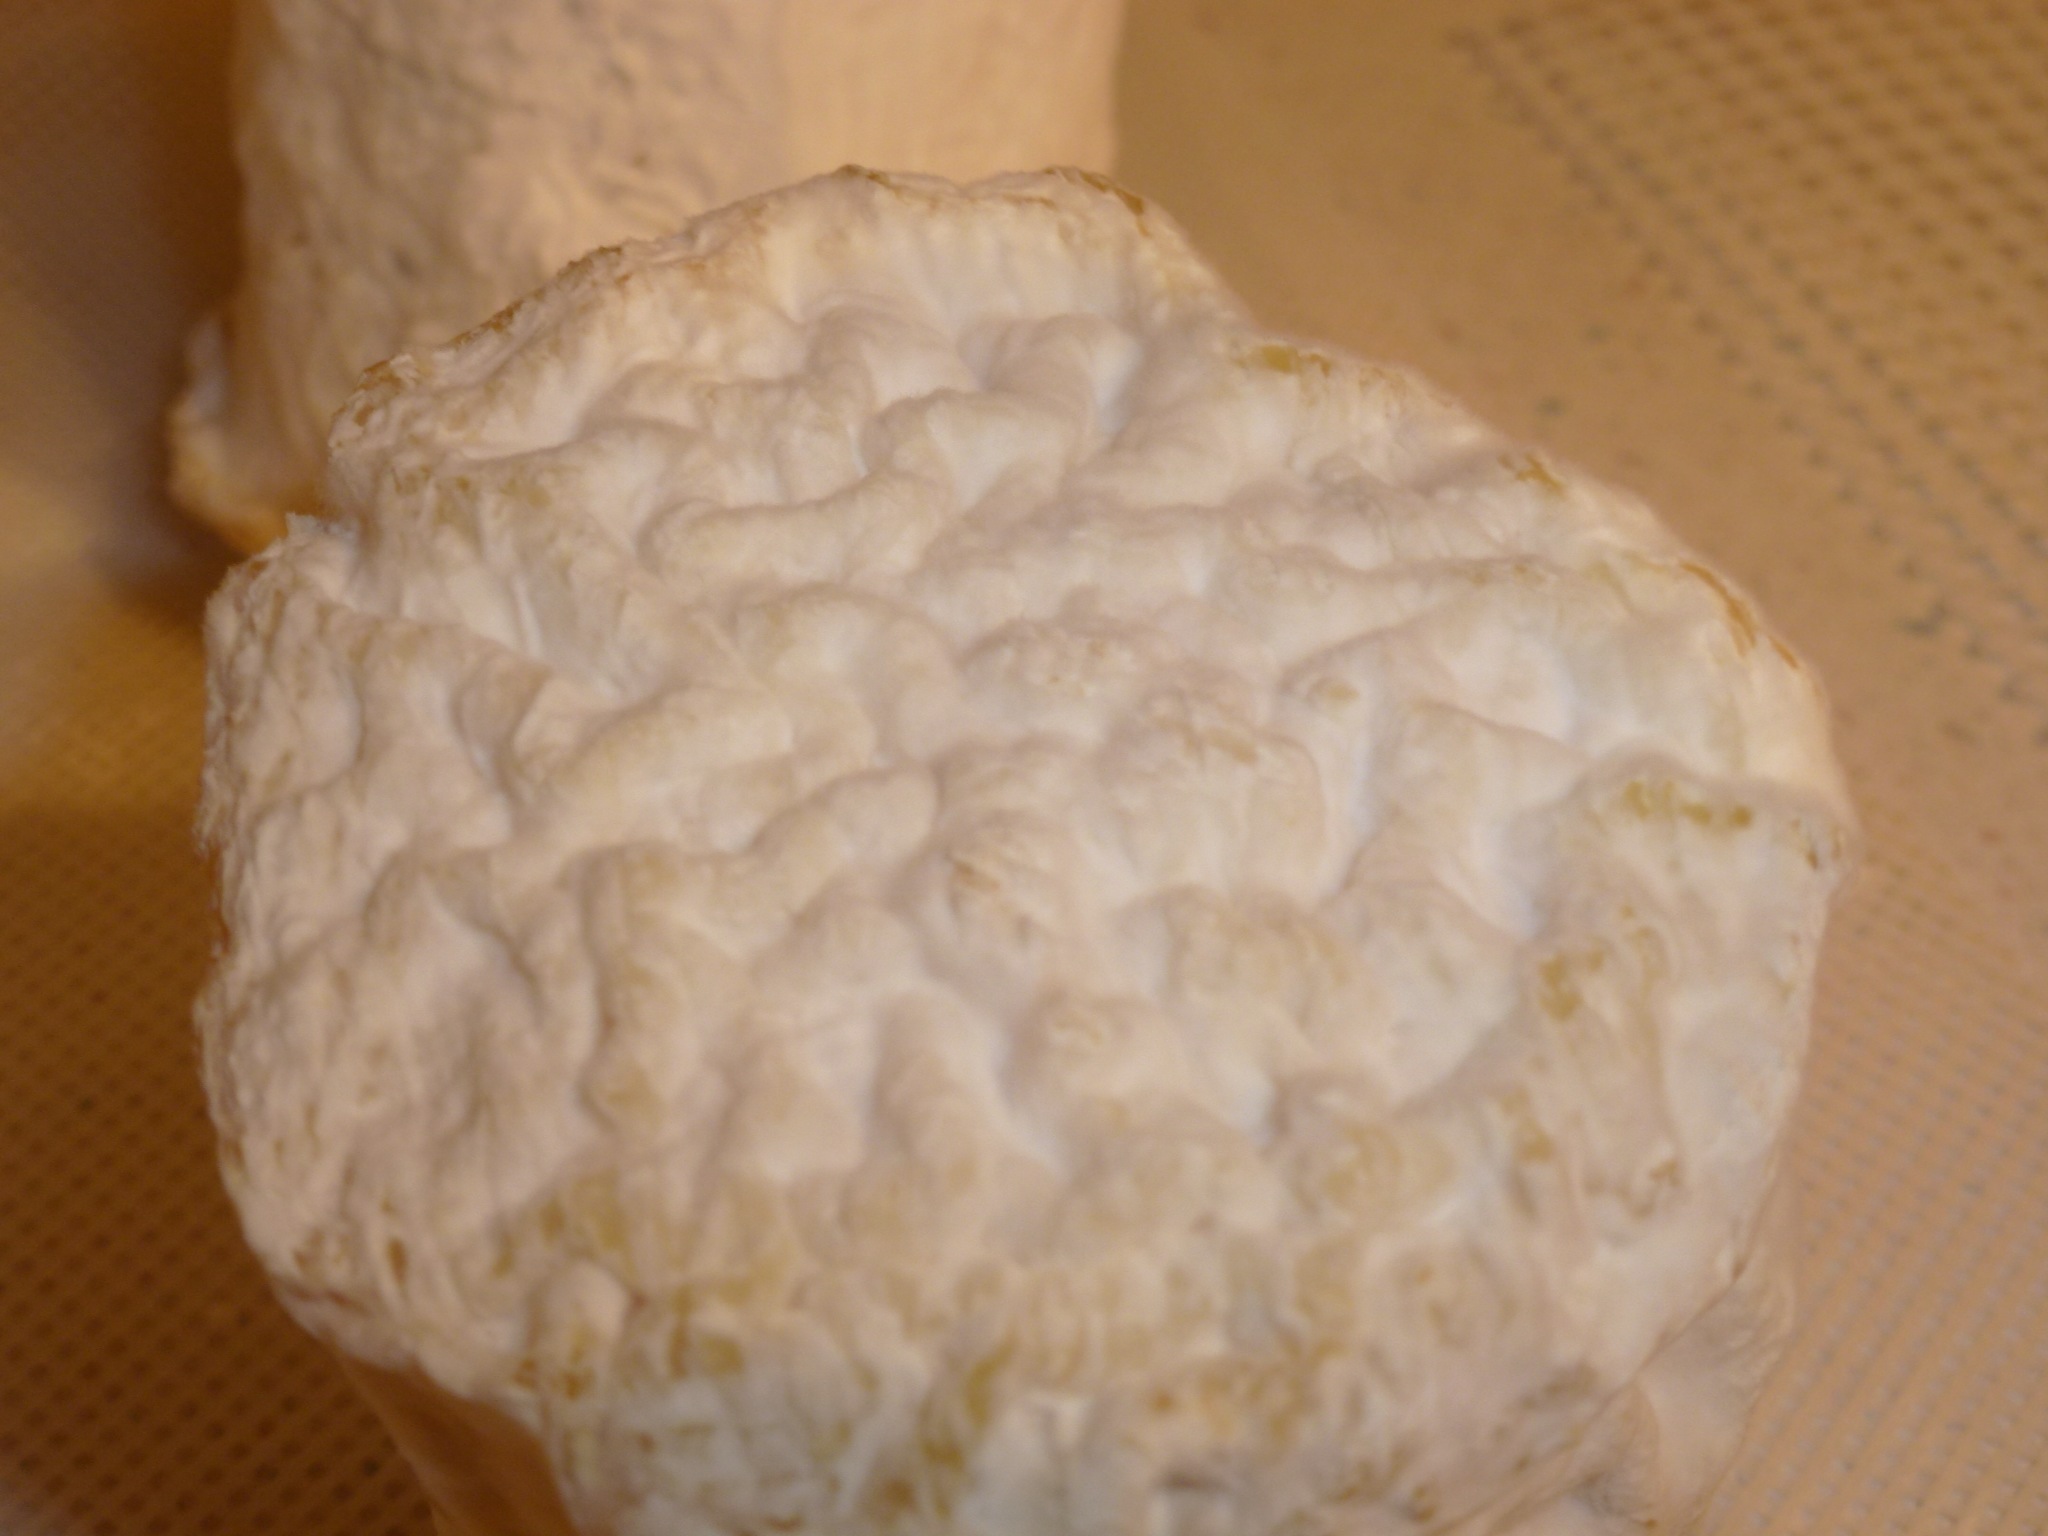
Here are some pictures of the Crottins taken 14 days after they were placed in the cave:

An interesting brain pattern (according to Lorrie) has developed on the rough tops of the Crottins. I have to be honest these look more like tall Brie rather than Crottin due to the well developed Pen. c.. Each time I flip them I feel like taking a bite out of one of them; they are sooo tasty looking, but I know patience will reward me with an even better aged Crottin.
Final Thoughts
My Crottins are more the size of horse droppings, rather than goat droppings. I may need to get 4 more molds but I will wait and see how these ones turn out.
The recipe did not mention flipping the cheeses in the molds as they are drying; thus one end is nicely rounded and the other is rougher (but has the neat brain pattern) so they are rather ‘rustic’ looking. When I reviewed some other recipes they recommended flipping the cheeses in the molds, the photos in the recipe book I used also mention that these Crottin “…are commercially made; homemade wheels will be larger and less uniformly shaped”; so I may experiment next time.

I sampled one of the Crottin 22 days after they were made. There was a well developed rind, the interior was firm but still creamy in the mouth with a mild goat taste. I thought it would be stronger flavoured which may develop with age. I will probably sample another in about a week when they are about one month old.


January Cheesepalooza Challenge
Surprise!!! I think this is my quickest Cheesepalooza Challenge post I have done by far. Maybe I should have made my posting speed a New Year’s Resolution.
It was pretty much a no brainer that I would make Asiago for the challenge, as this cheese is a favourite of both my wife Lorrie and myself. We have also eaten other cheeses that contain black peppercorns in the cheese and found these enjoyable.
For the non-Cheesepalooza’ers, Asiago was/is a cow’s milk cheese produced in northern Italy near the town of Asiago in the Veneto region. Production has been expanded and like other cheeses and copies are also made in other locations. But true Asiago is a Denominazione di Origine Protetta or DOP protected cheese made from cows milk in specific alpine valleys.
Asiago can be enjoyed at a variety of ages and textures. Young or fresh Asiago is smooth and fresh and is known as Asiago Pressato. Older aged Asiago known as Asiago d’Allevo is crumbly and stronger flavoured similar to Parmesan. A variation, Asiago Pepato has black peppercorns integrated into the curds before pressing. On to the make.
For this challenge I used Mary Karlin’s recipe but made a few variations. Mary’s recipe uses 6 quarts of whole milk and 2 quarts of 2% for a total cream content of 2.94%. According to Gianaclis Caldwell, Asiago is typically made with partly skimmed milk with an average 2 to 2.8% milk fat. I decided to go with 12 litres of 3.25% and 2 litres of 2% milk, which should give me a final cream content of 3.07%, which is a little high, but we do like cream in this family!
As the milk volume I used was 1.75x greater than the recipe called for I decided to add slightly less than 1 teaspoon of Thermophilic B, Calcium Chloride, and Rennet. The original recipe called for ½ teaspoon of each of these ingredients.
I once again had temperature control issues but this time I was too conservative. It took 70 minutes to reach 104 degF instead of 40 minutes. The curds turned out well and I got a good clean break.

During the stirring phase the temperature rose to 123 degF instead of 118 deF. I did manage to maintain the temperature during the settling period at 120 degF.

I then drained off the whey to expose the curds and placed the curds into cheesecloth lined St. Paulin/Tome mold (200 mm x 150 mm) and Reblochon molds (135 mm x 65 mm). I filled the Reblochon mold half full and then sprinkled black peppercorns across the top.

Once the mold were full I pressed them with 8 pounds for one hour and then unmolded and unwrapped them, flipped them rewrapped them and placed them back in the molds.

I then pressed them overnight or about 14 hrs with 8 pounds again. Mary had suggested pressing for 8 hours.
Remove the cheese from the molds and cheesecloth.

The cheese wheels must now be placed in Saturated Brine. I made my brine with 33 ounces of non-iodized salt, a quarter cup of Calcium Chloride and 4 litres of water that I had boiled on the stove. The Calcium Chloride is added so that the brine does not rob Calcium Chloride from the cheese (the concentrations want to equalize between the cheese and the brine). Some of the Cheesepalooza folks had their Feta turn gelatinous due to this transfer of Calcium Chloride from their cheese to the brine.
The cheese is brined for a period of time determined by the weight of the wheel (12 hours per pound of cheese). My Tome molded cheese weighed in at 3.54 pounds and the Reblochon molded cheese weighed in at 1.22 pounds. Thus the Tome cheese required 42.5 hours of brining and the Reblochon cheese required 14.5 hours of brining.

Large Wheel After Brining
I brined the smaller wheel for the full 14.5 hours but pulled the large wheel 4 hours early, as I didn’t want to get up at 3 am. My brine was also warmer as I didn’t have access to a 50 degF location that could hold my brine pot so I ended up brining at room temperature.
Side Profile of Large Wheel After Brining
Once brining is completed, blot the cheese dry and place in the cheese cave. Aging can range from a few weeks for Asiago Pressato to up to a year for Asiago d’Allevo. The smaller wheel is Asiago Pepato (added peppercorns) so I will probably sample that one first and leave the larger wheel for up to 6 months or so depending on how the cheese performs in the cave.
Final Thoughts
For this cheese make I have a couple of concerns. I brined the cheese at room temperature; I am concerned the salt uptake will have been too quick and by leaving my cheeses brine for virtually the recommended time for 50 degF they will be overly salty even for Asiago.
My second concern is that I didn’t press with enough weight. While the cheeses were brining (after pressing was complete) Ian tweeted to the Cheesepalooza group that the press weight is partly determined by the diameter of the cheese hoop (mold). I increased the milk volume and used my big Tome mold with the additional curd but I pressed at the recommended weight and time for the smaller sized mold so I am concerned I may not have expelled all of the whey.
I will keep you posted when I finally break into these cheeses.
So get out there and eat some handcrafted cheese! Your regional creamery will thank you.
December Cheesepalooza Post
Once again I am behind the 8 Ball (Val!) and find myself a few weeks behind on my Cheesepalooza post for December; so while I wait for my January Cheesepalooza make to ripen, I thought I would get a start on this.
The December Cheesepalooza Challenge was Farmhouse Cheddar or Caerphilly and Irish Cheddar among a number of others as extras so ….drum role please I decided to make Double Gloucester. This English cheese has been my son’s favourite cheese for several years so even though I have been wanting to make cloth bound Farmhouse Cheddar for almost 2 years I decided to go with Double Gloucester as a Christmas surprise for him. Now that I have proper cheese aging equipment, I have been quickly filling it up with Brie (for my wife), Crottin (for me), the Double Gloucester (for my son) and hopefully soon a real Clothbound Farmhouse Cheddar, that is, once I get the Asiago out of the way.
A few words about Double Gloucester from the British Dairy Board website:
Originally cheese made in the Severn Vale was made from Cotswold Sheep. As early as 1498 so much cheese was being made in Gloucester that a permanent market was set up in Eastgate Street in the City of Gloucester. This is still the site of Gloucester’s indoor market today.
By Tudor times cows milk was the norm across the Vale of Berkeley and down to Bristol. This came mainly from Old Gloucester cows whose milk was ideal for cheesemaking with small fat globules that made a fine even textured cheese. In 1745 cattle plague all but wiped out the breed and was replaced by the Longhorn. Once re-stocked, farms began to supply more liquid milk into London. In 1789 production of Gloucester cheese was estimated at more than 1000 tonnes.
From Google Images:

Production had all but stopped by the end of the 19th century due to low priced imports and the easier profit made by selling fresh milk.
There are two types of Gloucester cheese – Double and Single. Various stories exist as to how the two cheeses differ. Was it due to the double skimming required of milk from Gloucester cows (cream rose slowly therefore had to be done twice)? Was it related to the size of the cheese? Was it the fact that Double had cream added taken from the morning’ milk and added to the evening milk for making? Was it because Single Gloucester was half the size of a Double Gloucester?
Single Gloucester used to be made from the partially skimmed milk remaining and as such was made smaller than the standard 20 inch wide and 5 inches high Double Gloucester. Singles were typically the same diameter but about half the height. Maybe it is a combination of these factors and clearly demonstrated the difference between the two – by size and flavour.
Whereas the Double Gloucester was a prized cheese comparable in quality to the best Cheddar or Cheshire, and was exported out of the County, Single Gloucester tended to be consumed within the County.
There are still a few makers producing Single Gloucester – Charles Martell, Smart’s, Godsell’s Church Farm and Wick Court Cheese – all in the County – all of whom also make Double Gloucester. This Single Gloucester is an EU PDO and is made from whole milk and probably bears little resemblance to the Single Gloucester described above. According to the specification it is a flat, disc shaped, hard cheese of natural colour made from cows milk in the County of Gloucestershire and producers of the cheese must have a registered herd of Gloucester cows.
The cheese is still made in the traditional shape using the traditional method and skills. After the addition of starter culture and rennet to the milk, the curds are cut and scalded at a temperature of 32-35°C with the whey for 20-30 minutes. The whey is then drained away leaving the curd which is milled and salted. The cheese is then moulded and mechanically pressed for up to 5 days and is ready for consumption at around 2 months. Single Gloucester was sometimes known as the haymaker’s cheese; as it was matured for a short time it was ready for eating by farm labourers during the haymaking season.
Double Gloucester cheese is made in many parts of the UK both on farms and in large dairies. It has a characteristic light orange hue given by the addition of annatto to the milk. This has been a traditional characteristic of the cheese since the 16th century when producers of inferior cheese used a colouring agent to replicate the orange hue achieved by the best cheesemakers who were probably making the cheese from the evening’s milking to which was added the separated cream of the morning’s milking. During the summer months the high levels of carotene in the grass would have given the milk an orangey colour which was carried through into the cheese. This orange hue was regarded as an indicator of the best cheese and that is why the custom of adding annatto spread to other parts of the UK with Cheshire and Red Leicester cheese as well as Coloured Cheddar made in Scotland all using this natural dye.
Double Gloucester is made in traditional wheels with a natural rind on some farms whilst in larger dairies it would be made in 20 kg blocks which make the cheese ideal for pre-packing.
Flavour levels depend on the age of the cheese. As it matures Double Gloucester becomes very hard and this may be one of the reasons why it is associated with the annual cheese rolling event at Cooper’s Hill in Gloucester.
From Google Images:

It is said that buyers of Double and Single Gloucester would often jump up and down on the cheese to assess its grade and suitability. Double Gloucester is sold at about 4 months of age and has a firm close texture and a clean mellow, creamy or buttery flavour. Older cheeses will develop more complex and nutty flavours.
The farm made cheeses tend to be kept a little longer adding to their flavour and where the cheese is cloth bound they are significantly harder and drier than their creamery counterparts and generally more expensive. It is said that buyers of Double and Single Gloucester would often jump up And down on the cheese to assess its grade and suitability.
So there you have it from the historians at the British Dairy Board. Double Gloucester is not a very common cheese in Alberta and I generally have the most luck finding it at the Italian Centre Shop here in Edmonton. Sometimes it is sold in a striped wedge composed of up to 3 different British cheeses.
From Google Images:

Looking at the packaging (and price) I strongly suspect these are all factory-produced cheeses. I do understand why my son enjoys this cheese so much. The Double Gloucester we purchase here is fairly mild flavoured and the paste is somewhat creamy. The colouring is also somewhat unique to your standard factory produced Cheddar. These are all plausible reasons for why an unusual English cheese would catch the fancy of an adventurous Alberta boy.
Now that I knew what type of cheese I wanted to make I needed to find a recipe so a quick Google didn’t turn up anything special so I sent an inquiry out to the Cheesepalooza ‘hotline’ or rather Hashtag on Twitter. Of course Ian, one of the Cheesepalooza founders, was quick to respond with a recipe he found on the Cheeseforum.org site. It was for a Double Gloucester made with chives and onion called Cotswold. Turns out this posted recipe was a variation on a recipe from one of my cheese reference books “Making Artisan Cheese” by Tim Smith.
Since September, Ian has really turned into my cheese Yoda! He is such as wealth of knowledge and chances are he has experience with what you are facing.
From Google Images and my own photos and editing:

The Cheese is strong in this one.
So on with the make. I used Avalon Organic milk for this recipe but had to reduce the amount of milk to about 16 litres instead of the recipe, which called for 4.5 gallons as my countertop turkey roaster only holds about 16 litres comfortably.

This is a Collection of milk for my weekend projects and my cheese resource books.
This is really a pretty straightforward recipe; you can find it for your own use at Cheeseforum.org. It was also the first time I got to use my countertop turkey roaster. I found the roaster on Kijiji and got it for $30. It was brand new and still in the box.
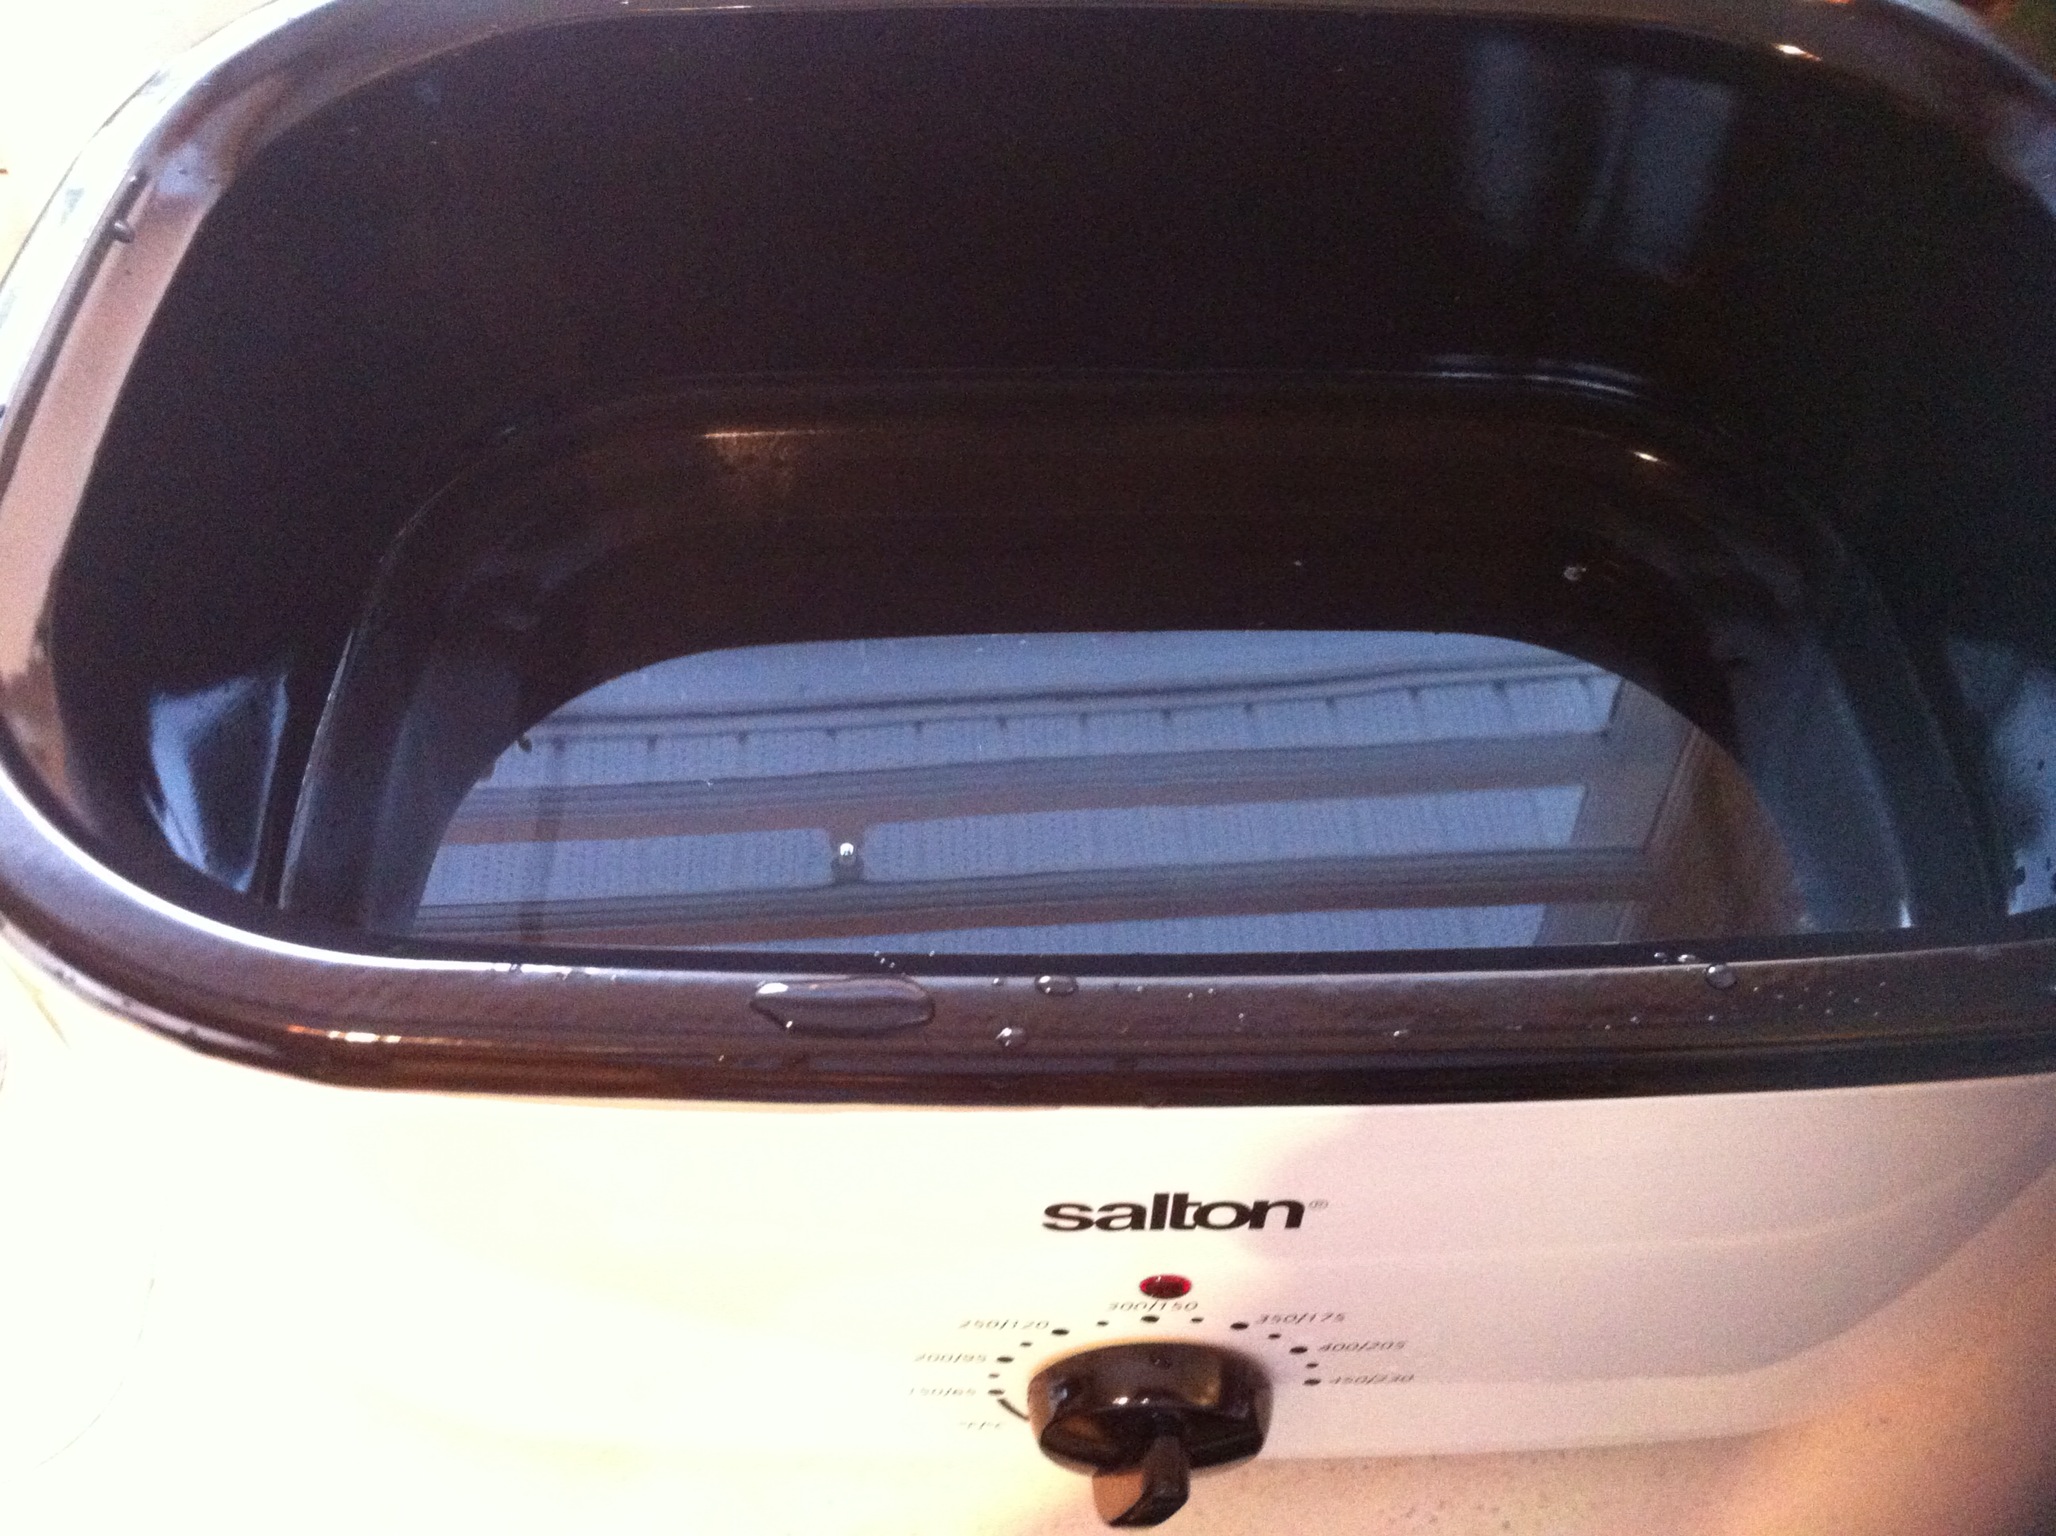
This picture shows the well. I can add about 2 litres of water to this well (against warranty if you have one). This water helps to equalize the temperature as the element goes around the sides of the unit.

Picture showing roaster full of milk and temperature probe that I purchased to go with the system.
I had issues with temperature control with the temperature going to 104 degF too (was supposed to be at 90 degF) soon but after this initial issue the temperature worked out fine. I just hope the curds were not adversely affected at this stage.
After the temperature issues were resolved I added the rennet 8 minutes too soon after struggling to control the vat temperature. This did not seem to affect the clean break.
I consulted with my son regarding the colour as the colour was very pale after adding the required amount of Annatto dye so we decided to double the amount; time will tell if we will end up with a mutant coloured cheese. It has seemed to darken a bit over time but not excessively.
For the non-cheesemakers in the audience, Wikipedia provides the following explanation:
Annatto, sometimes called roucou or achiote, is derived from the seeds of the achiote trees of tropical and subtropical regions around the world. The seeds are sourced to produce a carotenoid-based yellow to orange food coloring and flavor. Its scent is described as “slightly peppery with a hint of nutmeg” and flavor as “slightly nutty, sweet and peppery”.
In commercial processing, annatto coloring is extracted from the reddish pericarp which surrounds the seed of the achiote (Bixa orellana L.). Historically, it has been used as coloring in many cheeses (e.g., Cheddar, Gloucester, Red Leicester), cheese products (e.g. American cheese, Velveeta), and dairy spreads (e.g. butter, margarine). Annatto can also be used to color a number of non-dairy foods such as rice, custard powder, baked goods, seasonings, processed potatoes, snack foods, breakfast cereals and smoked fish.

The curds are cut to ¼” cubes with the recipe having a final temperature of 104 degF. You collect the curds in a cheesecloth lined colander and let the whey drain. Once the whey has stopped running freely you pour them into a cheesecloth-lined mold. For this exploration I used a St. Paulin/ Tome mold (200mm x 150 mm). This has resulted in a cheese about 3 inches thick. I now realize I need to get a few more sizes of molds that work with the volumes of milk I will be working with in my new turkey roaster. I would have preferred to have a taller cheese.
I followed the pressing requirements in the recipe as follows:

10 pounds for fifteen minutes

unwrap and flip the cheese and rewrap and return to the mold

30 pounds for ten minutes
unwrap and flip the cheese and rewrap and return to the mold
40 pounds for two hours
unwrap and flip the cheese and rewrap and return to the mold

50 pounds for 24 hours

Fresh from the 50 pound pressing.
WARNING: AS YOU CAN SEE I STARTED DOING MY PRESSING ON THE KITCHEN COUNTER. I TRIPLE CHECKED THE POSITIONING OF THE WEIGHTS I WAS USING AND EVEN HAD THE 50 POUND WEIGHT SUPPORTED BY THE CABINETS BUT THE CURDS SHIFTED MORE ON ONE SIDE AND THE WEIGHT TIPPED OVER DENTING MY TURKEY ROASTER AND BREAKING MY KITCHEN COUNTER :~{ SO BE EXTRA CAREFUL WHEN PRESSING WITH LARGE WEIGHTS.
Remove from the mold and place on a board (I used a draining mat) turning twice daily until the cheese is dry to the touch.
I left my cheese on the draining mat for 3 full days.
Place in cave at 55 degF and 80 to 85 percent relative humidity. Age the cheese for one to three months according to the recipe.
Wrap Up
For a fairly simple recipe I have several concerns relating to how my cheese will turn out.
The first was the too rapid increase in temperature of the milk during the ripening phase.
The second is of course what will the final colour of the cheese be. I want it to look like a Double Gloucester not Leicester a very dark red-orange cheese from the same region.
Third, since I’ve made this cheese I have discovered that the pressing weights are related to the diameter of the cheese mold. So I am not sure I pressed with enough weight for the large diameter wheel that I made. I will need to do more research on this in the future.
Originally I had planned to cloth-bind this cheese but was not ready to accomplish this when the cheese was ready so I am now aging it with a natural rind. I want to make it again soon with a cloth bandage so I can compare the results to determine if the cloth bandage is worth the effort.
FINAL NOTE:
The ‘Double Sandy Gloucester’ wheel is now residing alongside my Brie and Crottins, a wheel of Montasio, 2 wheels of Blue and a couple wheels of Caerphilly. The cave is almost full! This is also a real collage of flora and fauna. So it will be interesting to see how things develop.
The ‘Double Sandy’ has been aging for 5 days now. The temperature is holding rock steady at 13 degC and the Relative Humidity has held between 87% and 98%; depending on how much cheese is in the cave. The ‘Double Sandy’ has developed some tiny spots of Penn. C. on the rind but not enough to clean up yet. I turn the cheeses daily; no noticeable whey is coming out of it and it is firming up nicely. Only time will tell how this turns out.
FINAL FINAL NOTE: HOPE YOU FOUND YOUR PHOTO HUMOROUS IAN! You will always be just like Yoda to me.
The Highly Cultured Weekend AKA Deranged Squirrel Weekend
Another apology as this post was also written on November 23 and was delayed till now for publishing.
It had been about 9 days since I had last made cheese and I was feeling the pressure to get my cheese on in time for Cheesepalooza Tasting #3 so under the influence of Ian’s posts over at Much To Do About Cheese and his Secret Squirrel Cheese Project he was running; I was feeling intense pressure to get something done so like I usually do when stressed about too much to do I decided to act like a deranged squirrel and instead of just making mozzarella I decided to scurry too and fro making as much stuff as possible over the course of a single weekend; sort of like a squirrel storing nuts before the first snowfall.
This is the first part of the story of my 32 hours acting like a deranged squirrel.
The Highly Cultured Exploration
After an evening of highly cultured wine tasting at an unnamed club with my Cru – The Boys From My Hood- Jonathan The High Priest and leader of the pack, Hari The Greek, Gunther ‘The Baptizer’ an ‘Irish’ Lapsed Lay-Priest and yours truly Sailor Rick the babe in the woods (roll eyes here), I arose bright and early Saturday morning with the thoughts of cheese making dancing in my head. Actually those thoughts were doing the Rumba with the stale tannins floating in my head. After checking the family calendar for Dad & taxi duties I discovered I had an ‘opening’ so headed off to various stores to collect my proverbial ‘nuts’ to begin my deranged squirrel fun.
Being totally unprepared I quickly discovered that the Traditional Mozzarella recipe required some method of pH measurement (oh yeah I was going to order a pH meter but had procrastinated and then forgot, just like a squirrel). So I decided to go for the next recipe in the book – Junket Mozzarella. So I headed to a couple of shops that I thought might have it, I remembered seeing it somewhere but where (more squirrel like scurrying to and fro)? I can’t find junket anywhere so I gave up and procured a large volume food processor and 3 gallons of homogenized milk and 3 litres of heavy cream and headed for the nest.
I got back to the nest to review the recipe to try and figure out what the heck Junket Rennet was. There was lots of discourse on the WWW but nothing I thought that was definitive. Of course on Ian’s blog there was a conversion table for converting Junket amounts to regular rennet. The next hurdle I found was the recipe called for 1 gallon of pasteurized NOT HOMOGENIZED milk, great!!!! What am I going to do with 3 gallons of milk?? Way too much too drink so I decided to go for it and use it.
I did some more research and decided I wasn’t comfortable with the recipe I had so I did some more research and came up with Modified Sailor Rick “MSR” Mozzarella Recipe. If you too would like to feel like a deranged squirrel click SQUIRREL and jump to that post after which you can jump back to this post. I will sprinkle hot links SQUIRREL throughout this post to help with your squirreliness allowing you to jump back and forth when you feel the need arise.
Cultured Butter
The first product I began was cultured butter. We had enjoyed Val’s cultured butter at Cheesepalooza Tasting #2 and what kid hasn’t been intrigued with making butter at some point in their life? After decades of listening to the admonishments of my Mom telling me to be careful and to not beat the whipped cream into butter I was finally going to make butter…..lots of butter!
I followed Mary Karlin’s recipe but increased the cream volume to 3 litres; we like butter in this family! This was a nice simple recipe to start the weekend with. There are 2 ingredients: heavy cream and Aroma B Mesophilic Starter and some simple arithmetic to calculate the Aroma B amount required in the scaled up recipe.
The technique is as follows:
- Het the cream to 60degF,
- Turn of the heat
- Sprinkle starter over the cream, wait 5 minutes

- Whisk in the cream
- Cover and put it in a quiet place to cogitate for 12 hours
- Refrigerate for 12 additional hours
- Remove from refrigerator and allow to warm to 54degF before churning

- Fill bowl of food processor half full or half empty depending on your mood.

- Start ‘churning’ on high; in about 5 minutes or so (it was more like 3 minutes for me) the cream gets veerry stiff like the best whipped cream you ever saw.
- Next the ‘whipped cream’ will suddenly collapse and liquid will spray out of the food processor into your eyes if you are looking down the hole like I was.
- Stop food processor and wipe buttermilk out of your eyes.
- Dump food processor contents into a strainer, collecting the buttermilk in a bowl underneath.
- Collect the butter in your hand and knead lightly to remove additional buttermilk.
- Rinse and knead butter under cold water to remove any milk residue.
- Repeat churning steps as required.
- Form butter into your choice of decorative shape (I choose a squirrel, just kidding) and refrigerate or place on display.

This butter was amazing; it was the best I think I have ever eaten. Unfortunately 10 days later it is all gone but I have plans to make it regularly because it is so SQUIRREL easy to do and amazingly tasty.
My confidence was building.
Cultured Buttermilk
I had only tried buttermilk from a carton at the grocery store. It was sour and not very good tasting but it was a great ingredient in a lot of recipes I have cooked over the years. I saved the buttermilk from my butter churning experience; it was sort of thick and yummy looking so I refrigerated it for future consideration.

The next day I was preparing meatballs with mushroom sauce but didn’t have any cream or milk to use in the sauce (I had used all of it on the weekend making cheese and butter). I decided to try tasting the buttermilk. It was refreshing and pleasantly flavoured, sort of like a light kefir and not very sour. I decided to use the buttermilk as the base to my sauce. I was worried, unnamed primates in our home don’t like tried and true ‘family’ recipe favourites to be adulterated. I served the meal and got into a discussion with our youngest about her day’s activities.
I glanced over at our eldest’s plate and it was empty. I thought ahh here it comes…. what did you do to the sauce? I ain’t eatin’ this. But no, he had already finished his second helping and was moving in for more. Success! I then gambled and decided to tell them what the sauce was made of. The primates had no buttermilk experience so couldn’t judge other than to say that the buttermilk was great just like the butter.
I will be making this again soon!
Mascarpone
My next cultured product which I guess isn’t cultured was Mascarpone. I once again followed Mary Karlin’s recipe. This was another simple recipe but now required 3 ingredients: heavy cream, skim milk powder and the juice from one lemon. I made a double batch as well so some simple math was again required but my confidence was up after successfully combining the 2 ingredients for the cultured butter.
First whisk together the cream and powdered milk and heat slowly to 180degF.
Squeeze in the juice of half a lemon


There isn’t a a clean break after adding the lemon juice but rather it coats the spoon like above.
Add the remaining lemon juice and stir with a spoon to mix.
Cover the pan and refrigerate for 8 hours or overnight.
When the cream is firm to the touch transfer into a colander lined with damp butter muslin:

Squeeze out the moisture and the Mascarpone is ready for use.

I had left my cream an extra 8 hours and drained it well. This left a very stiff Mascarpone which would be ideal for my Burrata.
Whey Ricotta
I saved the whey from the Mozzarella to make Whey Ricotta. I had made this about 8 months previously after making a batch of cheese curds. It made a great dessert when a little flavoured syrup (strawberry) was poured on top, so I was keen to try it again.
I followed Mary SQUIRREL Karlin’s recipe once again. The difference with this batch was the curds began forming before the milk and whey came to temperature and before the addition of the vinegar. This must have occurred due to the residual acidity from the Citric Acid addition in the Mozzarella recipe.

Curds already forming before addition of vinegar.

Drained Whey Ricotta

Close-up of the Whey Ricotta after the addition of heavy cream
This batch of Whey Ricotta was as good as the first batch I made and some would be used in my Burrata below.
Burrata; AKA Faux Burrata
The night before the Cheesepalooza tasting I took two of my mozzarella balls from the refrigerator and followed the directions for heating the mozzarella curds and stretching them.
First I created the fillings by mixing equal parts of my mascarpone and cultured butter together. For the second Burrata I mixed some of the Whey Ricotta with some heavy cream.
Next I heated the mozzarella balls until they were pliable enough to stretch flat. The tricky part here is the mascarpone and butter mixture melted quickly so it was tough to contain the mixture within the Burrata. But if you don’t heat the mozzarella enough you won’t be able to seal the ball with the filling inside and once at this stage SQUIRREL can’t reheat the ball or the filling will get water logged; it is a fine balance of heat and workability.

My Burrata ended up having a small tear on one side that I couldn’t repair as there was melted butter on the tear and it wouldn’t stick; oh well it still looked pretty good. The Whey Ricotta and Cream Burrata went together smoothly; maybe due to the practice with the first one.

For the Cheesepalooza tasting I took the Burrata out of the refrigerator a couple hours before the tasting, hoping they would warm sufficiently. Alas, they were still pretty solid and need a few seconds in Val’s microwave. I thought they were delectable and was glad there were leftovers to take home. We ate slices of the leftovers for a number of days. They were delicious even cold straight from the refrigerator.
At the Cheesepalooza tasting Val suggested that I use a special >50% milk fat cream that I didn’t know existed until then. I agree that would make the Whey Ricotta Burrata extra good.
What a weekend it was! The refrigerator was full of home made delights. I survived the weekend and really enjoyed all of the cultured products I produced. However, it is winter now and I don’t feel a need to duplicate my Deranged Squirrel Weekend again in the near future. But who knows what next year will bring?
Thanks for humouring me! And one oh yeah, one last SQUIRREL!
Mozzarella – November Cheesepalooza Challenge
First off let me apologize for being so late with this post. The verbiage was completed on November 23 but I/we were very busy and I needed time to upload the photos. The Mozzarella Cheesepalooza Blog winners were announced and the Christmas season arrived….next thing you know it is now New Years Eve and I have learned my lesson. Future posts will be shorter and deal with a single subject rather than complicated multi-idea, multi-post ‘masterpieces’.
The Cheesepalooza Challenge for November was Mozzarella or ‘Stretched Curd’ cheeses. Watching the tweets and blog posts of other Cheesepalooza’ers I was getting more nervous by the post.
Everyone seemed to be having limited or no success. In the back of my mind I had been planning on making mozzarella with my kids as a fun family activity but the more I read about other Cheesepalooza’ers failures I decided that maybe this first batch was going to need my undivided attention and the fun family activity would need to wait for the Christmas break.
This mozzarella exploration was conducted during what I call my Deranged Squirrel Weekend, which is documented in my next post.
I am far from a mozzarella expert but have eaten buffalo milk mozzarella, aged mozzarella and ‘fresh’ mozzarella but not real fresh mozzarella of which I believe there are two beasts: fresh unstretched (soft bocconcini style) and stretched (what I made).
I reviewed the Mary Karlin recipes and soon realized I couldn’t make the traditional mozzarella because I had no way to measure pH. I quickly reviewed some of my favourite blogs, Addie and Ian and several other Cheesepalooza’ers which quickly confirmed there was no way I could fake it, estimate it or S.W.A.G. it; I was stuck and it was the weekend BEFORE the Cheesepalooza tasting at Val’s.
At this point I decided to make Junket Mozzarella and headed out. I was sure I had seen Junket Rennet somewhere in my recent travels and hopefully not during my trip to Oregon. I headed to Bosch Kitchen Centre, the place I save for hard to get items. Strike One! They didn’t have it and didn’t know where to find it. I have both tablet and liquid rennet at home so I was hoping I could salvage the day. I was burning daylight and decided to go for the Hail Mary Pass without accruing further strikes and headed home to begin.
I pulled out my 3 cheese making volumes and reviewed other recipes on the Internet and like a lot of discoveries decided to work with what I had and to use a blend of several recipes and come up with my own unique recipe using the raw materials I had on hand as follows:
Modified Sailor Rick “MSR” Mozzarella Recipe
Ingredients
8 liters whole milk (I used homogenized because I missed the recommendation to use non-homogenized)
1/2 teaspoon lipase powder dissolved in 1/3 cup distilled water for 20 minutes
1/2 tablet rennet dissolved in 1/3 cup distilled water
1/2 teaspoon calcium chloride diluted in 1/2 cup distilled water
3 teaspoons Lebanese Citric Acid Powder dissolved in 1/2 cup distilled water

Directions
- Heat milk to 80 degF.
- Add dissolved Lipase Powder and gently stir in with slotted spoon.
- Heat milk to 95degF.
- Add diluted Calcium Chloride, stir in with slotted spoon.
- Add Citric Acid solution, stir in with slotted spoon.
- Heat to 100degF.
- Add rennet, gently stir in with slotted spoon.
- Heat to 105degF.
- Turn off heat and let sit undisturbed for 20 minutes.
10. Check for a clean break, if not satisfied leave for 10 minutes more.
11. Scoop curds into a muslin-lined colander and drain off the whey (save the whey).
12. When curds stop dripping you are ready to proceed.
13. Heat up a large pot of water with enough dissolved sea salt to make the water taste like the ocean (being a sailor I love the poetic nature of this direction; but I digress and cannot take credit).
14. As the water reaches about 180degF clear everyone out of the kitchen and from within earshot, now stick a finger in the water. Can you take the pain? If yes, increase the temperature until you reach your upper limits of tolerance; cursing is acceptable as you’ve cleared out the kitchen. Once you’ve reached your maximal tolerance point make a note of this for future reference.

15. Squeeze together a ball of curds about the size of an orange (or as big as will comfortably fit in your cupped hands) and place gently in the hot water. They may separate a little but don’t worry we will fish them out.
16. Wait 5 minutes and scoop up the curds with slotted spoon.
17. Try and work the curds into a ball and squeeze out as much whey as possible on the slotted spoon. Pick up the ball of curds in your hands and cup between hands enclosing the curds (scream-shriek-curse the pain) squeezing tightly to expel more whey. Do this several times till the flow of whey almost stops, work quickly!
18. Start kneading the ball in your hands, at first it is grainy, coarse, dull and feels like a big failure but don’t despair! Keep kneading until too cool to work.
19. Flatten into a disc about 1/2 inch thick and put back into the hot water. Wait 5 minutes.
20. Take back into your hands and knead some more. Continue this process of kneading and heating until the cheese is shiny and elastic, as many times as necessary. But remember during this phase HEAT is your ally!

21. Once the cheese is stretchy and shiny, show off and stretch it out. I stretched mine about one meter (see photo).

22. Work it into a ball and stretch from the top and around the bottom to form a smooth ball. Pinch the bottom closed and place on a covered plate.

23. Repeat until all your curd is processed. Once you are comfortable you can have several balls in various stages of the process going at once.

24. Others will tell you to submerge the cheese balls in an ice water bath but I didn’t and my family really liked the final results.
25. My hands were sore when I was finished but they were back to normal the next morning.
26. Whimps, I mean ‘Modernists’ can wear gloves but I like to feel the curd as I work them.

FINAL THOUGHTS
I was really happy with how the mozzarella turned out. It was shiny and firm and had a nice toothiness; it was enjoyable to masticate. It also had a nice, more robust flavor that I had hoped to obtain from the addition of the lipase. However, at the Cheesepalooza tasting Valerie commented on how my mozzarella had a less creamy taste than she was expecting (she didn’t know about the lipase). I knew that by adding lipase I would give up that fresh creamy taste. That was a personal choice because I was planning to convert some of the mozzarella into burrata stuffed with mascarpone/cultured butter or ricotta and cream so I wanted more contrasting flavours.
I am not a mozzarella expert by any means and generally wouldn’t buy it to eat on its own and I have only made it once; but here are my thoughts about mozzarella making:
I know a number of the books and cheese makers and bloggers worry about overworking the curd. I treated my curd like bread dough and kept kneading until I thought it looked and felt right.
I will get a pH meter and try the traditional method to compare to my method to see if there is a difference in the cheese qualities.
I used homogenized milk because that is what I had on hand. I don’t think it had an effect.
I honestly wonder if the reason folks have difficulty is because they don’t squeeze out enough whey before the kneading process and then don’t heat the ball of curds hot enough to melt it before stretching and kneading. I had the same thoughts with every ball I made. It seemed like each ball was going to be a flop; it was grainy and dull and not stretchy but I kept at it and eventually it bound together and became a homogeneous mass.
Is it possible that by heating to a high enough temperature, the cheese proteins recombine? Dr. Addie comments please.
Maybe my secret ingredient, the Lebanese Citric Acid Powder was the magic that brought it all together. This acid powder is usually used be to make garlic sauce more sour without making the sauce runny like would happen by adding more lemon juice to the emulsion.
I reworked several of the mozzarella balls 4 days later by reheating in salted water and re-stretching the cheese. It did not seem to affect the cheese and it also allowed me to make the Burrata the day before the Cheesepalooza tasting. Please see my Burrata post for the recipe and procedure on how to make them. To quote Valerie (A Canadian Foodie) “His burattas were not at room temp, but so close, I thought the fillings would just ooze out. Nope. With a little nudging from the nuke-o-matic, they did ooze. Decadent deliciousness! I could have licked the plate.”
So please do find out for yourself.
I WILL be making this again. The whole family really enjoyed the taste of this fresh mozzarella.
FINAL FINAL THOUGHTS
Well here it is New Year’s Eve and I am about to post this. But before I do I’d like to mention that my partner in life’s Aunt Diane had heard rumors that I had been making cheese so she gave me/us a gift:

A mozzarella making kit. I will post the results of the use of this kit in the not too distant future.
And my final thought; I came across a piece of my home made mozzarella in our cheese drawer (things can be lost in there quite easily as we usually have upwards of 15 to 20 varieties of cheese in the drawer at any given time). Now about 6 weeks old it had a couple spots of mould on it and was looking a little tired but I trimmed it up and put it on a cheese plate with 12 other varieties. It was still pure white and when my wife looked at the plate she immediately picked it out and sampled it. “That’s your homemade mozza isn’t it? It is still delicious!”
What To Do On A Snowy Afternoon?
Make Squeaker Cheese Curds of Course!
Following in what has turned out to be my Quebec based theme this week I have decided to make a batch of cheese curds.
Primer
Having been born and raised in Alberta I had never really been exposed to the cheese curd phenomena. Generally speaking up to the very recent past even the poutine served in Alberta tended to have grated ‘white’ (usually mozzarella) cheese sprinkled on top and almost never would you find real cheese curds.
On our trip to eastern Canada last year we stopped at a gas station outside Quebec City (our first Quebec gas station stop) and on the counter was a basket piled high with packages of cheese curds. They were in cellophane packages, room temperature, white AND looked kind of moist as well; definitely not what you’d find in an Alberta gas station and definitely approaching my hopefully suppressed intolerance for weird, limits.
It was kind of a tourist trap gas station filled with all kinds of Quebec made items so I was a little apprehensive to say the least. It was then that I noticed all the items in the store were all pretty reasonably priced and the people running the gas station seemed like pretty nice folks, so I thought why not give them a try. So out to the car and the guinea pigs in the backseat. They had been complaining they were hungry again so I offered a sample and viewed the action from the rear view mirror. It was sort of a Jane Goodall moment, watching the primates in the back seat – examine the package, poke poke, apprehensively take a curd from the package, examine closely, sniff, sniff, a hesitant taste and then ‘hey this tastes pretty good and it squeaks when you chew on them’! Do we have any more?
Thus began our family love affair with fresh cheese curds. We bought them on the remainder of our trip, some were better than others but they were all pretty decent. We even stocked up with about 5 packages before we hit the VIA train from Montreal to Halifax. We actually managed to make those last for a couple days. But alas when we returned home there was none to be found except for the orange ones shipped in from Ontario; which by the time they reach us have finished their conversion to mild cheddar.
However, I had my package of cheese making gear from Glengarry Cheese Making and just needed to find a recipe. None of my cheese making books had a recipe so it was on to the trusty (not trusted) WWW to find a recipe.
I found a likely recipe at:
http://www.leeners.com/cheese/recipes/cheese-curd.shtml
I’ve been making these cheese curds for almost a year now. I’ve tweaked the recipe slightly (only on the procedure side) and am now pretty comfortable making them. They do take a few hours to make so I would recommend that if you have a family, make at least 2 gallons of milk worth or be prepared to see them disappear pretty quickly when the primates in your family discover them on the counter.
Cheese Curd Explorations
For this batch of cheese I decided to use 2 gallons of cows milk. This was the largest batch I’ve made to date; previously I had made 1.5 gallon batches and then used the left over whey to make ricotta. This time I wanted all of the curd.
In previous batches I used nested pots for a water bath, which inevitably led to drowning the controls on my stove (it only takes about a quarter of a cup to do that). This time I used the kitchen sink; it worked great. No more nested pot water baths for me!
The exact recipe follows below the step-by-step commentary.
After making quite a number of batches of cheese over the past couple of years I think I have a pretty good system down now.
Collect all of your materials and organize them in one place. I keep all of my cheese making equipment and supplies in the basement so it doesn’t take too many trips to the basement mid-procedure to learn that lesson.
Sterilization is key; you need to ensure everything is clean and sterilized. It is not as important with fresh cheeses as they will be consumed quickly but it is imperative to be scrupulously clean when making cheese to age, so you might as well practice extreme cleanliness now so that it is second nature when you make that cloth bound cheddar you will age for a year or that delicate brie you are patiently waiting on doesn’t deserve any dirty dishrag contamination resulting in black and pink moulds growing amongst the delicate white forest of penicillium candidum. There are lots of ideas around sterilization but personally I like to fill one sink with a 10% bleach solution and soak everything for a few minutes followed by a rinse in clean water and then left to air dry (must be my industrial hygiene background). I will sterilize cheesecloth by boiling it for 5 minutes in a pot of fresh water, allowing it to cool before use.
Mix all of your potions and elixirs before beginning. For this recipe I used tablet rennet so I crushed the tablet and dissolved in water before I needed it. I also diluted the calcium chloride before I needed it.

Crushed Rennet Tablet
The first step is to combine the milk with the calcium chloride and the heat the mixture to 86 deg F, watch closely and stir regularly as the temperature may suddenly spike if you are using an electric range (I use a wire whisk). At this point you should put the pot in your water bath to maintain the temperature.
Sprinkle the Mesophilic starter over the milk and let hydrate for 2 minutes. I have been using Abiasa Mesophilic II which is composed of Lactococcus Cremoris that I purchased from Glengarry Cheesemaking. It seems to work just fine. Stir the starter into the milk and then cover and rest for 45 minutes ensuring the water bath maintains temperature. Do not disturb the milk the Lactococcus Cremoris are busy procreating and subduing any potential bad boys hiding in the milk.
After 45 minutes, stir in the rennet solution and let the pot rest another 30 to 45 minutes in the water bath. I left mine for 45 minutes and then checked for a clean break.

In hindsight I think I should have left it longer as I wasn’t happy with the break but that is not what I did. Cut the ‘gel’ into ½ inch cubes (I always measure a square on a sheet of paper (front of my logbook) to compare with). Gently stir the pot (with a big spoon or paddle) cutting up the bigger pieces. Put the pot back on the stove and slowly heat to 100 deg F over about a 30-minute period. Gently stirring but do not over stir as the cubes make break smaller as they did here:

Put the pot into a 100 deg F water bath once the temperature has been reached. Leave for 30 minutes and the check for matting; if they matt when you gently squeeze them and then separate easily using your fingers you are ready to drain the whey. Save the whey and use it for bread baking or better yet use it to make ricotta.

I drain my curds into a stainless steel colander. Place the colander over the pot of whey and cover for 10 to 15 minutes allowing the curds to mat. The curds should be a solid mass. Cut the slab into 2 pieces and flip. Cover and leave for 10 minutes then flip the pieces and cover again. I like to place a weight on the cheese to help expel more whey. Keep flipping every 10 minutes for about an hour.

Use your favourite or handy beverage for a weight.

Now you are ready to mill the cheese slab into ½ inch by ½ inch by 2 inch pieces (I think this is a bit long so I vary the length as I am looking for handcrafted appeal not factory conformity.

Sprinkle with flaked salt and toss to evenly distribute. You can adjust the salt to your personal tastes. Place the curds in a Ziploc bag for storage. At this point I place a weight on the bag to squish the curds a bit. The one complaint I had from my ‘primates’ the first time I made them was the curds were too square and not ‘curd’ like enough as they hadn’t been squished with hundreds of pounds of other curds, packaged and then placed n a box with dozens of other packages, placed on a truck and driven for miles, to be unloaded and dumped into a display basket. In other words mine were too perfectly shaped!

Milled Curd
The curds will keep for a few weeks in the refrigerator but will only squeak if they are kept at room temperature.
For this recipe I had a yield of 48.2 ounces or 1.367 kg from the 2 gallons of milk.
Smoking Cheese Curds
After seeing a tweet by Addie to a new BBQ joint in town about using smoked curds in their poutine my creative juices were flowing. I have cold/cool smoked cheese for a few years so I thought I would experiment with some of my new curds.
I used my A-maze-n Pellet smoker for this task and used my grill as a convenient enclosure. There was no worries about overheating the cheese on this day as it was -12 deg C.

Curds Being Smoked
I smoked the curds using applewood pellets and left them for a couple of hours to be gently kissed by the slowly wafting smoke. When I checked on them the ones nearest the smoker had a pale brown hue to them, while the ones furthest away had no noticeable colour change.
The smell test revealed that they had a nice smoky bouquet. The taste test found the smoke to be a little overpowering. Were they over smoked? Possibly, for eating plain in your hand but I think they would have been quite nice on Addies’ plate of poutine or with a nice crisp beer.
Final Thoughts
I really liked the texture and flavour of my goat milk Feta so as I write this I think I may try to make my next batch of Squeaker Cheese Curds with goat’s milk. I will keep you posted.
Now that I use the kitchen sink as my water bath I think I will make 3 gallons next time as well as my pot will easily hold 3 gallons.
I have also discovered that the Cheese Factory on Whyte Avenue make fresh cheese curds and they have then for sale at the Strathcona Farmers Market on Saturdays. But it is way more fun and cost effective to make them yourself!
Oh, and now eighteen months latter, I really wish I had made some handicraft purchases at that gas station. I never found such a collection of reasonably priced, well-made Quebec items again.


Montreal Smoked Meat – Sailor Rick Style
Cured Beef Brisket Primer
Pastrami, Corned Beef, Montreal Smoked Meat or whatever name you are familiar with are all made from the same beast (beef) but they are hardly the same beast.
Michael Ruhlman & Brian Polcyn in Charcuterie describe Pastrami as “differs from corned beef in two ways: it’s smoked and it’s coated with a combination of crushed coriander seeds and black peppercorns. Other than that, it’s corned beef underneath a smoky crust.”
About five years ago my wife and I made the pilgrimage to Katz’s Delicatessen on East Houston in the Lower East Side. Katz’s has been in existence since 1888. According to their website their Corned Beef uses a secret “dry cure” pickling formula that requires a full month to be ready to serve. Katz’s serves Pastrami, Corned Beef and Brisket. We tried the Corned Beef and the Pastrami they were both good but the show-stopper was the pickled cucumbers. They were bright green and fresh looking and were just like eating a cucumber but pickled. I have spent hours searching the internet for comments about these pickles but it would seem that only my wife and I have rally noticed them. So if you have the recipe I will trade you some Smoked Meat.
After that trip, there was a dry spell with only the occasional taste of Swartz’s from Montreal whenever Jonathan, one of my wine mentors would have a hankering for Montreal Smoked Meat and have a brisket flown in from Montreal.
On a family vacation to Montreal a year ago we made the pilgrimage to Swartz’s to sample some of that delectable smoked meat straight from their steamer. The kids had always sort of turned their nose up at previous suggestions of smoked meat back home but I think a day of riding the BIXI bike system had worked up their appetites (that and standing in line for a half hour in the sun on a plus 30 deg C day). The whole family dug in and we soon made quick work of the mounds of steaming meat in front of us.

The Family Chowing Down

Waiting in Line While Drooling In the Window

Cured Briskets Waiting in The Window For Their Turn At Stardom
Looking at these photos now, I have to say my brisket was much more photogenic at that stage!

Our Happy Counter Crew
When we got home from the trip the whole family soon began craving more. I discovered the boxes of vacuum packed smoked meat from Dunn’s in the COSTCO coolers and from then on whenever we had a hankering for smoked meat we knew where the quick fix could be found. It was good but not quite the same.
Now that I had a smoker and had dabbled in a bit of meat curing alongside my cheese making over the last couple of years I thought it was time to go for the gusto and make my own Montreal Smoked Meat – Sailor Rick Style.
Montreal Smoked Meat Explorations
Once I had decided to jump in and make ‘Montreal Smoked Meat’, I thought I had better get it right the first time cause it ain’t cheap. A full packer brisket runs about $55.00 and then you need Cure #1, Pepper Corns and Coriander Seeds by the pound and a few other spices. Running the smoker is another cost at about $8.00 for pellets. All in it will run you about $80 dollars to finish a 13 pound brisket.
After reading my personal charcuterie library (Charcuterie and Cured) and reviewing some of the on-line smoking websites I discovered a recipe on Chowhound where there was a lengthy multi year discussion of how to make proper Montreal Smoked Meat. ‘Porker’ swore his recipe was as good as Swartz’s and a number of others agreed. He also mentioned it was not his own recipe but that he couldn’t remember where he got it. Through these posts I found an experiment by Chef Fowke in Vancouver called “The Great Pastrami & Smoked Meat Experiment”. At the time (9 years ago) he was the chef at Joe Fortes Seafood and Chop House.
After curing a number of briskets using both wet and dry cure methods he came to the conclusion that dry curing was best as it took only one week versus one month with the wet cure method. He also thought the end product was better as well.
So I felt well prepared to move forward and proceeded to forage for my raw materials. I got my brisket from K&K Foodliner on Whyte Avenue and kept it for 2 weeks to wet age just as Chef Fowke had done in his experiment. I then proceeded to use Porker’s recipe and coated the brisket in the cure. I wrapped the brisket in plastic wrap and placed it in a tub with a 12 pack of pop on top and placed it in the refrigerator. I flipped it every day for the first week or so and then every couple days for the last few days for a total of 12 days.

I rinsed off the cure and soaked the brisket in cold water for 3 hours to remove some of the salt. Let me tell you this was now one ugly looking piece of meat (no photos taken) and my wife took one look at it and then at me and from the look on her face I thought well looks like me and the brisket are going to be having intimate dinners together for the next week, without my wife. I remember Chef Fowke writing that he almost threw away his first brisket because it was so ugly looking he thought he had ruined it but was unwilling to throw it away without cooking it first (it turned out to be wonderful). So I had hope.

I coated the brisket with the spice blend of cracked peppercorns and coriander seeds and I wrapped up the brisket and put it back in the refrigerator overnight. I brought it out in the morning and placed it in the smoker for about 3.5 hours with apple wood smoke. I then wrapped it with foil and placed it in a 250 deg F oven for another 4 hours. The house smelled amazing and my wife was starting to have second thoughts. I then let it cool to room temperature and placed it in the refrigerator overnight.

Fresh From The Oven
The next afternoon I rigged a steamer using our roasting pan and proceeded to steam it for another 3 hours at 250 deg F. At this point when I brought it out of the oven it looked fabulous! I was nervous as I sliced it in half to check the colour. IT was an amazing reddish pink all the way through; nice and even and looked as good as any of the famous ones we had eaten.

I sliced enough for our meal by hand with a chef’s knife and the four of us proceeded to dig in. It was a super hit and we feasted until bursting. The remaining brisket I cut up with my meat slicer and vacuum package it and froze it for future use (fingers crossed with this experiment). Two days later I took some leftover pieces in my lunch. If possible it tasted even better than the first evening.

End Notes
This great exploration was occurring at the height of the E-coli fiasco at XL Meats. My wife and kids were concerned about this ungainly piece of meat sitting in our refrigerator for about a month. The meat was not from XL but to their knowledge they had never eaten a piece of meat that had been in our refrigerator so long. (Note to self don’t waste money buying aged meats for them) Leftovers more than 3 days old start getting the squinty eyed look around here. Which means I get some pretty tasty lunches for work.
The wonderful smells from the oven overpowered their fears by mealtime but I am sure they were watching their stomachs closely for the slightest sign of poisoning and I am sure my son was very relieved when he awoke the next morning, healthy and full of vigour.


Oh, and an additional side note; a deli has opened in New York called Mile End Deli and according to their website they are “a Montreal inspired Jewish Deli in New York City that specializes in traditional Jewish comfort food made from scratch.” Both Zagat and New York Magazine have voted it best deli in New York.
So there you have it, you can’t beat Montreal Smoked Meat; unless of course it’s Montreal Smoked Meat – Sailor Rick Style!
Sailor Rick Does the Cheesepalooza with Petite Ungulates – AKA Sailor Rick Makes Feta.
Well it is time for me to finish my write-up of Cheesepalooza Challenge #3 Feta.
I’ve eaten a fair amount of feta over the years; Greek, Bulgarian, Canadian and American, even feta smuggled into the country in the suitcase of a Greek friend, but I don’t remember eating feta made with goat’s milk very often. Up to this point in time, sheep milk feta has been my favourite. Feta has also been one of my son’s favourite cheeses since he was small so I was looking forward to getting the opinion of this fifteen year old ‘expert’.
For this challenge I wanted to do a head to head comparison of both goat and sheep feta. Actually I wanted to also do cow feta at the same time but was concerned about the logistics of simultaneously running 3, one gallon batches of cheese. As you will see running 2 batches at once stretched my ability equipment wise, timing wise and storage wise.
I followed Mary Karlin’s recipe in “Artisan Cheese Making At Home”; the ‘bible’ for all of us Cheesepalooza’ers.
I started with a gallon each of Goat’s and Sheep’s milk. I hadn’t actually realized/noticed that you could buy sheeps milk in the store until I was looking for goat’s milk for last months challenge:

The feta expert sampled the two milk varieties and declared the sheep milk was sort of granular (must be the way the milk is homogenized it wasn’t sour) compared to the goat milk. Morris the cat didn’t have a preference and greatly enjoyed his first tastes of goat and sheep milk.

Here is where the first equipment limitation hit. I didn’t have enough nesting pots to have 2 water baths so I made the executive decision and gave the water bath to the sheep milk (oops playing favourites already!).
First error the water bath got too warm – up to 92 deg F; optimum was 86 deg F. So now the sheep milk was behind the goat milk as I waited for it to cool. Playing with the water bath resulted in my crappy Kitchen-Aid range shorting out the computer circuit board once again when I spilt about 5 tablespoons of water on the cook surface (appears they forgot to put a gasket in between the cook surface and the front computer controls) But I digress.

So now the soon to be cheeses are about an hour apart step wise. Other than the temperature spike both cheeses were made in an identical manner. Surprisingly the sheep milk had the cleaner break when I checked for a clean break so the sheep milk had caught up to the goats milk by this stage (due to the temperature?).

Sheep Curds

Goat Curds
I cut the sheep curds first hoping the goat curds would sturdy up. They were better by the time I was finished the sheep curd cutting but they were still sort of soft looking compared to the sheep. I followed the directions and then ladled off the curds into the colanders to drain. The goat whey was quite milky looking and the sheep whey was more clear.

I flipped the curds for a couple of hours but then had a dinner invitations with close friends so the curds didn’t get flipped for about 4 hours. When I got home they had nicely formed a solid mass.

I cut them into about 1 inch cubes and tossed them with salt and lightly covered as suggested and placed them in the refrigerator to drain away additional whey. Twice a day I poured off the whey and on the fifth day I broke the curds apart as they had lightly bound (knit) together again. The goat curds were softer and creamier looking and seemed a little more delicate and had deformed in a plastic sort of way (in the geologic sense). The sheep curds had retained their cubic shape more and were firmer and somewhat crumbly.


The goat feta was creamy in the mouth and had a nice silky mouth feel and was delicious just lightly salted as above. The sheep feta was firmer and more crumbly like other fetas I have eaten but was nice and fresh due to the lack of brine.
My feta expert declared that the goat feta was good but he preferred the sheep feta. I later overheard him declare to his mother that the sheep feta was the best he had ever eaten.
I had made a light brine (following Mary’s instructions) and placed most of the cheese in the brine to age for 21 days.

I reserved some of each cheese variety and lightly sprinkled them with Salish Salt. A sea salt smoked with alder smoke. The smoky salt and the cheese were delicious together. Although the cubes did look like they had fallen in the dirt at a picnic.

The smoke salted cheese improved for the couple days they lasted before the daily sampling extinguished the supply. I have been tasting the brined fetas every other day and they are maturing nicely.
another interesting point. I started with the same volumes of milk but after the 5 days of aging I weighed the two types of cheese as there was a definite difference in volume of cheese.
I ended up with 22.8 ounces of goat feta for one gallon of milk and 36.9 ounces of sheep feta for one gallon of milk. I am not sure why this occured but at first glance it would appear that sheep feta is the more economical variety to make. I think in future batches of cheese I will weigh each batch to compare yield between the different typs of cheese and milk.
I will agree with my son and declare these to be the best fetas I have ever tasted. I have also discovered that I really enjoy ‘fresh’ lightly salted feta and will hold back more the next time I make it.
Verdict: Round 3 was a great success!!! Oh and my range has once again come back to life. Here’s hoping it has at least as many lives as Morris the Cat.

My First Pork Shoulder Smoke
Aug 24, 2012
This was was my first attempt at pulled pork. I am working on this from memory as it is a fond memory of an event 2 months ago.
I bought a pork shoulder from K&K on White Ave for this project.
I used Jeff’s Rub which I have been using for almost 3 years; it is FABULOUS! For example, I took some left over smoked ribs (coated in Jeff’s Rub) to work for lunch one time, the amazing smell drew people from across the floor to the lunch room. A female co-worker who is usually fairly mild mannered was drawn to the lunch room by the aroma and asked to try one; one bite and she let loose with a torrent of expletives about how great they were and that she had had ribs from a lot of places but none were as good as these and would I go to the BBQ store with her to pick out a smoker for her husband. I think some of the older guys in the lunchroom have permanently raised eyebrows after her first comments!
But hey nothing like positive affirmation!

Here is the little beauty waiting for the smoker. It has been coated in yellow mustard which acts as a wetting agent to hold on the rub. Amazingly you cannot taste the mustard on the completed product. One of my kids that absolutely hates mustard has never noticed it on the many ribs I have cooked before.

After smoking with hickory for approximately 10 hours of slow cooking and when the internal temperature reached 200 deg F I wrapped it in towels and placed it in a cooler to rest for a couple hours. Here I am taking it out of the cooler.

Waiting to be pulled.


The final product with a liberal dose of Carolina Vinegar Sauce. This vinegar sauce is a must. It cuts the greasiness of the pork and adds another layer to the amazing flavours.
Unfortunately it appears we were too busy eating to take some more pictures.
Serve on your choice of buns with coleslaw of your choice and some more of the vinegar sauce.
THIS IS A KEEPER!
I can post the exact recipe if anyone is interested.
